About 66% of houseplant owners kill their plants within the first year. That shocking number might make you feel less alone. Your struggling green friend can bounce back with proper care.
Your plant is sending you signals right now. Those yellowing leaves, drooping stems, or brown tips are cries for help. Learning how to save a dying plant isn’t mysterious or complicated.
Plant rescue tips focus on one simple idea: identify the problem, then fix it. Your plant might be getting too much water or not enough light. It could be dealing with bugs or missing important nutrients.
This guide walks you through each step of bringing your plant back to life. You’ll learn to read the signs your plant shows you. You’ll discover how to check soil moisture and evaluate lighting.
You’ll spot pests and feed your plant properly. You’ll even learn when repotting might be the answer.
Becoming a great plant parent takes patience and observation. Recovery doesn’t happen overnight. Your plant needs time to heal, and you need consistent care.
By following this step-by-step approach, you’ll feel confident tackling any problem. Let’s turn that dying plant into a thriving one.
Identify the Signs of a Dying Plant
Your plant speaks to you through visible signs. Learning to read these distress signals helps you rescue wilting plants before it’s too late. Think of yourself as a plant detective gathering clues.
Multiple symptoms often work together to tell a story. A single yellowing leaf might mean nothing serious. Yellowing leaves combined with soft stems signals a different problem.
Yellowing Leaves
Yellow leaves appear for many reasons. Overwatering is a common culprit, but nitrogen deficiency and poor light cause similar problems. Look at where the yellowing starts:
- Lower leaves turning yellow first often signals overwatering
- Pale yellow between green veins suggests nutrient problems
- Uniform yellowing across the plant may indicate light issues
Wilting or Drooping
Wilting plants need immediate attention. Your plant’s leaves droop when roots can’t deliver water properly. This happens from overwatering, underwatering, or root damage.
A slightly droopy plant on a hot afternoon might recover after watering. Consistent drooping means serious trouble. Rescuing wilting plants requires understanding whether your soil is bone-dry or waterlogged.
Stunted Growth
Healthy plants grow at predictable rates. Something blocks development when your plant stays the same size month after month. Stunted growth points to:
- Insufficient light for the species
- Soil lacking essential nutrients
- Crowded roots in too-small pots
- Temperature stress
Brown Leaf Tips
Brown, crispy leaf edges tell specific stories. Low humidity dries out leaf tips first. Fluoride in tap water and salt buildup from fertilizer also create this problem.
Brown tips at leaf edges usually mean environmental stress. They rarely indicate serious disease.
Assess Watering Needs
Watering remains the top reason houseplants struggle. Getting your watering routine right can transform your plant’s health. Learn what your specific plant needs rather than following a generic schedule.
Every plant has different water requirements. Your job is figuring out what works best for yours.
Check Soil Moisture
Before you water, always check the soil first. The easiest method is the finger test. Push your finger about 2 inches deep into the soil.
If the soil feels dry at that depth, your plant needs water. If it feels moist, wait a few more days.
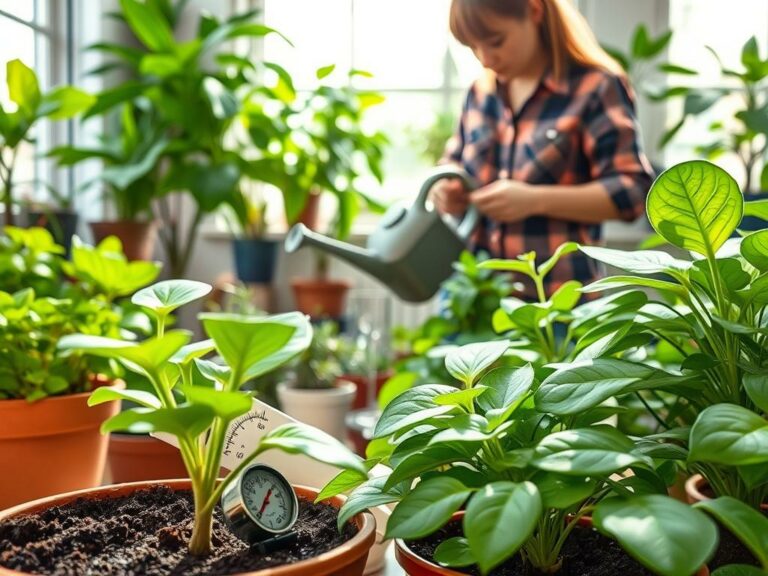
You can also use a moisture meter from garden stores like Home Depot or Lowe’s. These tools give you an exact reading of soil moisture levels. Some people lift the pot to feel its weight.
Adjust Watering Frequency
Water needs change with the seasons. In summer, your plant might need water twice weekly. In winter, it could go ten days between waterings.
Temperature, humidity, and light all affect how fast soil dries out. Water less during cold months when plants grow slowly.
The soak and dry method works well for most houseplants. Water thoroughly until water drains from the bottom. Then wait until the top 2 inches of soil dry before watering again.
Signs of Overwatering vs. Underwatering
| Overwatering Signs | Underwatering Signs |
|---|---|
| Yellow leaves with brown mushy spots | Dry, crispy brown leaves |
| Soil stays wet for days | Bone-dry soil that pulls away from pot edges |
| Foul, rotting smell from soil | Soil becomes hard and compact |
| Stems feel soft and weak | Plant wilts even after watering |
Overwatered plants develop root rot. Underwatered plants simply dry out. Both conditions cause wilting, which confuses many plant owners.
Look at the leaf color and soil condition to tell them apart. These signs help you act fast when something seems wrong.
Evaluate Light Conditions
Light is one of the most important factors in keeping your plants healthy. Your dying plant might struggle because it’s not getting the right amount of light. Understanding your plant’s light needs helps you find the perfect spot in your home.
Light conditions vary greatly depending on where you place your plant. Making adjustments can bring your plant back to life.
Understanding Your Plant’s Light Requirements
Plants need different amounts of light based on where they naturally grow. Some plants come from rainforest floors where sunlight barely reaches the ground. Others come from sunny desert regions and need bright, direct light.
Labels like “bright indirect light,” “low light,” or “full sun” describe specific light conditions. Bright indirect light means your plant should sit 3 to 5 feet from a south or west-facing window. A sheer curtain should filter the rays.
Low light plants can survive in rooms far from windows or in north-facing spaces. Plants needing full sun should sit directly in a window for several hours each day.
- South and west-facing windows receive the strongest light
- East-facing windows provide gentle morning light
- North-facing windows offer the softest, most consistent light
- Light intensity drops quickly as you move away from windows
Moving Your Plant to a Better Location
Relocating your plant requires care. Plants can experience shock from sudden light changes, so move them gradually. If your plant needs more light, shift it closer to a window over several days.
Start by placing your plant in a spot with slightly brighter light. Leave it there for a few days. Watch your plant for signs of stress like drooping leaves or leaf drop.
After your plant adapts, move it a bit closer to better light. This slow approach prevents damage and gives your plant time to adjust.
Using Grow Lights
Sometimes natural light isn’t enough, especially in homes with limited windows. Grow lights are an excellent solution for supplementing sunlight. Full-spectrum LED grow lights are energy-efficient and work well for most houseplants.
| Grow Light Type | Energy Use | Best For | Height Above Plants |
|---|---|---|---|
| LED Full-Spectrum | Low | Most houseplants and seedlings | 6-12 inches |
| Fluorescent Tubes | Medium | Leafy greens and herbs | 12-18 inches |
| Incandescent Bulbs | High | Temporary use only | 24+ inches |
| HPS Bulbs | High | Flowering plants and fruiting | 18-24 inches |
Position grow lights 6 to 12 inches above your plants. Run them for 12 to 16 hours daily. This schedule mimics natural daylight and gives your plant the energy it needs to recover.
You can use a simple timer to automate the lighting schedule. This makes it easy to maintain consistent care.
Evaluate your home’s light conditions carefully. Your plant’s recovery depends on matching its natural light needs with the right spot. Add artificial light when needed, and your struggling plant will bounce back stronger than ever.
Examine for Pests and Diseases
Pests and diseases are major threats to plant health restoration. Your indoor plants can fall victim to tiny invaders that weaken their strength. These problems spread quickly throughout your collection.
Learning to spot these issues early makes all the difference. You can save your plants before damage becomes severe. Regular inspections are your first line of defense against these troublemakers.
Common Indoor Plant Pests
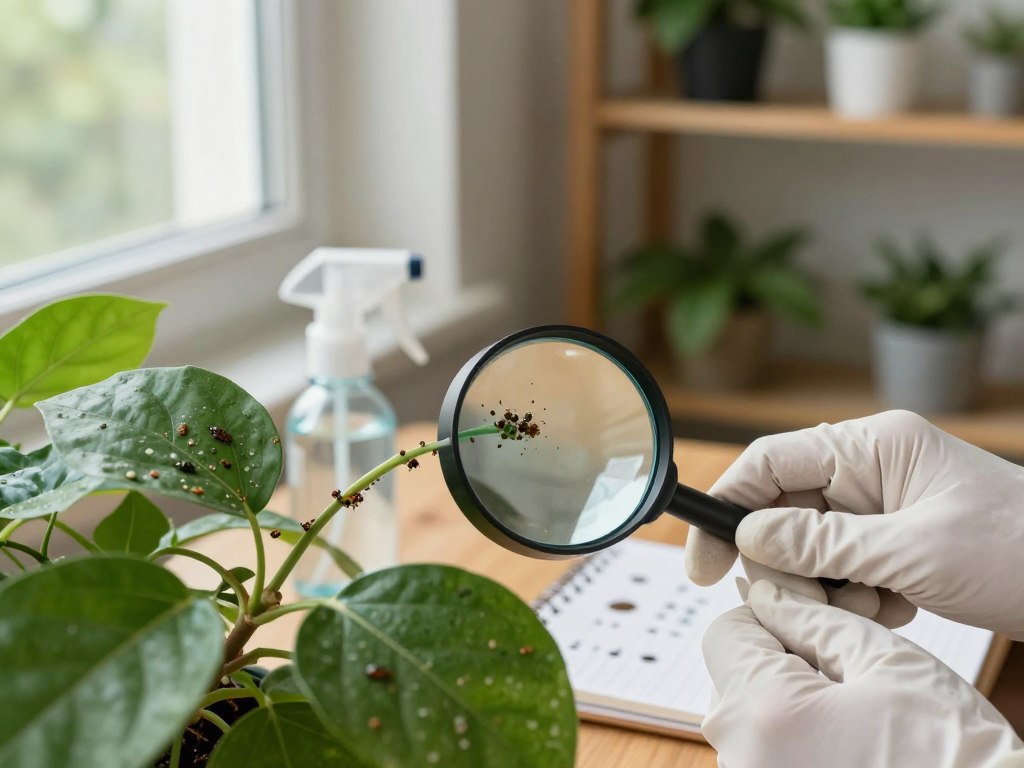
Your plants face several common pests that thrive indoors. Check the undersides of leaves and new growth areas regularly. Look for these unwanted visitors:
- Spider mites – Tiny bugs that create fine webbing and cause yellowing leaves
- Mealybugs – White, cottony clusters found in leaf joints and stem crevices
- Scale insects – Brown bumps on stems that look like part of the plant itself
- Fungus gnats – Small flying insects hovering around your soil surface
- Aphids – Groups of small insects clustering on new growth and stems
Use a magnifying glass to catch infestations early. Populations remain manageable during the first stages. Check your plants at least once weekly during your care routine.
Identifying Fungal Infections
Fungal diseases appear in different forms on your plants. Powdery mildew shows as a white powder coating on leaves. Root rot produces black, mushy roots with a foul smell.
Leaf spot diseases create brown or black patches surrounded by yellow rings. These infections spread fast and require quick action. Plant health restoration depends on catching fungal problems early.
Treatment Options for Affected Plants
Start with gentle approaches before moving to stronger solutions:
| Treatment Method | How It Works | Best For |
|---|---|---|
| Physical Removal | Wipe leaves with soapy water or spray with water | Early stages and mild infestations |
| Neem Oil Spray | Natural oil that disrupts pest life cycles | Spider mites, aphids, and mealybugs |
| Insecticidal Soap | Breaks down pest exoskeletons safely | Soft-bodied insects and early fungal issues |
| Chemical Treatments | Stronger formulas for severe cases | Resistant infestations only |
Quarantine affected plants immediately to prevent spread to your other houseplants. Repeat applications every 5 to 7 days for several weeks. Pests have life cycles where eggs and juveniles survive initial treatments.
Consistency beats sporadic applications for successful plant health restoration.
Check for Nutrient Deficiencies
Plants need food just like you do. Your plant shows warning signs when it lacks proper nutrients. Spotting these signals early helps you save dying plants before problems worsen.
Soil loses nutrients over time as plants absorb them. Water also washes nutrients away. Fertilizing becomes essential for keeping your plant healthy and strong.
Signs of Nutritional Imbalance
Different nutrients create different problems when they run low. Understanding each symptom helps you fix issues faster.
- Nitrogen deficiency shows as overall yellowing that starts with older leaves
- Phosphorus deficiency causes dark green or purplish leaves with slow growth
- Potassium deficiency appears as brown, scorched edges on leaf tips
- Iron deficiency creates yellowing between the veins while veins stay green
Choosing the Right Fertilizer
Fertilizer packages show three numbers called N-P-K values. These represent nitrogen, phosphorus, and potassium in different amounts. A balanced formula like 10-10-10 works well for most foliage houseplants.
Plants that bloom benefit from higher phosphorus. This is the middle number on the package.
| Fertilizer Type | Speed of Action | Best For |
|---|---|---|
| Liquid Fertilizers | Fast-acting | Quick nutrient boost during watering |
| Granular Fertilizers | Slow-release | Long-term feeding mixed into soil |
| Fertilizer Spikes | Slow-release | Convenient but may distribute unevenly |
How to Fertilize Properly
The golden rule for saving dying plants is simple: always use less fertilizer than the package suggests. Start with half-strength solutions applied every 4-6 weeks during spring and summer. Your plant grows actively during these seasons.
Reduce fertilizing during fall and winter. Plants rest during this time.
“Fertilizer burn happens when you apply too much fertilizer at once, leaving brown crispy leaf tips and edges on your plant.”
If your plant shows signs of fertilizer burn, flush the soil with plain water. This removes excess salts. This simple action can save your plant from further damage.
Repotting Your Plant
Repotting gives your struggling houseplant a fresh start. Moving your plant to a new container with fresh soil removes barriers to healthy growth. Your plant may need repotting when roots push through drainage holes or circle the soil surface.
Water may run straight through without soaking in. Some plants become top-heavy and tip over easily. These signs tell you it’s time for a bigger home.
Most indoor plants need repotting every 1 to 3 years. Growth speed determines the timing. Some plants prefer being slightly rootbound, so check your specific plant’s needs first.
When to Repot
Watch for these clear signs that your plant is ready for repotting:
- Roots growing through drainage holes
- Roots circling the soil surface
- Water running straight through without absorbing
- Plant becoming top-heavy and unstable
- Slowed growth despite proper care
Choosing the Right Pot and Soil
Select a new container only 1 to 2 inches larger than your current pot. Going too large causes soil to stay soggy. This can lead to root rot.
Consider these pot materials:
| Pot Material | Best For | Benefits |
|---|---|---|
| Terracotta | Plants prone to overwatering | Breathes well, dries quickly |
| Plastic | Plants that need consistent moisture | Retains water longer |
| Ceramic | Any plant needing moderate moisture | Attractive appearance, balanced drainage |
Drainage holes are essential for most plants. Use fresh potting mix rather than garden soil. Select standard houseplant mix for most plants, cactus mix for succulents, and orchid bark for orchids.
Tips for Successful Repotting
Follow these steps to ensure your plant adjusts well to its new home:
- Water your plant one day before repotting to reduce transplant shock
- Gently remove the plant and tease out circling roots with your fingers
- Remove any black, mushy, or diseased roots
- Position your plant at the same depth as it was in the old pot
- Fill with fresh soil and firm it down gently
- Water thoroughly after repotting
Your plant may look stressed for a few days as it adjusts. This is normal. Be patient and give your plant time to settle into its new environment.
Avoid fertilizing for at least 4 to 6 weeks after repotting. Fresh soil contains nutrients your plant needs.
Pruning Damaged Leaves and Stems
Pruning is one of the most powerful ways to revive dying plant specimens. Removing dead or damaged tissue stops your plant from wasting energy on leaves that won’t recover. This simple step redirects your plant’s strength toward healthy new growth.
Strategic pruning prevents disease from spreading. It makes your plant look fuller and more attractive over time.
How to Properly Prune Your Plant
The right pruning technique makes all the difference for revival. Always cut just above a node—that small bump on the stem where leaves grow. This encourages your plant to branch out from that spot.
Remove entire leaves at their base rather than just trimming brown tips. Partial cuts look unnatural and don’t solve the real problem.
Never remove more than 25 to 30 percent of your plant at one time. Cutting too much causes shock and slows recovery. Work slowly and step back frequently to see how your plant looks.
Tools You’ll Need for Pruning
Clean, sharp tools prevent crushing damage and infection. Your toolkit should include:
- Sharp scissors for delicate plants like ferns and herbs
- Bypass pruners for woody stems up to half an inch thick
- Your clean hands for pinching soft new growth
- Rubbing alcohol for sterilizing between cuts
Always sterilize your tools with rubbing alcohol before switching between plants. This is particularly important when dealing with diseased leaves.
Caring for Your Pruned Plant
After pruning, your plant may look sparse at first. Water slightly less since there is less foliage to support. Wait two to three weeks before fertilizing to avoid stressing your plant.
Provide bright light and good humidity to help your plant bounce back strong.
Most plants respond beautifully to thoughtful pruning, often emerging healthier and more vibrant than before.
Your plant will bush out nicely with proper aftercare. This shows that pruning truly helps revive dying plant life.
Implement a Care Routine
Building a solid houseplant care routine keeps your plants healthy and thriving. After fixing problems that made your plant sick, you need a system to prevent future issues. The best routines are flexible because plants change their needs with seasons and growth cycles.
Your new routine will combine regular watering checks, proper lighting, and weekly monitoring. This approach keeps your plants happy without wasting your time or water. Many plant owners find that consistency matters far more than perfection.
Creating a Watering Schedule
Start by checking your soil moisture on specific days rather than watering on a fixed schedule. Pick two days each week—perhaps Monday and Thursday—to feel the soil about one inch deep. This simple habit beats guessing when your plant needs water.
Use these tools to stay organized with your indoor gardening advice:
- Set phone reminders for your soil check days
- Keep a simple notebook recording when you watered and how your plant looked
- Try plant care apps like Planta or Gardenize to track watering dates
- Mark a calendar with soil moisture check dates
Remember that winter requires less water than spring and summer. Your plant enters a rest period when temperatures drop and days get shorter.
Setting Up a Light Schedule
Consistent lighting prevents weak, stretched-out growth. Rotate each plant a quarter turn every seven days so all sides receive equal light. This helps your plant grow balanced.
| Light Condition | Best Plant Examples | Daily Light Hours Needed |
|---|---|---|
| Bright Indirect | Pothos, Philodendron, Snake Plant | 6-8 hours |
| Medium Light | ZZ Plant, Dracaena, Peace Lily | 4-6 hours |
| Low Light | Cast Iron Plant, Parlor Palm | 2-4 hours |
| Supplemental Grow Light | Most houseplants in winter | 12-16 hours |
If you use grow lights, set them on timers so your plants get consistent lighting every day. During winter months, aim for twelve to sixteen hours of light daily.
Regular Monitoring and Adjustment
Great houseplant care tips involve weekly inspections of your plants. Spend ten minutes looking at each one and noting what you observe. Check for new leaves sprouting, any pest activity, leaf color changes, and overall texture.
Keep a personalized care journal for each plant. Write down what works, what doesn’t, and how your plant responds to different conditions. This becomes your own houseplant care guide that beats any generic advice.
Watch for these positive signs showing your plant is recovering:
- New leaf growth appears bright and healthy
- Stems feel firm instead of mushy or brittle
- Leaves develop vibrant color and smooth texture
- Your plant stands upright instead of drooping
Seasonal adjustments are normal and expected. Most plants need less water and no fertilizer during winter dormancy.
Spring arrives and growth speeds up, so increase your watering and feeding schedule gradually. Stay responsive to what your plant actually needs, not what you think it might need. Trust your observations and adjust your routine based on results.
Be Patient and Observant
Plant recovery takes time. Real plant rescue happens slowly, not like dramatic movie scenes. Your green friend won’t bounce back overnight.
Fast-growing plants like pothos or spider plants might show new leaves in two to three weeks. Slow growers like snake plants or ZZ plants need two to three months. This timeline depends on how sick your plant is and how fast it naturally grows.
Understanding Your Plant’s Recovery Time
Give your plant at least two to three weeks before judging if your changes are working. Jumping between different care methods confuses your plant and stops real improvement. Make one change at a time, then wait and watch what happens.
You’ll feel the urge to tinker and adjust everything at once. Resist that urge. Over-helping your plant does more harm than good.
Signs of Improvement to Look For
New growth is the best sign that your plant rescue tips are working. Look for fresh leaves pushing out from the center or the tips of stems. Old damaged leaves won’t fix themselves.
Brown or yellow leaves stay brown or yellow. This is normal. What matters is that your plant produces healthy new growth.
You’ll also notice leaves standing up straighter and firming up instead of drooping. Healthy roots should look white and firm, not mushy or dark. Your plant stops declining and starts building strength.
When to Seek Professional Help
Sometimes you need backup. If you’ve fixed the watering, improved the light, treated for pests, and added nutrients but your plant keeps getting worse, it’s time to ask for help.
Rare diseases or pests might need expert eyes. Valuable or sentimental plants deserve professional care. Visit your local nursery staff or contact your university extension office.
Join online plant communities where experienced growers share knowledge. These resources offer real advice from people who love plants as much as you do. Plant parenthood is a learning journey, and even expert gardeners lose plants sometimes.