Nearly 70 percent of beginner gardeners quit their first garden within one year. These failures happen because of mistakes that could have been prevented. This shows how common gardening mistakes affect new plant enthusiasts.
Starting your first garden brings excitement and hope. You imagine beautiful flowers blooming or fresh vegetables ready to harvest. Common mistakes new gardeners make can turn those dreams into frustration and wasted effort.
The good news? Most of these errors are completely avoidable once you understand what to watch for.
Every experienced gardener at Burpee and botanical institutions started exactly where you are now. They faced challenges with soil quality, watering schedules, and plant selection. What set them apart was learning from their mistakes early on.
This guide walks you through the ten most common pitfalls that trip up new gardeners. You’ll discover practical solutions for soil preparation, proper watering techniques, and climate selection. Learn about timing, spacing, sunlight needs, pest management, fertilizing, and design planning.
Understanding these challenges upfront saves you time and money. You’ll build a garden that truly thrives. Your gardening success starts with knowledge.
Let’s explore these gardening mistakes beginners should avoid and turn your garden dreams into reality.
Ignoring the Importance of Soil Quality
Many new gardeners overlook soil quality and jump straight to planting. Your soil is the foundation of everything that grows in your garden. Healthy soil provides nutrients, water retention, and a home for beneficial organisms.
Understanding and improving your soil is simpler than you think. You don’t need fancy equipment or advanced knowledge. Investing a few hours in soil preparation sets you up for success.
Understanding Soil Types
Your soil falls into one of several main categories. Each type behaves differently with water and nutrients. Knowing your soil type helps you grow healthier plants.
| Soil Type | Texture | Water Retention | Best For |
|---|---|---|---|
| Clay | Heavy and compact | Holds water well | Moisture-loving plants |
| Sandy | Loose and grainy | Drains quickly | Drought-tolerant plants |
| Loamy | Balanced mixture | Ideal drainage | Most vegetables and flowers |
| Silty | Smooth and fine | Moderate retention | Perennials and shrubs |
You can identify your soil type with a simple jar test. Fill a jar with soil, add water, and shake it well. Let it sit overnight.
The soil will separate into layers. Sand sinks first, silt settles in the middle, and clay floats on top. The proportions tell you your soil type.
Testing Your Soil
You need to know your soil’s pH level and nutrient content. pH measures how acidic or alkaline your soil is. This affects whether plants can absorb nutrients properly.
- Purchase a home soil test kit from a local garden center
- Contact your county extension office for professional testing
- Test in spring before planting for best results
- Check pH, nitrogen, phosphorus, and potassium levels
Most vegetables and flowers grow best in slightly acidic soil. The ideal pH range is between 6.0 and 7.0. If your soil leans too far either way, plants struggle to absorb nutrients.
This is a major beginner gardening error that often goes unnoticed. You feed and water your plants, yet they still look pale and weak. Testing reveals the real problem.
Enhancing Soil Fertility
Once you understand your soil, improve it with organic matter. Compost is your best friend here. Mix 2-4 inches of compost into your garden bed before planting.
If testing shows your pH needs adjustment, use lime to raise pH in acidic soil. Use sulfur to lower pH in alkaline soil. Follow package directions based on your soil type.
Building better soil takes patience, yet the results speak for themselves. Plants grow stronger and yields improve. You’ll stop repeating the same beginner gardening errors season after season.
Overwatering or Underwatering Your Plants
Getting the watering balance wrong is one of the most common gardening blunders for beginners. Your plants need water to survive. Finding that sweet spot between too much and too little can feel tricky at first.
Many new gardeners kill their plants by being too generous with water. Learning to water properly takes time and practice. It’s one of the most important skills you can develop in your garden.
Different plants need different amounts of water. Succulents love dry conditions, while hostas prefer moist soil. Understanding your specific plants’ needs helps you avoid watering mistakes.
The key is learning to read what your plants tell you. Watch their leaves and check their soil regularly.
Signs of Overwatering
Overwatering causes more plant deaths than underwatering does. When soil stays too wet, roots cannot get oxygen and begin to rot. This creates the perfect environment for fungal diseases to thrive.
You’ll notice yellowing leaves that feel soft and mushy rather than crispy. The soil feels constantly soggy. Your plant may smell like wet earth or decay.
Wilting can happen even when soil is wet, which confuses many gardeners. This wet wilting looks similar to drought stress but has the opposite cause. Your roots are drowning instead of thirsting.
- Yellow or brown leaves that feel soft
- Soil that stays wet for days
- Fungal growth or mold on soil surface
- Mushy, dark roots when you dig down
- Unpleasant, moldy smell from the pot
Signs of Underwatering
Underwatering shows different symptoms than overwatering. Your leaves become dry and crispy, curling inward at the edges. Growth slows down noticeably, and leaves may drop from the plant entirely.
The soil pulls away from the edges of the container, creating gaps. Water runs straight through without soaking in properly.
Plants under water stress may wilt during hot afternoons, then recover when temperatures cool. This temporary wilting isn’t always a problem. True water stress happens when wilting appears even in cooler morning hours.
- Dry, crispy leaf edges that crumble easily
- Slower plant growth than expected
- Leaves dropping from branches
- Soil pulling away from pot edges
- Water running through soil without soaking
Establishing a Watering Schedule
Creating a watering routine prevents many common gardening blunders for beginners. Your schedule depends on several factors. These include climate, season, plant type, and soil conditions.
A simple finger test works great for checking soil moisture. Push your finger into the soil about two inches deep. If it feels dry, water your plant.
If it feels moist, wait another day or two.
Morning watering is generally best. It allows foliage to dry before nighttime, reducing disease risk. Container plants need more frequent watering than garden beds since pots drain faster.
Larger containers hold more moisture than smaller ones, so adjust your schedule accordingly.
| Plant Type | Soil Moisture Level | Watering Frequency | Best Time |
|---|---|---|---|
| Vegetables | Consistently moist | Every 2-3 days | Early morning |
| Succulents | Mostly dry | Every 10-14 days | Early morning |
| Tropical Plants | Lightly moist | Every 3-5 days | Early morning |
| Herbs | Moderately moist | Every 2-4 days | Early morning |
| Perennials | Moderately moist | Once weekly | Early morning |
Weather patterns affect how often you water. Hot, dry spells require more frequent watering. Cool, rainy periods may mean you skip watering entirely.
Young plants need more consistent moisture than established ones. As your garden matures, watering needs typically decrease.
“The best gardeners are humble observers of nature. They watch their plants daily and adjust their care based on what they see, not what a calendar says.”
Start by checking your soil regularly. Keep notes about when you water and how your plants respond. Over several weeks, you’ll develop an instinct for your garden’s needs.
This hands-on learning helps you move beyond common gardening blunders for beginners. You’ll become a confident gardener with practice.
Choosing the Wrong Plants for Your Climate
One common mistake is selecting plants that won’t survive in your local climate. A tropical plant won’t thrive in a cold region, no matter how much care you provide. Understanding your climate and choosing the right plants is essential for success.
Your climate determines which plants will flourish naturally in your garden. A plant suited to warm zones will struggle in freezing winters. Cool-season vegetables wilt in intense summer heat.
Researching Plant Hardiness Zones
The USDA Plant Hardiness Zone Map divides the United States into zones. These zones are based on average minimum winter temperatures. Finding your zone is the first step in avoiding climate-related mistakes.
- Visit planthardiness.ars.usda.gov to find your zone
- Enter your zip code for instant results
- Note your zone number when shopping for perennials, shrubs, and trees
- Select plants rated for your zone or colder
Native Plants vs. Exotic Species
Native plants have evolved to thrive in your specific region. They require less water and maintenance than exotic species. Native plants are naturally adapted to your soil, rainfall patterns, and temperature swings.
They also support local pollinators and wildlife, creating a healthy ecosystem.
| Feature | Native Plants | Exotic Plants |
|---|---|---|
| Water Needs | Low to moderate | Often high |
| Pest Issues | Minimal | Frequent problems |
| Fertilizer Required | Rarely needed | Regular applications |
| Wildlife Support | Excellent | Limited |
| Cold Hardiness | Naturally suited | Often inadequate |
Seasonal Planting Considerations
Understanding cool-season and warm-season crops helps you time plantings correctly. Lettuce, peas, and spinach thrive in spring and fall temperatures. Tomatoes, peppers, and squash need warm summer conditions to flourish.
Timing your plantings according to seasonal needs prevents avoidable gardening mistakes. Plant cool-season crops in early spring or late summer. Wait until all frost danger passes before planting warm-season varieties.
- Check your local frost dates
- Plan spring plantings 2-4 weeks before last frost
- Schedule fall crops 8-10 weeks before first frost
- Adjust timing based on your hardiness zone
Matching your plants to your climate eliminates countless problems. Your region holds the key to gardening success.
Planting at the Wrong Time
Many beginners rush to plant seeds before conditions are right. This impatience often causes poor germination, frost damage, or struggling plants. Understanding when to plant is just as important as knowing what to plant.
Timing your plantings correctly means working with nature rather than against it. Temperature, day length, and seasonal weather patterns affect how seeds germinate and plants grow. Right timing helps your plants thrive and saves time, money, and effort.
Importance of Timing
Getting the timing right makes a real difference in your garden’s success. Seeds need specific soil temperatures to sprout. Cool-season crops like lettuce and peas sprout when soil is around 40-50°F.
Warm-season crops like tomatoes and peppers need soil temperatures of 60-70°F or higher. Planting too early wastes seeds because they won’t germinate in cold soil. Planting too late means your plants don’t have enough time to grow before frost.
Recognizing Frost Dates
Your local frost dates are key reference points for garden planning. The last spring frost date is when the final frost typically occurs in your area. The first fall frost date is when frost usually arrives in autumn.
These dates help you decide when to start seeds indoors and transplant seedlings outdoors. You can find your frost dates through:
- The National Weather Service website
- Your local county extension office
- Online frost date calculators from Almanac.com
- Talking to experienced gardeners in your area
Remember that frost dates are averages, not guarantees. A frost can occur a week or two before or after the average date. Planting a bit later than the frost date gives you extra safety.
Seasonal Planting Guides
Following a seasonal planting schedule helps you avoid mistakes and keeps your garden productive year-round.
| Season | Best Planting Activities | Cool-Season Crops | Warm-Season Crops |
|---|---|---|---|
| Early Spring | Start seeds indoors 6-8 weeks before last frost | Plant peas, lettuce, spinach, cabbage outdoors | Not yet (too cold) |
| Late Spring | Transplant seedlings after last frost date | Plant more lettuce for succession harvest | Plant tomatoes, peppers, squash, beans, cucumbers |
| Early Summer | Direct sow warm-season crop seeds | Plant heat-tolerant greens in shade | Plant basil, eggplant, okra, melons |
| Late Summer | Start fall crops indoors | Plant broccoli, kale, cauliflower, carrots | Growing and harvesting spring plantings |
| Early Fall | Direct sow cool-season seeds | Plant garlic cloves for spring harvest | Stop planting warm crops |
| Late Fall | Prepare beds for winter | Add mulch to cool-season crops | Harvest remaining summer crops |
Succession planting means planting the same crop at different times to extend your harvest. Plant lettuce every two weeks from spring through early fall. This way, you get fresh greens all season instead of one big harvest.
Some vegetables tolerate light frosts and can be planted earlier or left growing later. These include spinach, kale, peas, cabbage, and broccoli. Knowing which plants are cold-tolerant helps you maximize your growing season.
Check your local frost dates and follow seasonal guides. Plant when soil temperatures and weather conditions are right. Your garden will reward you with healthy plants and abundant harvests.
Neglecting Plant Spacing and Placement
One common rookie gardening mistake is crowding plants too closely together. Your seedlings look tiny in small pots. Your garden bed looks empty and sparse.
The urge to fill those gaps is natural. You might plant everything closer than recommended. This impulse leads to serious problems down the road.
Proper spacing prevents major issues like disease, pest problems, and poor growth. Plants need room to breathe. Air circulation keeps fungal diseases away.
Adequate space means each plant gets the nutrients and water it needs. Your garden becomes healthier and more productive. Resist the temptation to overcrowd.
Understanding Plant Growth Habits
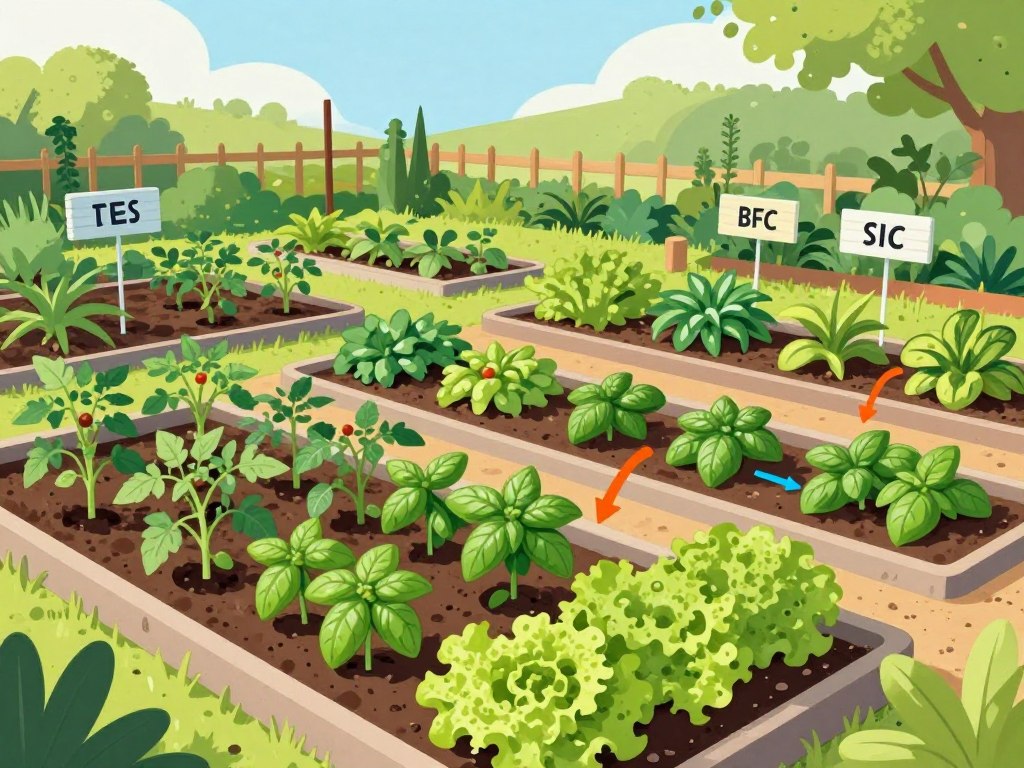
Before you place anything in the ground, research how big your plants will get. Different plants grow in different ways. Some spread outward along the ground.
Others grow tall and upright. Some develop deep root systems that need plenty of underground space. Vining plants climb and sprawl in unexpected directions.
Look at seed packets or plant tags for mature size information. Check online gardening databases like the University of Illinois Extension or the Missouri Botanical Garden website. Understanding these growth patterns helps you make smart planting decisions.
Visualizing Your Garden Layout
Plan your garden on paper before you dig. Draw your garden bed to scale. Mark where each plant will go.
Use stakes or markers to show where plants will reach at full maturity. This simple step prevents rookie gardening mistakes. You’ll save time and energy later.
Consider plant heights when arranging your garden. Place tall plants where they won’t shade shorter ones that need sun. Layer plants by height for better light exposure.
Digital tools like garden planners from apps such as SmartDraw or Canva make this easier.
Recommended Spacing Guidelines
| Plant Type | In-Row Spacing | Between-Row Spacing | Reason for Space |
|---|---|---|---|
| Tomatoes | 24-36 inches | 36-48 inches | Air circulation prevents disease |
| Lettuce | 6-12 inches | 12-18 inches | Less mature size needs less room |
| Basil | 12 inches | 18 inches | Bushy growth pattern |
| Zucchini | 36-48 inches | 48-60 inches | Large vining spreads |
| Marigolds | 10-12 inches | 12-18 inches | Moderate spreading habit |
Spacing guidelines differ between in-row spacing and between-row spacing. In-row spacing is the distance between plants in a line. Between-row spacing is the distance between rows.
Proper spacing allows easy harvesting and maintenance. Your plants stay healthier. You’ll spend less time fighting disease and pest problems.
- Check mature plant size before positioning seedlings
- Give plants room for their full growth potential
- Improve air circulation to reduce fungal diseases
- Make harvesting and weeding easier
- Reduce competition for water and nutrients
Spacing seems wasteful when plants are small. Yet this planning prevents bigger problems. Your garden will look fuller faster when plants develop properly.
Avoiding rookie gardening mistakes like overcrowding sets you up for success. Give your plants the space they deserve. They’ll reward you with healthy, vigorous growth.
Skipping Sunlight Requirements
Ignoring sunlight needs is a major garden blunder for beginners. Light matters just as much as water and soil for healthy plants. Sun-loving plants fail in shade, and shade plants wilt in bright sun.
Understanding your garden’s light conditions will transform your results. This knowledge helps you avoid disappointment and struggling plants.
Different Plants, Different Needs
Plants need different amounts of light based on where they naturally grow. Learning these categories helps you avoid common garden blunders for beginners.
| Light Category | Hours of Direct Sunlight | Example Plants | Best For |
|---|---|---|---|
| Full Sun | 6+ hours | Tomatoes, roses, lavender, sunflowers | Vegetables and bright flowers |
| Partial Sun/Shade | 3-6 hours | Lettuce, begonias, hydrangeas, salvia | Mixed garden areas |
| Full Shade | Less than 3 hours | Hostas, ferns, ivy, astilbe | Under trees or north-facing spots |
Observing Sunlight Patterns
Your garden’s light changes throughout the day and across seasons. Spend time watching where the sun travels. Take photos at different times or use smartphone apps to track patterns.
Notice how spring sun differs from summer sun. This observation prevents major garden blunders for beginners by showing exactly where light falls.
- Observe your yard during morning, midday, and evening
- Track changes from spring through fall
- Note which areas get afternoon shade
- Identify bright spots that get intense afternoon heat
Adjusting Your Garden Layout
Use your sunlight knowledge to place plants strategically. Put tall plants where they won’t shade shorter ones. Group plants with similar light needs together.
Position containers in movable spots so you can adjust them as seasons change. Use reflective surfaces or light-colored walls to bounce light into shadier corners. These smart adjustments overcome many garden blunders for beginners.
- Map out sunny and shady areas in your garden
- Position tall plants on the north side
- Place shade-loving plants under trees
- Cluster sun-lovers in open spaces
- Move potted plants to optimize their light exposure
Light is the food of plants. Get it right, and everything else becomes easier.
Match plants to your garden’s actual light conditions for success. This simple step eliminates many frustrating failures. Your garden will thrive naturally with proper light placement.
Avoiding Pest and Disease Prevention
One of the biggest beginner gardening pitfalls is waiting until pests destroy your plants. Many new gardeners think insects will go away on their own. Bugs multiply fast.
What starts as a small problem becomes a disaster in just weeks. You can prevent most pest damage by watching your garden daily. Acting early saves your plants.
Taking a proactive approach beats fighting a major infestation any day. Spending a few minutes daily looking at plants saves hours later. Early detection gives you simpler and more effective options.
Recognizing Common Pests
Learning to spot common garden pests helps you respond quickly. Look for these troublemakers:
- Aphids – Tiny soft-bodied insects that cluster on new growth and leave sticky residue
- Spider mites – Cause yellowing leaves with fine webbing underneath
- Caterpillars – Create holes in leaves and can strip plants bare
- Slugs – Leave large, irregular holes and silvery trails
- Japanese beetles – Make lacy patterns in leaf tissue
Check the undersides of leaves regularly. This is where pests hide. Look for discolored spots, tiny holes, or sticky residue.
Natural Pest Control Methods
You do not need chemicals to protect your garden. Natural methods work well:
- Plant marigolds near tomatoes to repel pests
- Encourage ladybugs and lacewings that eat harmful insects
- Use row covers to shield young plants
- Spray neem oil or insecticidal soap on affected plants
- Remove infected leaves by hand
Integrated pest management combines these approaches. This system minimizes chemical use while keeping plants healthy.
Importance of Monitoring Plant Health
Regular garden inspections catch problems before they spread. Check new growth closely. Watch for signs of fungal diseases like powdery mildew or bacterial blight.
Make inspections part of your daily routine. This simple habit prevents many beginner gardening pitfalls. Your garden will thrive with consistent attention.
Failing to Fertilize Properly
Many new gardeners make mistakes with fertilizer use. They either feed plants too much or too little. Balanced nutrition is key to healthy plant growth.
Your plants need nutrients for strong roots and flowers. They also need nutrients to resist diseases. Understanding what plants need and when helps them thrive.
Fertilizer provides essential nutrients that soil may not supply. Think of it as vitamins for your garden. Without proper nutrition, plants struggle to reach their full potential.
This section covers fertilizer types and nutrient ratios. It also explains application timing. These basics help you avoid common fertilizer mistakes.
Types of Fertilizers
You have several fertilizer options available. Each type has unique benefits and drawbacks. Understanding these choices helps prevent typical beginner mistakes.
- Organic fertilizers come from natural sources like compost and aged manure. They release nutrients slowly and improve soil structure over time.
- Synthetic fertilizers provide quick nutrient delivery. They work fast but require careful application to avoid burning plants.
- Granular forms release nutrients gradually when watered into the soil.
- Liquid fertilizers give immediate results but need frequent reapplication throughout the growing season.
- Slow-release fertilizers feed plants consistently over weeks or months, reducing application frequency.
Organic options like Miracle-Gro Performance Organics work well for beginners. Espoma products also provide steady nutrition. Synthetic choices such as Miracle-Gro All Purpose Plant Food deliver quick results.
Understanding Nutrient Ratios
Every fertilizer package displays three numbers, like 10-10-10 or 5-10-5. These numbers represent the nitrogen-phosphorus-potassium ratio. Understanding them prevents critical mistakes.
| Nutrient | Symbol | Purpose | Best For |
|---|---|---|---|
| Nitrogen | N | Promotes leafy green growth | Lettuce, spinach, grass |
| Phosphorus | P | Supports root development and flowering | Tomatoes, roses, root vegetables |
| Potassium | K | Strengthens overall plant health and disease resistance | All plants, especially fruit-bearers |
A 10-10-10 ratio works for general plant care. For leafy greens, choose higher nitrogen ratios. For flowering plants and vegetables, pick higher phosphorus formulas.
Timing Your Fertilizer Application
Timing matters just as much as what you use. Different plants have different feeding schedules throughout the growing season.
- Start fertilizing when plants show active growth in spring
- Feed heavy feeders like tomatoes and peppers every 2-3 weeks
- Apply fertilizer to flowering plants during bloom season
- Reduce feeding as plants enter dormancy in fall
- Stop winter fertilization for most perennials
Native perennials and established shrubs need little to no fertilizer. Annual vegetables and flowers demand regular feeding. Watch for signs like yellowing leaves or stunted growth.
Over-fertilizing causes fertilizer burn, damaging roots and foliage. Apply fertilizer according to package directions. This prevents common mistakes.
Learning proper fertilization techniques transforms your garden. By mastering these basics, you set yourself up for success.
Rushing into Garden Design
Many new gardeners jump straight into planting without creating a solid plan first. You might feel excited to get your hands dirty. Skipping the design phase leads to wasted space, poor plant placement, and endless rework.
Taking time to sketch out your garden before planting saves hours of frustration. A good plan creates a space you’ll actually enjoy.
A thoughtful garden design balances what you need with what looks beautiful. Your garden should work hard for you while also pleasing your eye.
Planning ahead helps you avoid crowding plants together or leaving awkward empty spots. You won’t plant tall plants in front of shorter ones. These simple mistakes could have been prevented with just a little upfront thinking.
Planning Your Garden Space
Start by looking at what you actually have. Walk around your yard and measure the space where you want to garden. Notice how much sunlight hits different areas throughout the day.
Check where your water source is located. See how close your garden sits to your house.
Think about how you’ll use the space. Do you need pathways to walk through comfortably? Will you need room to kneel and work?
Map out where the busiest foot traffic flows. Consider which areas get the most shade from trees or buildings. Understanding these details helps you avoid mistakes about placement and accessibility.
Considering Functionality and Aesthetics
Your garden needs to work well and look appealing. Think about plant colors that go together nicely. Mix different heights so shorter plants don’t get shaded by taller ones.
Choose plants with different textures to create visual interest throughout the seasons.
Balance practical elements with pretty ones. Add focal points like a special plant, bench, or water feature that draws the eye. Use repetition by planting the same type of flower in a few spots.
These design touches transform a basic garden into one that feels intentional and welcoming.
Utilizing Garden Design Tools
You don’t need fancy software to plan your garden. Start simple with graph paper and a pencil. Sketch your space to scale and draw circles representing your plants at full grown size.
For digital options, apps like Garden Planner and iScape let you visualize your design before planting. Many local extension offices offer free garden planning guides and resources specific to your area.
Using these tools helps you spot problems before they happen. You’ll prevent mistakes about spacing and sun exposure.
- Measure your garden space accurately
- Note sunlight patterns throughout the day
- Identify water source locations
- Plan pathways for easy access
- Sketch your design on paper or use digital apps
- Consider plant heights and spacing needs
- Think about color and seasonal interest
Taking time to design your garden upfront means less time fixing problems later. You’ll spend more time enjoying your growing space. A little planning creates a garden that’s both beautiful and productive from day one.
Not Seeking Help and Resources
One of the biggest beginner gardening errors is trying to figure everything out alone. Gardening is a journey that never really ends. You don’t have to walk it by yourself.
Help is everywhere. Other gardeners want to share what they know. Connecting with experienced growers speeds up your success and makes everything more fun.
Local Gardening Clubs and Communities
Your area likely has garden clubs and master gardener programs. These groups meet regularly to discuss plants and share tips. You can visit community gardens and work alongside other gardeners.
Some groups focus on specific plants like roses or vegetables. These local connections give you advice that fits your exact region. You’ll get tips about what grows best in your climate.
Local gardening communities let you trade seeds and share extra produce. You can ask questions to people who know your neighborhood’s soil. Many experienced gardeners are happy to help beginners avoid common mistakes.
Online Resources and Forums
The internet offers tons of gardening information at your fingertips. University extension websites provide research-based facts you can trust. Forums like GardenWeb let you ask questions and get quick answers.
YouTube channels from experienced growers show you how to do things step by step. Social media groups connect you with people who share your interests. You can find gardeners who live in your region.
Check where the information comes from before you trust it. University sites and official extension offices give reliable facts. Reading reviews and comments on forums helps you spot trustworthy advice.
Books and Guides for New Gardeners
Building a small library of gardening books is worth your time. Look for guides that cover your region specifically. Classic books like “The Vegetable Gardener’s Bible” by Edward C. Smith teach solid techniques.
Modern books often include photos and updated methods. Pick books that match your interests, whether vegetables, flowers, or native plants. A good reference book sits on your shelf for quick answers.
You have a whole community ready to help you succeed. Don’t hesitate to ask questions, join groups, or browse online resources. Learning alongside others makes gardening richer and more rewarding than doing it alone.