Over 18 million American households grew food at home in 2021. That number keeps climbing as more people discover gardening’s joy. You don’t need a green thumb or years of experience.
Gardening 101 is simpler than you might think. Many beginners worry about killing plants or wasting money on supplies. The truth is that gardening doesn’t have to be complicated or expensive.
With the right gardening tips for beginners, you can create a beautiful garden from day one. This guide gives you 20 essential tips to set you up for success. You’ll learn what tools matter, where to place your garden, and how to care for plants.
Every experienced gardener started exactly where you are now. They made mistakes, learned lessons, and grew stronger gardens year after year. Think of this as your roadmap to gardening success.
You’ll discover that mistakes are normal and valuable. They teach you what works for your specific space and climate. Approach your gardening journey with curiosity and patience.
You can grow fresh vegetables, colorful flowers, or a mix of both. This guide will build your confidence. You’re ready to dig in and create the garden you’ve always dreamed about.
Start with the Right Tools
Getting started with beginner gardening tips means you don’t need expensive equipment. Many new gardeners worry about buying costly gear before planting their first seed. Starting a garden focuses on having a few quality tools that serve you well.
You’ll accomplish much with just the essentials. Building your tool collection gradually makes sense both financially and practically. This approach helps you understand which tools you actually use.
Essential Tools for New Gardeners
Every beginner needs basic tools. These items make your work easier and help you care for plants properly. Quality versions save money long-term since they won’t break or rust easily.
- Hand trowel — Perfect for digging holes and planting seedlings in tight spaces
- Garden fork — Turns soil and breaks up compacted earth around plants
- Pruning shears — Cuts branches and dead flowers cleanly without damaging plants
- Watering can or garden hose — Delivers water with gentle control to avoid washing away soil
- Gardening gloves — Protects your hands from dirt, thorns, and blisters
- Rake — Levels soil and clears fallen leaves and garden debris
Quality matters here. A sturdy hand trowel from Fiskars outlasts cheap plastic versions. Look for tools with comfortable grips that fit your hands well.
Your hands do the work. Good gloves prevent injuries and keep gardening enjoyable.
Budget-Friendly Tool Options
Smart shopping helps you build your toolkit without overspending. Several strategies make starting a garden affordable for every budget.
| Money-Saving Strategy | Description | Savings Potential |
|---|---|---|
| Start with basics only | Buy just the six essential tools and add specialized equipment as you gain experience | Save 40-50% initially |
| End-of-season sales | Purchase tools in fall when stores clear inventory for winter months | Save 30-60% on tools |
| Secondhand options | Check garage sales, thrift stores, and online marketplaces for used tools | Save 50-75% on used items |
| Tool library membership | Borrow tools from community libraries instead of buying them outright | Save entire purchase costs |
| Borrow from friends | Ask neighbors or friends if you can use their extra tools temporarily | Free to low cost |
Buying few quality tools beats purchasing many cheap ones that break quickly. One good rake lasts longer than three flimsy versions. Local tool libraries offer another excellent option for beginners.
These beginner gardening tips help you start confidently without financial stress. You’ll build your collection naturally as your skills grow.
Choosing the Right Location
Location is one of the most important decisions you’ll make when learning the basics of gardening. Where you plant your garden affects how well your plants grow. Your yard has different areas that get varying amounts of sunlight and wind exposure.
Taking time to observe these conditions now will save you from replanting later. You need to match your plants with areas that suit their needs. This means understanding what your space offers in terms of light and protection.
Sunlight Requirements
Most vegetables and flowering plants need at least 6 to 8 hours of direct sunlight each day. Leafy greens and herbs can manage with 4 to 6 hours of sunlight. Understanding the basics of gardening includes knowing how to measure sunlight in your yard.
Watch your space throughout the day to find different sun zones:
- Full sun areas: Get 6 or more hours of direct sunlight daily
- Partial shade areas: Get 3 to 6 hours of sunlight with some afternoon shade
- Full shade areas: Get less than 3 hours of direct sunlight
Pay attention to shadows from buildings, trees, and fences. These shadows move as seasons change. Track your yard for a few days before planting.
Wind Protection
Strong winds damage young plants, dry soil quickly, and stress seedlings. Identifying windy spots in your yard is essential to the basics of gardening success.
You can protect your garden in several ways:
- Plant near natural windbreaks like existing fences or hedges
- Create barriers using trellises or plant screens in strategic locations
- Choose naturally sheltered spots in your yard, such as areas near your home
Smart location selection is one of the wisest moves you can make as a beginner gardener.
Understand Your Soil
Healthy soil is the foundation of every successful garden. Understanding what’s in your soil unlocks the secret to growing stronger plants. Learning about soil doesn’t have to feel overwhelming.
Recognizing that your soil type matters just as much as the seeds you plant is key. Good soil gives plants the nutrients, water, and air they need to thrive.
Testing Soil Quality
Before you plant anything, find out what you’re working with. You can use inexpensive home test kits from garden centers to check your soil’s pH level. These kits give you quick results right in your backyard.
For more detailed information, send a soil sample to your local cooperative extension office. They’ll provide a complete analysis for a small fee.
Most vegetables grow best in slightly acidic to neutral soil with a pH between 6.0 and 7.0. Understanding your soil’s pH helps you choose plants that will flourish in your garden.
Improving Soil Texture
Your soil texture falls into three main categories. Identify which type you have:
- Clay soil – Heavy, sticky, and slow-draining
- Sandy soil – Loose, light, and drains too quickly
- Loamy soil – The ideal balanced mixture
| Soil Type | Main Problem | Solution |
|---|---|---|
| Clay | Poor drainage and compacted roots | Mix in compost to improve air circulation |
| Sandy | Quick water drainage and nutrient loss | Add compost to increase water retention |
| Loamy | Minimal issues | Maintain with regular organic matter additions |
Adding organic matter improves every soil type. Compost works wonders for transforming poor soil into rich, productive growing space.
Adding Nutrients
Your plants need food to grow strong and produce well. Enriching your soil with nutrients is simple using organic amendments. Consider these options:
- Compost – Feeds plants and builds beneficial soil organisms
- Aged manure – Provides slow-release nutrients
- Leaf Mold – Breaks down gradually while improving soil structure
- Kitchen Scraps – Turn your waste into garden gold
Mixing these amendments into your soil takes little effort and delivers big results. Investing time in understanding and improving your soil rewards you with healthier, more productive plants.
Pick the Right Plants
Choosing what to plant is one of the most exciting garden decisions. Your plant selections shape your garden’s look, maintenance needs, and long-term success. Learning plant selection basics helps you grow a thriving garden that fits your space.
Your choices between native and non-native plants affect yearly garden work. Deciding between annuals and perennials also impacts your maintenance schedule.
Understanding plant options gives you power to create a garden that works. The right plant selection makes all the difference in achieving your garden goals.
Native Plants vs. Non-native Plants
Native plants are species that naturally grow in your region. They’ve adapted to your local climate, soil, and weather over many years. Choosing native plants offers real benefits that make gardening easier.
Native plants typically need less water once established. They show strong resistance to local pests and diseases. These plants support pollinators like bees and butterflies, plus local birds.
Best of all, they require less maintenance than plants from other regions.
| Plant Type | Water Needs | Maintenance | Wildlife Support | Cost |
|---|---|---|---|---|
| Native Plants | Low to Moderate | Minimal | Excellent | Affordable |
| Non-native Plants | Moderate to High | Moderate to High | Limited | Varies |
Non-native plants deserve consideration in your garden planning. Many non-native species grow beautifully in American gardens. Popular choices include hydrangeas, Japanese maples, and ornamental grasses.
The best approach combines both types. Use native plants as your foundation for easy care and environmental benefits. Add select non-native plants for specific purposes or visual appeal.
Annuals vs. Perennials
Understanding the difference between annuals and perennials saves you time and money. These two plant categories serve different roles in your garden.
Annuals complete their entire life cycle in one growing season. They sprout, grow, flower, produce seeds, and die when cold arrives. Common annuals include zinnias, tomatoes, and marigolds.
These plants offer immediate gratification with abundant blooms throughout the season. You’ll get non-stop color from spring through fall with most annuals.
Perennials return year after year from the same root system. Plants like coneflowers, hostas, and asparagus come back stronger each season. Once established, they typically need less attention and become more impressive.
- Annuals provide instant, continuous color all season long
- Annuals require replanting every year
- Annuals work well for trying new color combinations
- Perennials build a strong garden foundation over time
- Perennials need less yearly planting work
- Perennials often spread and fill in garden spaces naturally
Mix both types in your garden for best results. Annuals fill gaps and provide quick color while perennials establish permanence. This combination creates a dynamic garden that improves each year.
“The glory of gardening: hands in the dirt, head in the sun, heart with nature. To nurture a garden is to feed not just the body, but the soul.” — Alfred Austin
Your plant choices shape your gardening experience. Take time to research what grows well in your area. Visit local nurseries, talk to experienced gardeners, and observe neighborhood gardens.
These observations guide you toward selections that will flourish in your unique space.
Plan Your Garden Layout
Creating a solid plan before you plant is essential. Sketching out your garden on paper helps you see the space clearly. This simple step prevents costly mistakes and wasted materials.
You’ll visualize where each plant belongs. You’ll see how your garden looks when everything grows to full size. A well-organized layout makes your entire experience more enjoyable.
You save time and reduce plant diseases. You also increase your harvest. Let’s explore the key elements that turn a blank space into a thriving garden.
Importance of Spacing
Giving your plants room to grow is essential. Plants compete for sunlight, water, and nutrients when too close together. This competition weakens them and invites disease.
Check your seed packets and plant tags carefully. They show the mature size of each plant. Tiny seedlings deceive many beginners—they grow much larger than expected.
Resist the urge to squeeze in extra plants. Proper spacing delivers these benefits:
- Plants receive adequate sunlight
- Air flows freely between leaves
- Water reaches roots evenly
- Soil nutrients support healthy growth
- Disease spreads less easily
Include pathways in your layout design. These walking spaces let you water, harvest, and maintain plants without stepping on soil. Compacted soil damages plant roots and restricts water movement.
Companion Planting Basics
Some plants thrive when grown together. This concept, called companion planting, improves plant health naturally.
Try these proven combinations:
| Plant Combination | Benefits |
|---|---|
| Tomatoes with Basil | Basil repels pests and enhances tomato flavor |
| Carrots with Onions | Onions deter carrot flies effectively |
| Corn, Beans, and Squash | The “Three Sisters” method provides mutual support and nutrition |
These partnerships work because plants support each other in different ways. One may repel harmful insects while another provides shade. Some add nutrients to the soil.
Research combinations that match your climate and growing conditions. Planning your garden layout maximizes your space and sets you up for success. You’ll enjoy a healthier, more productive garden that requires less work to maintain.
Watering Wisely
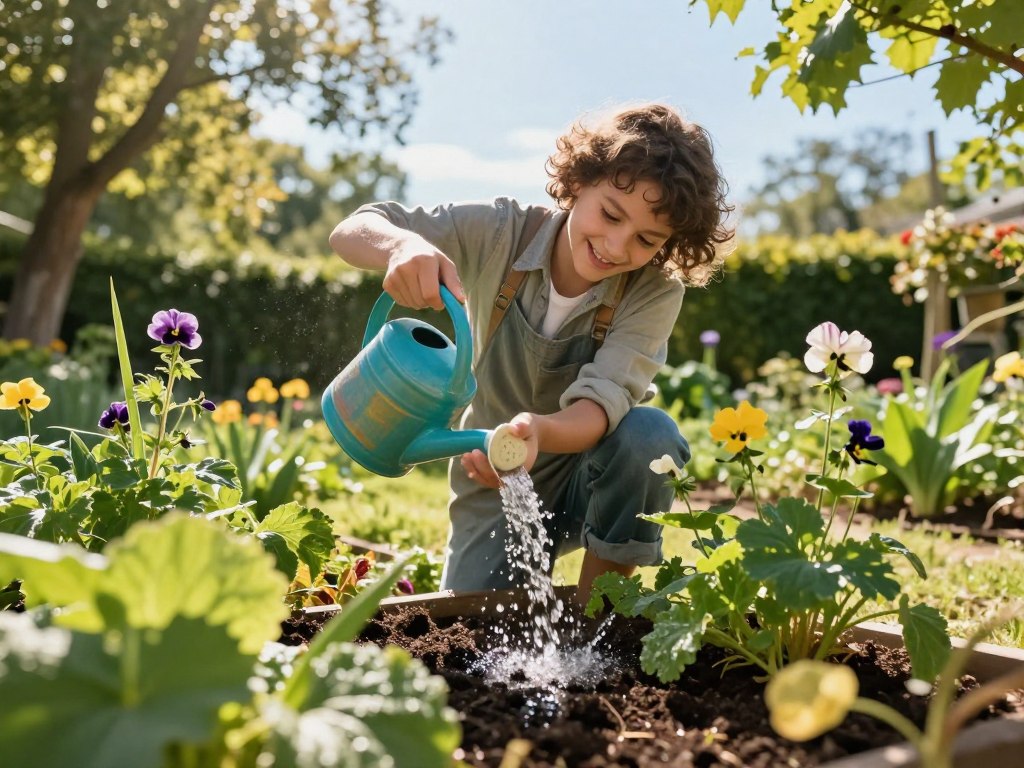
Water is essential for plant growth. Yet improper watering causes more plant problems than almost any other mistake. Learning to water correctly is one of the most important skills for new gardeners.
Many beginners struggle with finding the right balance between too much and too little water. The good news is that watering becomes simple once you understand your plants’ needs.
Getting your watering routine right protects your investment and helps your garden thrive. This section covers the signs of overwatering and the best times to water your plants.
Signs of Overwatering
Overwatering is the most common watering mistake among beginners. The soil stays wet constantly, which drowns your plant roots. Roots need oxygen to survive, and waterlogged soil blocks oxygen from reaching them.
Watch for these warning signs of overwatering:
- Yellowing leaves, especially the lower ones on the plant
- Wilting leaves that feel soft and mushy
- Brown or blackened roots when you dig up the plant
- A sour or rotten smell coming from the soil
- Fuzzy white or gray mold growing on the soil surface
The simplest way to check if your soil needs water is the finger test. Push your finger about two inches into the soil. If the soil feels dry at that depth, your plants need water.
If it feels moist or wet, wait a few days before watering again.
Best Times to Water
Timing matters just as much as the amount of water you give your plants. These timing tips will improve your results significantly.
| Watering Time | Benefits | Drawbacks |
|---|---|---|
| Early Morning | Foliage dries before evening, reducing disease risk. Water reaches roots before heat causes evaporation. Plants start the day fully hydrated. | Requires early schedule |
| Evening | Works if mornings don’t fit your schedule. Still allows water to reach roots. | Wet foliage overnight increases disease risk |
| Midday Heat | None | Much water evaporates before reaching roots. Wasteful and inefficient. |
Early morning is the best time to water your garden. Water your plants before 9 a.m. when possible. This gives foliage time to dry before evening comes, which prevents fungal diseases from developing.
Water deeply but infrequently to build strong plants. Deep watering encourages roots to grow down into the soil. This creates a sturdy, drought-resistant root system.
Shallow, frequent watering creates weak surface roots that struggle when conditions dry out.
Learn About Fertilization
Fertilization is a crucial gardening skill that beginners often miss. Good soil provides nutrients, but most gardens need extra fertilizer. Plants need this boost to grow strong and stay healthy.
Think of fertilizer as plant food that fills nutritional gaps. Heavy feeders like tomatoes, peppers, and roses need this extra help. They cannot produce well without proper feeding.
Learning to feed your plants correctly changes your garden’s success. Your plants depend on you to meet their needs.
Organic vs. Synthetic Fertilizers
Two main fertilizer types exist for your garden. Organic fertilizers come from natural sources like compost and manure. They also include bone meal, fish emulsion, and kelp.
These natural options work slowly and release nutrients over time. They improve your soil structure while feeding helpful microorganisms.
Synthetic fertilizers are human-made chemicals that work fast. Plants can use them quickly for immediate results. However, they do not build long-term soil health.
- Organic fertilizers improve soil quality and are better for the environment
- Organic options work slowly but create lasting benefits
- Synthetic fertilizers provide fast results and exact nutrient amounts
- Synthetic options give plants what they need quickly but cost less
- Many smart gardeners use both types together
Choosing the Right Fertilizer
Reading fertilizer labels helps you choose correctly. Every bag shows three numbers called N-P-K ratios. Each letter represents a key nutrient your plants need.
| Letter | Stands For | What It Does | Best For |
|---|---|---|---|
| N | Nitrogen | Builds leafy green growth | Lettuce, spinach, kale |
| P | Phosphorus | Helps roots and flowers grow | Roses, tulips, flowering plants |
| K | Potassium | Strengthens plants and fights disease | All plants benefit from it |
Remember this important rule: use less fertilizer than you think necessary. You can always add more later if needed. Over-fertilizing burns plant roots and kills helpful soil organisms.
Start small and watch how your plants respond. Add more only after observing their growth patterns.
Pest Management
Finding bugs on your plants doesn’t mean you’ve failed as a gardener. Pests are a natural part of gardening. Learning to manage them is one of the best easy gardening tips for beginners.
The goal isn’t to eliminate every insect you see. Many insects actually help your garden by pollinating flowers and eating harmful pests. Instead, you want to keep pest damage at levels you can live with.
Spotting pest problems early makes them much easier to handle. Check your plants regularly by looking at both the tops and bottoms of leaves. Healthy plants resist pest damage better than weak ones.
Identifying Common Pests
Learning to spot garden pests is a key part of easy gardening tips. Here are the most common troublemakers you’ll find in American gardens:
- Aphids — tiny, soft-bodied insects that cluster on new growth and leaf undersides
- Japanese beetles — shiny green beetles that create lacy, skeletonized leaves
- Tomato hornworms — large green caterpillars that strip leaves quickly
- Slugs and snails — leave wet slime trails and chew irregular holes in leaves
- Spider mites — cause yellow, speckled leaves with fine webbing
Natural Pest Control Solutions
You have many effective, earth-friendly ways to manage pests without harsh chemicals. These easy gardening tips protect your garden naturally:
- Hand-pick larger pests like hornworms and beetles into soapy water
- Spray aphids away with a strong water stream from your hose
- Place copper tape around pots to stop slugs and snails
- Apply neem oil to soft-bodied insects following package directions
- Bring in beneficial insects like ladybugs and lacewings that eat pests
- Plant pest-fighting herbs such as lavender, rosemary, and marigolds
Regular plant inspections help you spot problems early. These natural methods give you the confidence to handle pest problems calmly and effectively.
Pruning and Deadheading
Your garden needs regular care to stay healthy and beautiful. Pruning and deadheading are two essential skills every gardener should know. These techniques help plants grow stronger and produce more blooms.
When to Prune
Timing is everything with pruning. Each plant type needs cutting at specific times. Good timing protects next year’s flowers from accidental removal.
- Prune spring-flowering shrubs like lilacs and forsythia right after they bloom, since they create next year’s buds during summer
- Trim summer-flowering plants such as roses and butterfly bush in late winter or early spring before new growth begins
- Remove dead, diseased, or damaged branches whenever you spot them
- Shape plants or control their size during their dormant season in fall and winter
Always use clean, sharp pruning tools. Make cuts just above a bud or branch junction. Remove branches that cross or rub against each other.
Cut back leggy growth to encourage bushier plants. These techniques create strong, attractive plants.
Benefits of Deadheading
Deadheading means removing spent flowers from your plants. This practice offers several advantages for your garden.
| Deadheading Benefit | What It Does for Your Garden |
|---|---|
| Neat Appearance | Keeps plants looking fresh and attractive throughout the season |
| Extended Blooms | Encourages plants to produce more flowers instead of seeds |
| Longer Blooming Season | Extends flowering time for many annuals and perennials significantly |
| Prevents Self-Seeding | Stops aggressive plants from spreading seeds everywhere in your garden |
Deadheading is simple to do. Just pinch or cut off faded blooms above the next leaves or buds. Your plants will reward you with more beautiful flowers.
Seasonal Maintenance
Gardening doesn’t stop with spring and summer. Your garden needs care all year to stay healthy and productive. Understanding seasonal changes helps you work with nature’s rhythms.
Different seasons bring unique challenges and opportunities. Your garden care approach must shift with the weather. Learning these seasonal patterns is one of the most valuable skills you can master.
Preparing for Winter
Fall is the time to protect your garden from harsh winter conditions. Start by removing dead leaves and spent plants that harbor pests and diseases. Leave some leaf litter in place for beneficial insects that need shelter.
Cut back perennials after frost kills the foliage. Ornamental grasses can stay standing for winter interest and texture. Apply thick mulch around perennials and shrubs to insulate roots from temperature swings.
Before freezing temperatures arrive, drain garden hoses and irrigation systems. Clean your tools and apply oil to prevent rust. Store them properly to protect your investment.
Plant spring-blooming bulbs like tulips, daffodils, and crocuses before the ground freezes. In milder U.S. regions, you can grow cool-season vegetables like kale and spinach. These crops need minimal protection through winter.
Spring Planting Tips
Spring is exciting but requires patience. Check with your local extension office for your area’s last expected frost date. Tender vegetables and flowers need warm soil to thrive.
Prepare garden beds by adding compost and turning the soil. Work the soil only when it’s dry enough. Muddy soil will compact and harm plant roots.
- Start seeds indoors 6-8 weeks before your transplant date
- Harden off seedlings by gradually exposing them to outdoor air over one week
- Plant cool-season crops like lettuce, peas, and spinach as soon as soil can be worked
- Space plants according to their mature size
- Water gently after planting to settle soil
The transition between seasons is when your garden thrives or struggles. Timing matters. Following these tips keeps your plants healthy year-round and makes seasonal changes feel manageable.
“A garden requires patient labor and attention. Plants are living things and respond to care.” – Gertrude Jekyll
Composting Basics
Composting transforms your kitchen scraps and yard waste into valuable soil amendment. This practice creates what gardeners call “gardener’s gold.” Your compost pile becomes a living laboratory where waste breaks down into rich material.
Starting with composting is one of the smartest moves for your plants and the environment.
Benefits of Composting
Composting offers rewards that go far beyond your garden fence. Your finished compost improves soil structure in all soil types. It loosens heavy clay and helps sandy soil hold moisture better.
The dark, crumbly material adds essential nutrients and beneficial microorganisms. These support strong plant growth throughout your garden.
- Reduces your need for synthetic fertilizers
- Helps soil retain water, cutting watering needs
- Diverts waste from landfills and shrinks your environmental footprint
- Saves money on soil amendments and fertilizers
- Boosts vegetable garden yields significantly
Composting stands out as one of the best investments for long-term garden health.
How to Start a Compost Bin
Getting started requires less effort than you might think. Choose what works for your space and budget. Options include a simple pile, a three-sided bin, or a purchased tumbler-style composter.
| Compost Type | Cost Level | Space Needed | Decomposition Speed |
|---|---|---|---|
| Simple Pile | Free | Medium | 3-6 months |
| Pallet Bin | Low | Medium | 2-4 months |
| Tumbler Composter | Medium to High | Small | 2-3 months |
Place your bin in a convenient spot with good drainage. Learn the basic recipe for success. Alternate green materials with brown materials for best results.
Green materials are nitrogen-rich items like vegetable scraps and coffee grounds. Brown materials are carbon-rich items like dried leaves and shredded paper.
Keep your pile moist like a wrung-out sponge. Turn it occasionally to add oxygen and speed decomposition. Your finished compost becomes dark, crumbly, and earthy-smelling.
Compost is usually ready within two to six months. The timeline depends on conditions and how often you maintain it.
Avoid composting meat, dairy, oils, and pet waste. These attract pests or create unpleasant odors. This simple skill turns waste into gardening gold and strengthens your garden’s health.
Keep Learning
Your gardening journey is just beginning. You now have the tools, knowledge, and confidence to grow beautiful plants. Gardening is a lifelong learning experience.
Every season brings new lessons and discoveries. Even experienced gardeners continue to learn and adapt. The gardening community welcomes beginners with open arms.
Resources for Ongoing Education
Start with your local cooperative extension office. Every U.S. county has one available to you. They offer free or low-cost soil testing.
They diagnose plant problems. They provide research-based publications for your specific region. This advice comes straight from experts who understand your local conditions.
Reputable websites and YouTube channels show you techniques in action. Gardening books from trusted authors sit on your shelf as references. You can return to them again and again.
Gardening podcasts keep you learning while you work or commute. Social media groups connect you with other gardeners who answer questions. You can share your experiences and get feedback.
Look for information specific to your USDA hardiness zone. Advice that works in one region may not work in yours. Temperature, rainfall, and soil type all vary by location.
Joining Local Gardening Clubs
Your community has fellow gardeners waiting to meet you. Master gardener programs offer intensive training and volunteer opportunities. Garden clubs hold regular meetings with educational programs.
You build friendships with people who share your passion. Community gardens provide shared space and resources for hands-on learning. Plant swaps let you get new plants at low cost.
Garden tours inspire you with new ideas and techniques. Local gardeners know your area’s soil, climate, and common challenges. They can tell you which plants thrive in your neighborhood.
They share stories about what works best. You gain insider tips that help you succeed. Your plants will flourish as your skills grow.