Did you know that nearly 60% of new vegetable plots underperform their first year? This is due to a few avoidable errors. These mistakes can turn your season into frustration instead of fresh produce.
This guide will help you avoid common garden mistakes. You’ll enjoy better yields with less work. Starting your first vegetable beds in the United States? These tips focus on what matters most: location, spacing, soil health, watering, and choosing the right varieties.
Learn how beginner gardening errors lead to pests, disease, and wasted time. We’ll guide you to trusted resources like the Cooperative Extension and the USDA Plant Hardiness Map. This way, you can match advice to your local climate and soil.
In the next sections, you’ll find a clear roadmap. It covers 12 frequent pitfalls: choosing the wrong spot, overcrowding, ignoring soil tests, and more. By avoiding these mistakes, you’ll get healthier soil, larger harvests, and more enjoyment from your garden.
Read on for practical, actionable tips you can use this season. Avoid these common garden mistakes to have a better gardening experience.
Choosing the Wrong Location for Your Garden
Finding the perfect spot for your garden is key. You need areas where plants get enough light, air, and protection. A bad spot means fighting shade, wet soil, pests, and foot traffic.
How sunlight affects vegetable growth
Most veggies need 6–8 hours of direct sun to grow well. The USDA says put tomatoes, peppers, and other sun lovers in the afternoon sun. Leafy greens like lettuce need less light. Root crops like carrots and beets prefer moderate sun.
Watch the sun for a few days before planting. Note the morning and afternoon sun. Avoid shady spots near tall trees, garages, or fences. Make long beds run north-south for even light as the sun moves.
Importance of soil drainage and avoidance of low spots
Drainage is crucial to prevent root rot and poor growth. Vegetables need soil that drains well and warms up fast in spring. Low spots that hold water are bad for roots.
Test drainage by digging a 12-inch hole and filling it with water. If it drains in 24 hours, it’s good. If not, think about raised beds, mounded rows, or containers to improve drainage and warmth.
Proximity to pests, pets, and foot traffic
Being close to compost piles, bird feeders, or dense shrubs attracts pests. Avoid beds near these areas. Keep beds away from heavy foot paths to prevent soil compaction and plant damage.
If kids or dogs use the yard, protect beds with sturdy fencing or raised boxes. Leave paths of 18–24 inches for easy care without stepping on roots. Good garden placement saves time and harvests later.
Overcrowding Plants and Poor Spacing Practices
Getting plant spacing right is simple and helps your garden. Seed packet spacing and plant tags guide you. They help plants get enough light, water, and nutrients.
Understanding plant spacing on seed packets and plant tags
Seed packets give two numbers: in-row and between-row spacing. In-row spacing is for seeds along a row. Between-row spacing is for aisles to let air flow.
For transplants, check plant tags for spacing. Tomatoes need 18–36″ space. Carrots start at 1–2″ in row and thin to 2–3″ for best roots.
Consequences of overcrowding: disease and poor yield
An overcrowded garden traps humidity and blocks air. This creates perfect conditions for diseases like late blight and powdery mildew. Pests have more places to hide, and fruits grow smaller.
Thinning seedlings prevents these issues. Thin when true leaves appear. Use thinnings for salads or compost. This protects stronger plants and improves harvest quality.
Companion planting vs. crowding: balancing benefits
Companion planting pairs helpful species, like basil with tomatoes. It improves flavor and repels pests. But, too many plants in a small space can harm benefits.
Use square-foot gardening or keyhole beds for better spacing. Sketch bed layouts and count plants before planting. This keeps benefits while ensuring air flow and high yields.
Ignoring Soil Health and Nutrient Balance
Your garden starts under your feet. If the soil is unhealthy, plants will wilt. They will also have weak roots and low yields, no matter how much water or sunlight they get.
Testing your soil pH and nutrient levels
Start by getting a soil test from your county Cooperative Extension or a lab like A&L Laboratories. Ask for pH, N-P-K, organic matter, and micronutrient analysis. Test every two to three years or before big changes in your garden.
Most vegetables like a soil pH between 6.0 and 7.0. A soil test shows if you need to add lime or sulfur. Follow the lab’s advice for your soil and crops.
How to amend soil with compost and organic matter
Add organic matter to improve your soil. Spread 2–3 inches of quality compost into the top 6–8 inches of soil each year.
Use good compost, backyard compost, or worm castings for a quick fix. Good compost gives slow-release nutrients and helps with beneficial microbes.
Choosing the right fertilizer for vegetables
Choose fertilizer based on what your vegetables need. Leafy greens need more nitrogen. Root crops need moderate nitrogen. Fruit plants need balanced N-P-K with extra potassium and phosphorus.
Organic options include bone meal, blood meal, fish emulsion, feather meal, and composted manures. Synthetic options are granular or water-soluble. Always follow the label and use the right amount to avoid problems.
Too much fertilizer can harm your plants and the environment. It can also hurt the soil. Light tilling, planting cover crops, and adding organic matter help. This supports healthy plants and soil for the long term.
Incorrect Watering Techniques
Getting water right is key to a better harvest. Many gardeners water too much or too little. They also wet the leaves, which invites disease. Simple habits can help save water, protect roots, and keep plants healthy.
Signs of under-watering and over-watering
Look out for signs of under-watering like wilting and dry soil. Slow growth and leaf curling are also signs. Plants often perk up after a good soaking.
On the other hand, overwatering shows as yellow leaves and soggy soil. Poor root oxygen and root rot are also signs. If drainage is poor, stems can soften and plants decline fast.
Best practices for watering frequency and time of day
Check soil moisture by probing 2–3 inches deep. Most veggies need 1–1.5 inches of water weekly. Adjust during hot weather and for different soil types.
Water deeply but less often to promote deep roots. Water in the early morning to avoid evaporation and disease. Avoid midday sprinkling that wastes water and wets leaves.
Drip irrigation and soaker hoses for consistent moisture
Drip irrigation and soaker hoses deliver water right to the roots. They reduce foliage wetness and save time. Brands like Rain Bird, DripWorks, and Drip Depot offer reliable kits for beds and containers.
Use drip systems or soaker hoses with 2–3 inches of organic mulch. Mulch retains moisture and moderates soil temperature. For containers, check moisture more often. Consider self-watering pots or wicking systems when you’re away.
Failing to Start with the Right Vegetable Varieties
Choosing the right seeds is key to success. Start by matching vegetable varieties to your USDA hardiness zone and local climate. Use the USDA Plant Hardiness Map and county extension guides to learn planting windows and find cultivars that finish before your first frost.
Selecting varieties suited to your USDA hardiness zone
Check days-to-maturity on seed packets to ensure a crop will finish in your growing season. For a short summer, choose fast-maturing types like early beets, radishes, or short-season tomatoes. Local extension offices and seed companies like Johnny’s Selected Seeds and Territorial Seed Company list regional recommendations that match your USDA hardiness zone.
Determinate vs. indeterminate varieties explained
Know the difference for crops like tomatoes and beans. Determinate varieties are bushy and give a concentrated harvest. They work well in containers and small plots. Indeterminate varieties vine and produce steadily all season. They need staking or trellises but offer a longer supply of fruit. Pick the habit that fits your space and harvest goals.
Choosing disease-resistant cultivars for beginners
Look for resistance codes on packets, such as V, F, N or letters like VFN for Verticillium, Fusarium and Nematode resistance. Choose blight-resistant tomatoes, powdery-mildew-resistant squash, and disease-resistant varieties of lettuce to cut problems early. Trusted seed houses like Baker Creek Heirloom Seeds carry many labeled options for home gardeners.
For ease, focus on beginner-friendly crops: bush beans, determinate cherry tomatoes, radishes, leaf lettuce, Swiss chard, zucchini with vigilant checks for squash vine borer, and herbs such as basil and parsley. These choices reduce stress and build confidence while teaching you how season length and resistance traits affect success.
When in doubt, consult regional seed-starting suppliers and extension publications before you plant. A smart initial selection of vegetable varieties, attention to USDA hardiness zone, understanding determinate vs indeterminate habits, and choosing disease-resistant varieties will make your first seasons smoother and more productive.
Skipping Crop Rotation and Soil Resting
If you don’t plan crop rotation, pests and diseases can quickly build up. A simple garden rotation plan helps by changing hosts for pests and spreading nutrient demand. This keeps plants healthy.
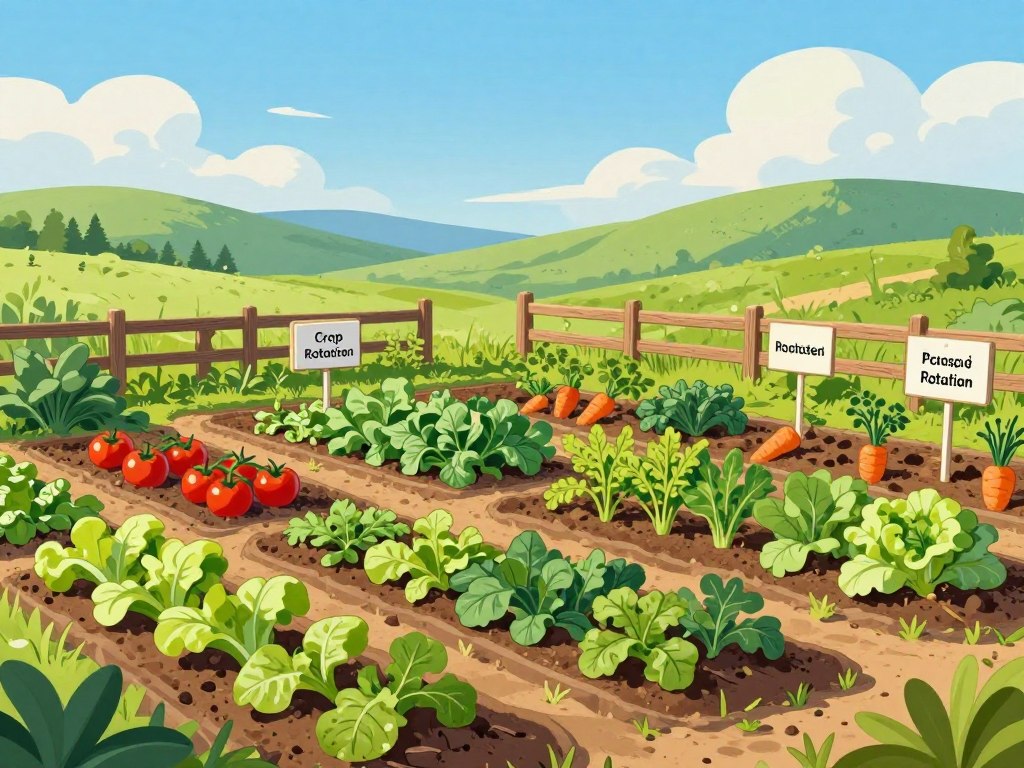
Why rotate
Rotate plant families like Solanaceae (tomatoes, peppers), Brassicas (cabbage, broccoli), Cucurbitaceae (squash, cucumbers) and legumes (beans, peas). This breaks the life cycles of pests and diseases. It also balances nutrients in the soil.
Small garden rotation made easy
Divide a small yard into three or four beds. Move families to a new bed each year. Even a small change can greatly reduce problems.
You can use this three-year example:
- Year 1: Bed A — Solanaceae; Bed B — Brassicas; Bed C — Legumes
- Year 2: Bed A — Brassicas; Bed B — Legumes; Bed C — Solanaceae
- Year 3: Bed A — Legumes; Bed B — Solanaceae; Bed C — Brassicas
Soil resting and cover crops
Letting a bed rest improves its structure and biology. If you can’t leave soil fallow, use cover crops. They protect soil, add biomass, and rebuild nutrients.
Choose cover crops based on your goals. Clover and vetch fix nitrogen, winter rye builds organic matter, and buckwheat breaks up ground. Cut them before seed set and mix the residue into the soil.
Using legumes strategically
Plant legumes before heavy-feeding crops like tomatoes or corn. They fix nitrogen, reducing fertilizer needs. This boosts the next crop’s health.
Practical tips
- Keep simple records of what you plant in each bed each year.
- Avoid planting related crops in the same bed two years in a row.
- Use cover crops during off-seasons to protect soil and help reduce soil-borne disease.
Neglecting Pest and Disease Monitoring
Creating a simple routine for pest and disease monitoring is key. Walk your garden at least once a week. Look for signs like damaged leaves, eggs, larvae, and sticky honeydew. Regular checks save time and protect your garden.
Early signs of common garden pests and diseases
Small holes in leaves can mean caterpillars or beetles. Fine stippling or yellowing often points to aphids or spider mites. Wilting with healthy foliage above ground may signal root problems.
Watch for powdery mildew, leaf spots, and distorted fruit as signs of garden diseases.
Non-toxic and organic control options for beginners
Start with hand-picking slugs and caterpillars when you see them. Use physical barriers like row covers and collars to protect young plants. Choose insecticidal soaps or neem oil for soft-bodied pests.
Apply Bacillus thuringiensis (Bt) against caterpillars and diatomaceous earth for slugs. Encourage beneficial insects like ladybugs and lacewings for ongoing organic pest control.
When to consult local extension services or experts
If symptoms are unclear or severe, contact your county Cooperative Extension office or a university plant clinic like Cornell or Penn State for diagnosis. Collect clear photos, note dates, plant varieties, and include a small sample of affected tissue in a sealed bag when requested.
Extension services can advise lab tests and targeted treatments. Use IPM practices to combine monitoring, sanitation, resistant varieties, and mechanical controls. Treat only when pest thresholds are exceeded.
Read pesticide labels carefully, follow re-entry intervals, and avoid spraying during bloom to protect pollinators.
| Issue | Early Sign | Recommended Action |
|---|---|---|
| Caterpillars | Large irregular holes, frass on leaves | Hand-pick, apply Bt, use row covers |
| Aphids / Spider mites | Stippling, yellowing, sticky honeydew | Spray insecticidal soap, release ladybugs, prune infested tips |
| Slugs | Ragged leaf edges, slime trails | Hand-pick at night, use diatomaceous earth, set collars |
| Fungal diseases | Powdery mildew, spots, wilting | Improve air flow, remove infected leaves, apply copper or sulfur per label |
| Root issues | Sudden wilting, poor vigor despite watering | Inspect roots, rotate crops, consult extension services for lab tests |
Using Improper Mulch or Neglecting Weed Control
Choosing the right mulch is key to a healthy garden. It keeps the soil moist, controls temperature, and prevents disease spread. It also fights weeds and adds nutrients as it breaks down. Pick wisely to avoid problems.
Benefits of mulch: moisture retention and weed suppression
A 2–3 inch layer of organic mulch saves water and keeps the soil moist. It blocks weed seeds from getting light, helping control weeds. It also keeps the soil temperature even, protecting roots from extreme weather.
Types of mulch suitable for vegetable gardens
Use organic mulches like straw, shredded leaves, and composted bark. Straw is light and breaks down fast, while leaves add nutrients. Bark is good for paths. Grass clippings are okay if applied thinly and without herbicides.
Black plastic and landscape fabric are inorganic options. They warm the soil and control weeds for warm-season crops. Each has its own trade-offs.
Hand-weeding and tools to keep weeds manageable
Start weed control early. Pull seedlings when they’re small to prevent them from setting seed. Use a shallow hoe for gentle weeding.
For better efficiency, use tools like a hori-hori knife, a stand-up hula hoe, or a stirrup hoe. Keep paths clear to stop weeds from spreading.
| Mulch Type | Pros | Cons | Recommended Use |
|---|---|---|---|
| Straw | Light, good weed suppression, breaks down to feed soil | May contain seeds unless sourced clean | Rows and around established vegetables |
| Shredded leaves | Readily available, adds organic matter | May mat if too thick, can blow away | Layer 2–3 inches around plants |
| Wood chips | Long-lasting, good for paths and perennial beds | Fresh chips can tie up nitrogen near stems | Use in paths; aged chips at bed edges |
| Grass clippings | Free and nutrient-rich when dry | Can introduce weed seeds or herbicide residues | Apply thinly and dry; mix with other mulch |
| Black plastic / landscape fabric | Excellent weed suppression, warms soil | Limits water infiltration unless managed | Warm-season crops, raised bed covers |
Don’t pile mulch too high or it will smother seedlings. Avoid fresh wood chips near stems to prevent nitrogen loss. Use composted grass clippings if unsure.
Time your weed control right. Pull weeds when they’re small and before they seed. Use the right tools to save your back and work efficiently. With proper mulch and weed control, your garden will thrive.
Planting at the Wrong Time of Year
Choosing the right time to plant is crucial for your garden’s success. Use a planting calendar to plan your planting schedule. This helps avoid frost damage, long waits for harvest, and wasted seeds.
Understanding cool-season vs. warm-season crops
Cool-season crops like lettuce, peas, spinach, and broccoli do well in cooler weather. They can handle light frost. Plant them early in spring or fall for a strong start.
Warm-season crops such as tomatoes, peppers, and cucumbers need warm soil and air. Wait until the soil warms up and nights stay warm before planting them.
How to use last frost and first frost dates in planning
Find your local frost dates from the USDA Plant Hardiness Map, your county extension, or the Farmer’s Almanac. Mark these dates on your calendar.
Use these frost dates to plan when to direct-sow and transplant. Sow cool-season crops before the last frost. Plant warm-season crops after the frost danger has passed.
Starting seeds indoors and timing transplants
Create a seed starting schedule by counting back from your transplant date. For example, start tomatoes indoors 6–8 weeks before transplanting. Start peppers 8–10 weeks ahead.
Consider the days to transplant and days to maturity on seed packets. This helps you plan for harvest times and try succession planting for steady yields.
Hardening off and succession planting
Harden off seedlings over 7–10 days by gradually increasing outdoor exposure. This reduces transplant shock and improves survival.
Use succession planting to keep a continuous harvest. Sow quick lettuce every 2–3 weeks. Pick short-season varieties to bridge gaps between main crops.
A compact reference table for common timing
| Crop Type | Typical Start Indoors | Transplant/Direct Sow | Notes |
|---|---|---|---|
| Leafy greens (lettuce, spinach) | No or 3–4 weeks | Before last frost / early spring | Can tolerate light frost; good for succession planting |
| Peas | No | Early spring, as soil thaws | Direct-sow; prefer cool soil |
| Broccoli | 4–6 weeks | Transplant before last frost | Performs well in cool weather |
| Tomatoes | 6–8 weeks | After last frost, when soil warms | Needs warm nights; use days-to-maturity for timing |
| Peppers | 8–10 weeks | After frost danger passes | Slow to set fruit if nights are cool |
| Cucumbers | 3–4 weeks optional | Direct-sow or transplant after soil warms | Warm soil improves germination and growth |
Poor Tool Care and Garden Maintenance Habits
Good garden care is simple. It starts with basic habits that protect your plants and save time. Keep a few quality garden tools and a regular maintenance plan. These steps reduce disease risks and make gardening easier.
Begin with the essentials: a hand trowel, hori-hori knife, garden fork, spade or shovel, rake, pruning shears, gloves, a watering can or hose with nozzle, a wheelbarrow, and a soil probe or moisture meter. Choose trusted brands for durability. Fiskars, Corona, and Felco are great for pruners. Ergonomic handles help reduce fatigue during long tasks.
Cleaning and sharpening tools keep them working well and plants healthy. Wipe blades after use and disinfect pruners and shovels with 70% isopropyl alcohol or a 10% bleach solution, then rinse. Sharpen tools for clean cuts that heal faster. Light oil on metal parts prevents rust and extends life.
Store tools in a dry place and hang them up to protect edges. An organized tool station speeds up work and reduces accidents. Always use proper lifting techniques, wear sturdy gloves, and protect your eyes during cutting tasks or when handling chemicals.
Adopt small gardening routines you can keep. Do a quick daily check for water needs, pests, and ripe produce to harvest. Set aside one day each week for weeding, trellising, mowing paths, and checking irrigation. Seasonal tasks include soil testing in spring and fall, planning planting schedules, and managing cover crops.
Below is a helpful comparison to guide purchases and upkeep. It shows what to buy, how to maintain each item, and the benefit you get from regular care.
| Tool | Tool Maintenance Tips | Benefit of Regular Care |
|---|---|---|
| Hand trowel / Hori-hori | Clean soil off after use; sharpen edge yearly; oil metal | Smoother digging, less wrist strain, longer life |
| Garden fork / Spade | Rinse, dry, and remove sap; sharpen blade; oil handle ferrules | Better soil penetration, safer lifting, reduced rust |
| Rake | Straighten tines, tighten bolts, store hanging | Even beds, faster cleanup, prevents bent tines |
| Pruning shears (Felco or similar) | Disinfect between plants, sharpen regularly, replace springs | Clean cuts that heal, lower disease spread, accurate pruning |
| Gloves | Wash or replace when torn; keep dry between uses | Fewer blisters, better grip, hand protection |
| Watering can / Hose & nozzle | Flush hose, clean nozzle screens, store coiled and dry | Consistent water flow, less clogging, reliable irrigation |
| Wheelbarrow | Check tire pressure, grease axles, wash after heavy loads | Smoother hauling, fewer breakdowns, safer transport |
| Soil probe / Moisture meter | Wipe contacts, store indoors, replace batteries as needed | Accurate readings, better watering decisions, healthier plants |
Overreliance on Chemical Solutions Instead of Cultural Practices
You can protect your garden without always using broad-spectrum pesticides and synthetic fertilizers. These products can harm beneficial insects and damage soil life. They also encourage pests to become resistant. Try to use cultural pest control first.
When chemicals are necessary: Use them only for severe infestations or invasive diseases. Opt for labeled, least-toxic products like microbial insecticides. Always read and follow EPA labeling and local guidance.
Sanitation and spacing: Remove diseased plant material and fallen debris quickly. Space plants for good air flow to prevent fungal issues. Prune selectively to increase light and lower humidity.
Resistant varieties and rotation: Plant disease-resistant cultivars and rotate crops to break pest cycles. Changing plant families each season helps. These practices support long-term plant health and lessen chemical use.
Biological pest control and organic amendments: Introduce beneficial organisms like Bacillus thuringiensis for caterpillars. Use insectary plants to attract predators. Build soil with compost and kelp to boost plant vigor.
Integrated approach: Combine regular monitoring, timely prevention, cultural pest control, and targeted biological pest control. When treatment is needed, choose targeted organic options that preserve beneficials and maintain yield.
Safety reminder: Follow label directions, wear recommended protection, and never use unregistered or off-label products. Careful, legal use keeps your harvest safe and your garden ecosystem healthy.
Conclusion
To avoid mistakes in your vegetable garden, start by choosing wisely. Pick a spot that gets plenty of sunlight and drains well. Follow the spacing on seed packets and focus on soil health with compost and a soil test.
Water your garden regularly and choose varieties that fit your USDA zone. Rotate your crops to keep pests and diseases away. These tips are key for beginners to grow a successful vegetable garden.
Check your garden every week for pests and diseases. Use mulch and weed regularly to save water. Choose natural methods over chemicals for better results.
Keep your tools clean and sharp. Create simple routines to make gardening easier. Use trusted seed suppliers and local resources to learn more.
Start small and learn from each season. View every mistake as a chance to learn. Create a garden plan, get a soil test, and make a planting calendar.
Use this guide to avoid common mistakes and grow your confidence. Move towards healthier, more productive gardens with successful vegetable gardening.