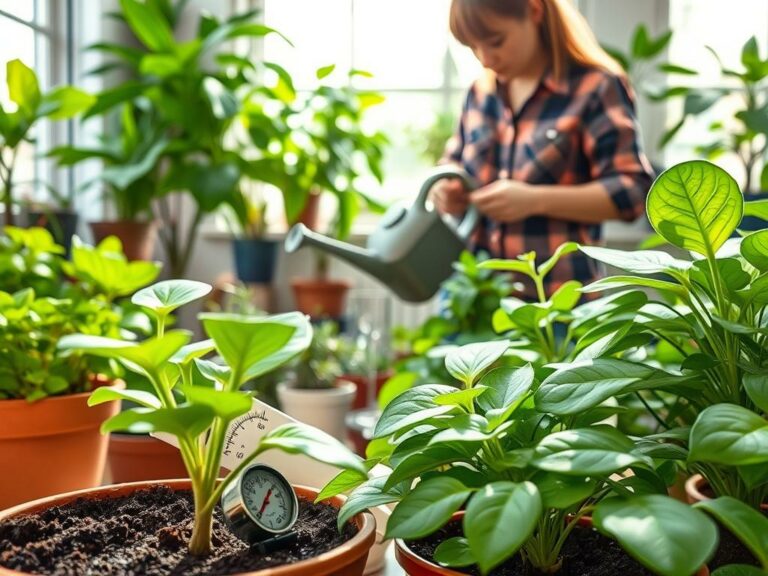
Did you know up to 50% of houseplant issues come from bad drainage? It’s more common than pests or not enough light. This shows how key good drainage is for healthy plants.
This guide will teach you to better drain plant pots with easy steps. You’ll learn to check drainage, pick the right pots and mixes, and use layers and amendments. You’ll also know how to safely drill holes or add mesh.
There are also solutions for planters and tips for indoor and outdoor gardening. You’ll use perlite, pumice, terracotta pots, and a drill with a masonry bit. Plus, moisture meters to avoid overwatering.
Keep reading to boost your confidence in fixing pot drainage. Give your plants a better root environment for stronger growth and fewer problems.
Why drainage matters for healthy potted plants
Good drainage keeps roots healthy by balancing water and air in the potting mix. Roots need oxygen to breathe. Without it, they become stressed and disease-prone.
How poor drainage harms roots and plant growth
Roots need oxygen. Waterlogged soil pushes air out, creating hypoxic conditions where roots suffocate. This invites pathogens like Pythium to cause root rot.
Affected roots turn mushy or black and lose their ability to feed the plant. Symptoms on the foliage include yellowing leaves, wilting, stunted growth, and sudden leaf drop. Different plants handle moisture differently.
Signs your pots need better drainage
- Standing water in saucers or on the soil surface long after watering.
- Water pools on top or takes many minutes to sink in when you water.
- A foul, sour smell from the soil that signals anaerobic conditions.
- Consistent leaf tip burn or unexplained leaf loss when light and nutrients are fine.
Benefits of improving drainage for indoor and outdoor plants
Better drainage speeds root oxygenation and lowers the risk of root rot. Healthier roots mean stronger stems, fuller foliage, and improved flowering or fruit set.
Good drainage reduces emergency repotting and cuts plant losses. It helps nutrient uptake by preventing nutrient lockout from overly wet soil.
For outdoor containers, improved drainage reduces freeze-thaw damage and prevents soil compaction during heavy rains. Overall, paying attention to drainage saves time and supports long-term plant vigor.
How to improve drainage in plant pots
Good drainage stops root rot and keeps plants healthy. First, check how your pots handle water. Then, use simple fixes to boost flow without stressing the plant. Follow these steps to assess pot drainage, increase water flow, and decide when to repot.
Assessing the current drainage situation
Tip the pot gently and watch for water from the bottom holes. Pour a measured cup of water into the soil and time how long it takes to exit. If it drains very slowly or pools, you should assess pot drainage more closely.
Use a moisture meter or stick your finger 1–2 inches into the soil to compare surface wetness with deeper layers. Remove the plant briefly if needed to inspect root health and soil texture. Dense, dark clumps or crisp, hydrophobic soil after drying are red flags.
Check the pot type and hole presence. Glazed ceramic and decorative cachepots often restrict flow. If the container lacks holes or they are tiny, that will limit options to increase water flow in pots unless you modify or repot.
Basic steps to increase water flow
Clear blocked holes first. Use a chopstick or narrow screwdriver to free compacted roots and debris from drainage openings. This small step can make a noticeable difference.
Replace heavy, compacted potting mix with an airy formula or amend the existing soil with perlite, pumice, or bark. These materials improve porosity and form part of effective improve drainage steps.
Elevate the pot on pot feet, a broken clay saucer, or a small rack so water can escape instead of pooling under the rim. Proper elevation helps runoff and prevents soggy crowns.
Adjust your watering technique. Water thoroughly until excess drains, then allow the top portion of the mix to dry to the appropriate level before the next watering. This practice reduces the risk of chronic saturation.
When to repot for improved drainage
Consider repotting for drainage when roots are root-bound, soil is degraded or hydrophobic, or the container has no practical way to add holes. Repotting for drainage often gives you the chance to use a better potting mix and a container with proper holes.
Time the move to spring or early growth season for most houseplants. For succulents and drought-tolerant species, late spring is best. Choose a pot one size larger only when needed. A much larger vessel holds extra moisture and can work against your improve drainage steps.
If you prefer to keep the same container, weigh the effort of drilling holes against repotting for drainage. Often, switching to a pot made from terracotta or one with adequate hole size delivers faster results than oversized pots.
Choosing the right pots to enhance drainage
Choosing the right container is key for your plants’ health. Here’s a quick guide on materials, hole placement, and when to modify or replace a pot.
Material comparison
Terracotta is great for plants that like dry soil. It breathes and wicks moisture away. But, terracotta is heavy and can crack in cold weather.
Plastic holds moisture better and is lighter. It’s perfect for plants that love water and for moving pots around. Make sure plastic pots have drainage holes or drill them carefully.
Glazed ceramic is stylish and stable for tall plants. It keeps water like plastic. Make sure it has enough holes for drainage.
Metal planters are modern but can get hot or cold. They might rust unless lined. Make sure they have clear drainage to protect roots.
Drainage hole placement and size considerations
Put holes at the bottom for full drainage. A single small hole can clog. Use multiple holes, at least 1/4 inch (6 mm) for small pots.
In big pots, use several holes from 1/4 to 1/2 inch. This speeds up drainage and prevents blockages. Avoid holes near the rim to prevent water rings.
When to modify a pot vs. buy a new one
Modify a pot if it’s special, heavy, or fits your plant perfectly. You can drill plastic and many ceramics carefully. Or, use a liner with holes for a decorative pot.
Get a new pot if drilling might break it or if it’s easier than modifying. A self-watering insert or a pot inside another can add drainage without changing the outer pot.
Consider durability, weight, and water retention when picking pots. If you modify a pot, drill safely and check the drainage before planting.
Best potting mixes for faster drainage
Good mixes keep roots airy and prevent puddles. Start by matching potting soil components to the plant’s needs. A fast draining potting mix uses chunky bits like perlite, pumice, and coarse sand to speed runoff while retaining enough moisture for roots.
Components that improve aeration and runoff
Perlite is lightweight volcanic glass that lifts a mix and stops compaction. Pumice gives longer-lasting structure and stays put during watering. Coarse sand adds weight and lets water pass through faster. Pine or orchid bark creates chunky gaps for woody and epiphytic plants. Coconut coir holds some water yet keeps structure; pair it with perlite or pumice for balance.
Recipes for indoor and outdoor mixes
For general houseplants try: 2 parts peat-free potting compost or coco coir, 1 part perlite, 1 part pine bark fines. This DIY potting mix balances moisture and airflow for most species.
For succulents and cacti make: 2 parts coarse pumice or perlite, 1 part coarse sand, 1 part potting compost or coco coir. This blend creates a fast drying root zone that reduces rot risk.
For outdoor mixed containers use: 2 parts premium potting mix, 1 part compost, 1 part coarse perlite or horticultural grit. That mix helps plants survive heavy rains without staying waterlogged.
How to amend heavy soil to prevent waterlogging
If your soil compacts, break it up and mix in 25–50% perlite, pumice, or coarse sand by volume. Adjust the amount based on how dense the original soil is. Add moderate amounts of well-rotted compost or leaf mold to improve crumbly texture without turning the mix into a sponge.
When problems persist, consider replacing the potting mass with a formulated DIY potting mix rather than repeating small fixes. That approach often saves plants from chronic waterlogging and gives you a reliable fast draining potting mix from the start.
Use of drainage layers and what actually works
Choosing the right drainage layers in pots is key, not just for looks. You need them to improve root health and prevent waterlogging. Learn how to place them for the best results.
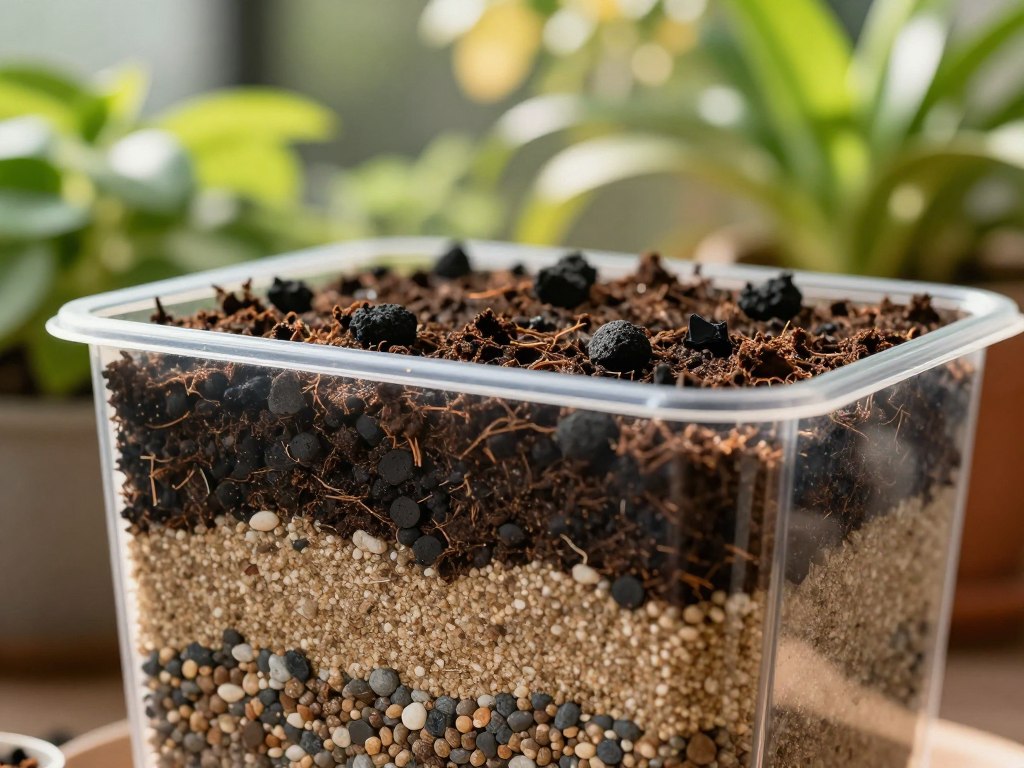
Match materials to your plant’s needs. Lighter plants do well with perlite, while succulents and cacti need more pumice or coarse sand. Knowing the difference helps choose the right materials for each pot.
Perlite is light and cheap. It boosts aeration and dries quickly, which many plants like. But, it can be dusty when dry and may float with too much water. Wear a mask when handling it to avoid breathing in dust.
Pumice, a volcanic rock, stays put. It provides long-lasting structure and doesn’t float. It’s pricier and heavier than perlite but better for plants needing stable, gritty mixes.
Coarse sand or horticultural grit adds weight and improves drainage. Make sure the mix is clean to avoid compaction. For heavy soils, mix sand, pumice, and organic matter for balance.
The gravel layer myth says a shallow layer at the bottom improves drainage. But, science shows it creates a perched water table. Water fills the soil above the gravel until it’s saturated, so the gravel doesn’t really help.
Don’t just use a bottom layer to fix drainage. Instead, increase porosity throughout the root zone. This prevents long-term saturation and helps roots get oxygen, reducing rot and stress.
When adding drainage materials, mix them evenly through the potting mix. This applies to perlite, pumice, and grit. Even distribution prevents waterlogging and supports root growth.
For large containers, use a coarse base with vertical drain channels. Drill extra overflow paths or insert rigid tubes. Then, fill around them with amended mix. This avoids water trapping.
Use a coarse mesh or pottery shards over drainage holes to stop soil washout. This keeps roots from clogging the exit and preserves drainage over time.
| Material | Pros | Cons | Best Use |
|---|---|---|---|
| Perlite | Lightweight, cheap, boosts aeration | Can float, dusty when dry | General houseplant mixes, when lightness matters |
| Pumice | Stable, long-lasting, does not float | More expensive, heavier | Succulent and cactus mixes, long-term structure |
| Coarse Sand / Grit | Adds weight, improves drainage | Can compact if fines present; needs cleaning | Amending heavy soils, outdoor containers |
| Gravel / Shards | Adds weight, decorative | Creates perched water table; does not improve true drainage | Use only to prevent soil washout, not as main drainage |
| Combined Mix | Balanced porosity, consistent water distribution | Requires correct ratios for plant type | Best drainage materials when mixed through root zone |
Improving drainage for hanging baskets and shallow pots
Shallow containers and hanging baskets need a mix of soil, airflow, and watering. This keeps roots healthy. You want fast drainage without losing nutrients or drying out too quickly. Here are tips on media, placement, and watering to reduce soggy roots and boost plant vigor.
Selecting fast-draining media for shallow containers
Choose potting mixes with perlite, pumice, or coarse sand for quick water flow. Lightweight bark-based blends are good for annuals and trailing plants.
Avoid heavy compost-rich mixes in shallow pots as they hold too much moisture. Look for commercial mixes for hanging baskets or add extra grit to regular mix for better aeration.
Techniques to prevent roots from sitting in water
Use containers with good drainage holes and check liners for water flow. Coir liners can trap moisture if too tight; test them before planting.
Choose plants with root systems for the container depth. Move moisture-loving species to deeper pots. Hang baskets where air flows beneath them and avoid water-filled trays to protect drainage.
Watering methods tailored to shallow containers
Water in smaller amounts more often to wet the root zone without prolonged saturation. Use a narrow-spout watering can or wand to direct water to the root ball and let excess escape.
In hot weather, check moisture daily. Consider short-cycle drip lines or a wicking setup to keep soil moist without compromising drainage. These methods make watering hanging baskets easier and protect roots from standing water.
Tools and simple modifications to increase drainage
You can make small, effective changes to improve drainage in your pots without buying new containers. A few tools and simple pot modifications will help water flow, protect roots, and keep soil in place.
Before you start, gather a drill, masonry or diamond-coated bits for ceramic, a standard bit for plastic, safety glasses, and silicone or hot glue. Work slowly and steady. These steps reduce the risk of cracking and give you durable results.
Drilling drainage holes safely in existing pots
For plastic pots use a sharp standard drill bit. Apply moderate pressure and keep speed low to medium. Wear safety glasses to protect your eyes.
For terracotta and ceramic use a masonry or diamond-coated bit at low speed. Keep the drilling area wet by spraying water or working in a shallow tray of water to reduce heat and cracking risk.
With glazed pots start with a small pilot hole and increase bit size stepwise. Clamp the pot securely and protect the interior glaze with tape. Test on a cheaper pot if you are unsure about cracking.
Adding mesh or fabric to keep soil in place while allowing flow
Place landscape fabric, hardware cloth, or a piece of fiberglass window screen over drainage holes to stop soil washout while letting water pass. Secure the mesh with hot glue or silicone so it won’t shift.
Avoid impermeable liners below the holes. They block flow and defeat the purpose of drainage. For decorative cachepots set the planted nursery pot with holes inside the outer pot. This keeps the outer pot dry while the inner pot drains freely.
Using self-watering inserts with improved overflow control
Self-watering inserts regulate moisture but can keep roots too wet unless they have proper overflow design. Choose models with overflow ports or clear fill lines so the reservoir cannot flood the root zone.
Wicking inserts draw water up only as needed. Pair them with an airy potting mix so soil does not remain saturated. Ensure the reservoir overflow sits above the root zone to avoid waterlogging.
| Task | Recommended Tool/Material | Key Tip |
|---|---|---|
| Drill holes in plastic pots | Standard drill bit, safety glasses | Low-to-medium speed, steady pressure |
| Drill holes in terracotta or ceramic | Masonry or diamond-coated bit, water spray | Keep area wet to prevent cracking |
| Protect glaze while drilling | Pilot drill bit, tape, clamp | Start small and enlarge gradually |
| Prevent soil washout | Landscape fabric, hardware cloth, fiberglass screen | Secure with hot glue or silicone |
| Use with decorative cachepots | Nursery pot with holes or mesh layer | Inner pot handles drainage; outer stays dry |
| Manage reservoir moisture | Self-watering inserts with overflow or wicking | Overflow must be above root zone; use airy mix |
Watering practices that complement good drainage
Good drainage works best when your watering routine matches plant needs. This includes pot size and the mix you use. Adjust how much water you give and how often based on the plant’s preferences and the season. Use simple checks and small habits to keep roots healthy and avoid soggy soil.
How much and how often to water potted plants
There is no one schedule that fits every species. Let plant type guide you: succulents and cacti need sparse watering and near-dry soil between sessions. Moisture-loving ferns need consistently damp but not waterlogged soil. For many houseplants, let the top inch or two dry before you water again.
When you water, aim for deep, even soakings rather than frequent light sprinkles. Water until it runs out of the drainage holes to flush salts. Empty saucers after a few minutes to prevent roots from sitting in standing water.
Checking moisture properly with meters and finger tests
Use a reliable moisture meter to read at root depth for accurate results. For medium pots, probe 6–8 inches; for smaller pots use 1–2 inches. A moisture meter gives numbers you can track over time.
Combine the meter with the finger test to build intuition. Your finger gives tactile feedback while the meter provides a quantitative check. Watch plant cues like leaf firmness and color to confirm what tools tell you.
Seasonal adjustments for watering and drainage needs
Plants grow faster in spring and summer, so you will likely increase watering frequency and keep drainage clear to avoid root stress. In fall and winter, slow growth means reduce how often you water. Check at root depth before adding moisture.
Indoor heating and low winter humidity can dry the surface faster but leave deep soil damp. Use a moisture meter and tailor seasonal watering adjustments to avoid overwatering in cold months. Keep drainage holes clear year-round to prevent winter waterlogging and freeze damage.
Quick watering tips for drainage:
- Water deeply, then let excess drain away.
- Use a moisture meter and finger test together for confidence.
- Empty saucers after 10 minutes to stop roots from sitting in water.
- Adjust watering frequency potted plants based on season and growth.
Managing drainage in outdoor containers and planters
Good outdoor container drainage starts with thoughtful placement and simple adjustments. You can reduce soggy soil, root rot, and frost damage by choosing the right spot and lifting pots off wet surfaces. Small changes in planter positioning make a big difference for runoff and airflow.
Raise pots on pot feet, bricks, or commercial risers so water can flow freely from drainage holes. Place containers where sun and wind help dry the soil, while avoiding harsh exposure that stresses plants. Group pots so excess water moves away from plant bases instead of pooling between them.
Protect drainage in cold climates and heavy rains
In freezing weather, move sensitive containers to sheltered areas or elevate them to reduce contact with cold ground. For heavy storms, tuck pots under eaves or a covered porch to protect fragile drainage. If a planter stays outside, use frost-resistant terracotta or glazed containers rated for outdoor use and ensure overflow paths remain clear.
Combining container drainage with landscape grading
When you place large planters on soil or garden beds, make sure the ground slopes away from your house so overflow won’t pool at foundations. On patios and terraces, use permeable paving or install simple drain channels to handle water from many pots. Site water-loving containers where the existing grade encourages runoff, and put heavy planters on surfaces that allow unrestricted outflow.
Pair these placement and grading steps with well-draining mixes and regular checks after storms. That keeps roots healthy, helps you protect planters from rain damage, and makes outdoor container drainage work for your garden all year.
Conclusion
To improve drainage, start by checking your pots. Make sure water can flow out easily. Trim roots if they’re too long and repot if the soil is always wet.
These steps help prevent rot and diseases. Healthy plants need well-draining soil to thrive.
Choose pots and mixes that let water drain well. Terracotta pots and mixes with perlite or pumice work best. Avoid using just a gravel layer at the bottom.
Good drainage means better root health and growth. This is true for both indoor and outdoor plants.
Water your plants right to match good drainage. Water deeply, then let the top dry out. Use a moisture meter or finger test to check.
Adjust how often you water based on the season. This week, check your pots, add holes if needed, and repot if necessary. Elevate saucers to improve air flow.
Drilling holes, adding perlite, or lifting pots slightly can help a lot. These tips will keep your plants happy and healthy.