Did you know a well-planned garden layout can increase your yield by up to 40%? This is thanks to careful planning that considers light, water, and plant relationships.
This article will show you how to design your garden for better health and looks. You’ll learn to boost yields, fight pests and diseases, save water, and make upkeep simpler.
Our advice is for all gardeners in the United States. Whether you have a backyard, balcony, community plot, or small urban space, we’ve got you covered. We’ll guide you to resources like the USDA plant hardiness zones and the Royal Horticultural Society.
Our guide is easy to follow: assess your site, set goals, map and measure, choose plants, plan irrigation and access, and add structures. Each step comes with tools and checklists to help you create a garden that supports your plants’ growth.
Understanding the Basics of Garden Layout Planning
Good layout is key for healthy plants and easy care. Learning the basics helps you plan for success. It ensures sunlight, soil, and water reach where they’re needed.
Why layout matters for plant health
Where you place plants affects their health. Sunlight, wind, and temperature impact growth. Proper spacing also reduces disease risk by improving air flow.
Layout helps pollinators and beneficial insects too. This leads to better yields as bees and insects move freely.
Key elements to consider: light, soil, water, and space
First, map out sun, shade, and deep shade areas. Place sun-loving veggies like tomatoes in sunny spots.
Test your soil to know its condition. Use compost or products from Espoma or Dr. Earth to improve it. Good soil supports strong roots and plants.
Plan your irrigation system well. It should reach roots efficiently and avoid waterlogging. Follow local water rules and use water wisely. Leave enough space for plants to grow and for paths.
How seasons and climate affect design choices
Use USDA zones and frost dates to guide perennial placement. Microclimates can extend your growing season or protect plants.
In hot, dry areas, focus on shade, mulch, and drought-tolerant plants. In cool, wet places, prioritize drainage and disease-resistant varieties. This approach ensures your garden thrives over time.
| Element | What to Check | Practical Tip |
|---|---|---|
| Light | Full sun, partial shade, full shade; hours per day | Map sun patterns in spring and summer; place sun-loving crops in full sun zones |
| Soil | Texture, pH, organic matter, drainage | Amend with compost or Espoma and Dr. Earth products to boost soil fertility |
| Water | Supply source, drainage, municipal rules | Use drip irrigation and group plants by water need to reduce waste |
| Space | Mature spread, root zones, access paths | Allow buffer zones between incompatible crops and clear paths for maintenance |
| Climate | USDA zone, frost dates, microclimates | Apply climate-aware gardening: shade and mulch in hot zones, drainage in wet zones |
Assessing Your Site Before You Start
Before you start digging, do a thorough site assessment. This step saves time and money later. Use simple tools and careful observation to map sunlight, soil, and water across your lot.
Begin with a sunlight survey to see where sun and shade fall. Record the light at morning, midday, and afternoon. Mark areas that stay shaded by trees or buildings. For a tech approach, apps like Sun Seeker or Sun Surveyor can help plan your beds.
Then, do basic soil testing to check its texture and fertility. A jar test or ribbon test shows the soil’s balance. For pH and nutrient levels, send samples to your state extension lab, like Penn State or University of California Cooperative Extension. Use these results to decide on lime, sulfur, nutrients, or organic matter like compost.
After heavy rain, observe drainage patterns. Walk the yard to spot puddles and low spots. Dig a small test hole to see how fast water drains. Slow drainage spots are good for raised beds. Fast-draining areas may need mulch and organic matter to hold moisture.
Map the microclimates you find during these tests. Note south-facing walls and paved patios that store heat. Mark hollows where frost lingers. Use warm spots for tender vegetables and cooler spots for lettuce and greens. Simple maps help place plants where they will thrive.
Below is a compact planning table to guide your on-site checks. Use it while you work so your site assessment stays organized and actionable.
| Check | What to Record | Tools or Methods | Actionable Response |
|---|---|---|---|
| Sunlight survey | Hours of direct sun by location; persistent shade areas | Sun apps, watch, simple grid map | Sit sun-loving crops in full-sun zones; shade-tolerant plants under trees |
| Soil testing | Texture, pH, nutrient levels | Jar/ribbon tests, home kits, extension lab tests | Add compost, adjust pH with lime or sulfur, balance N-P-K as needed |
| Drainage observation | Pooling areas, percolation rate | Post-rain walkthrough, test holes | Install raised beds in wet spots; improve drainage with organic matter |
| Microclimates | Heat-retaining surfaces, cold pockets, wind exposure | Seasonal visits, temperature notes, visual cues | Place tender plants near warm walls; protect frost-prone hollows |
Setting Goals for Your Garden Space
First, decide what you want from your yard. Clear goals help with every choice, from where to put beds to what plants to pick. Think about who will use it and what will add the most value to your home.
Deciding on purpose: vegetables, ornamentals, pollinators, or mixed-use
Choose between a kitchen garden, a colorful ornamental garden, a space for bees and butterflies, or a mix. For a kitchen garden, place beds near the kitchen for easy access. Use corners for a pollinator garden to help wildlife.
Balancing beauty and productivity
Make your garden look good by using the same colors and textures. Add beauty with edible flowers and herbs. Mix long-lasting perennials with annuals for a change of seasons without much work.
Planning for maintenance needs and your available time
Be honest about how much time you have each week. If you’re short on time, choose low-maintenance plants and systems. Use simple plans and checklists to keep up with your garden without stress.
Share the work if you can. Local landscapers can help with mulch and irrigation. Community garden volunteers might trade help for a plot. Good planning makes big dreams possible.
Mapping and Measuring Your Garden Area
Begin by creating a detailed base map. It should include property lines, buildings, trees, and utilities. Use blueprints or Google Maps for reference. Make sure to note the north direction and key measurements before you start measuring on the ground.
Measure the boundaries and fixed elements with a tape measure or measuring wheel. Record the distances to fences, patios, and large trees. Mark utility lines and permanent features to ensure your garden scale drawing is accurate.
Use a grid on graph paper or a digital file for a precise base map. Choose a scale, like 1 inch = 4 feet, and keep it consistent. This makes updating your garden scale drawing easier.
Look into garden planning apps to make data collection and visualization faster. Tools like SketchUp, SmartDraw, Gardena My Garden, Planter, or iScape are great for plant placement and mood previews. Use apps like Measure on iOS or MeasureKit for quick distance measurements. Sun Seeker or similar apps show sun patterns over the year.
Turn your field measurements into a garden scale drawing. This way, widths and clearances will be realistic. Mark permanent elements like sheds and patios, and identify areas for annual beds and containers. This clarity helps with decisions on paths, irrigation, and bed layout.
Plan path widths based on their use. Use 18–24 inches for single access, 36 inches for wheelbarrow or mower access, and wider spaces for seating or equipment. Label each area on your base map to ensure construction and planting follow the plan without surprises.
Keep your maps and drawings editable. Update them when you add new features like raised beds, trellises, or a shed. A living base map paired with garden planning apps makes it easy to test layouts and refine your bed layout over seasons.
Design Principles for Better Growth and Aesthetics
Good garden design mixes function with beauty. It makes your space work well and look welcoming. Start by grouping plants simply, plan for rotations and layers, and use vertical gardening.
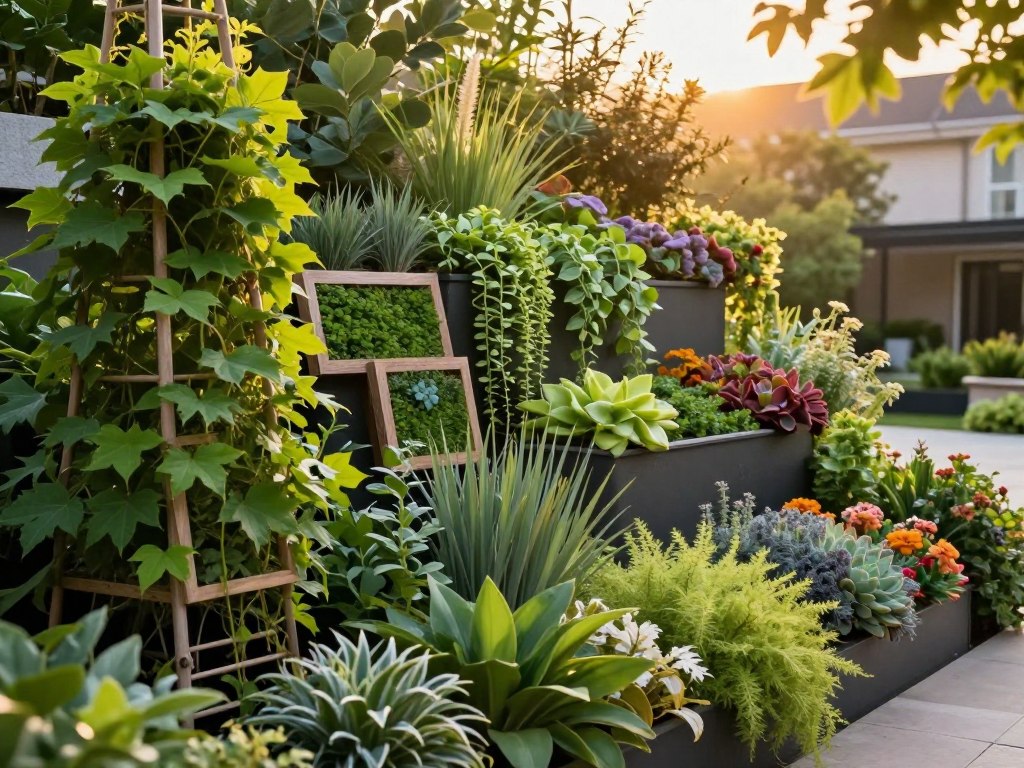
Pair plants with companion planting to help each other. Basil with tomatoes improves taste and keeps pests away. Marigolds near roots fight nematodes. Beans add nitrogen, helping corn and brassicas.
Group plants by their vulnerability to pests and disease. Place trap crops like nasturtiums at the garden edge to draw aphids away from lettuces. Add plants like lavender and Echinacea near fruiting crops to help with pollination.
Plan crop rotation to protect your soil and reduce disease. Rotate families like Solanaceae and Brassicaceae across beds each year. Follow warm-season crops with cover crops like clover or rye in fallow periods to rebuild soil fertility.
Use succession planting for a steady harvest. Stagger sowings of lettuces, radishes, and beans to fill gaps. After cool-season crops finish, plant quick-maturing warm-season varieties to keep beds productive.
Make vertical gardening a part of your layout to save space and improve air flow. Trellises and arbors are great for cucumbers, peas, and pole beans. Espalier fruit trees against a sunny wall give fruit without taking up much lawn.
Layer plants to maximize light and suppress weeds. Combine tall, mid, and groundcover layers like corn, pole beans, and squash. Choose compact or patio varieties for containers when space is tight.
When designing your beds, balance aesthetics with these tactics. Thoughtful companion planting, planned crop rotation, timely succession planting, and smart vertical gardening will make your garden more resilient and attractive.
Choosing Plant Types and Placement
You want a garden that thrives with minimal drama. Start by picking plants that match your site’s sunlight, soil, and moisture. Choosing wisely saves time and effort in the long run.
Matching plants to microclimates and soil conditions
Map the warm, cool, dry, and wet spots in your garden. Use microclimate planting to place drought-tolerant herbs like rosemary and thyme in dry areas. Put moisture-loving plants like hostas and irises where water gathers.
Check USDA hardiness zones and native plant lists from the Lady Bird Johnson Wildflower Center for better choices. If your soil is poor, amend it or choose plants like daylilies for compacted clay to avoid constant soil battles.
Placement for sun-loving versus shade-tolerant plants
Sort your garden beds by sunlight patterns. Use full-sun areas for tomatoes, peppers, and other sun-lovers. North-facing spots or under trees are best for ferns, Heuchera, and Ajuga that need less light.
Remember, sun patterns change with the seasons. A spot that gets full sun in summer might be shaded in spring. Plan spring crops for early-sun areas for an early harvest.
Considerations for spacing, mature size, and root zones
Follow seed packet and nursery advice on spacing to avoid crowding and disease. Proper spacing improves air flow and reduces pests.
Think about the mature size and spread of shrubs and perennials when placing them. Mark the root zones of trees and large shrubs to protect foundations, patios, and utilities. Use root barriers where aggressive roots might invade beds or pipes.
Plan for the long-term with perennials and shrubs. Thoughtful placement now saves you from future pruning, dividing, and replacement.
Incorporating Watering and Irrigation into Layout
Start planning your garden’s irrigation early. This way, watering becomes a part of the design, not an afterthought. A well-thought-out plan saves water, time, and stress on your plants. Consider zones, delivery methods, and storage as you plan your garden’s layout.
Divide your garden into zones based on sun exposure and plant type. Use a separate irrigation system for sun-loving vegetables. Shade-tolerant plants should go in cooler zones to avoid overwatering. This approach helps your garden use water wisely and keeps plants healthy.
Drip irrigation and soaker hoses are great for beds and borders. They deliver water right to the roots, reducing evaporation and fungal diseases. Brands like Rain Bird, DripWorks, and Orbit offer kits for different garden setups.
Use sprinklers for lawns or large areas needing even watering. Water in the early morning to reduce evaporation and disease risk. Timers or smart controllers help adjust watering based on seasons and weather.
Group plants by their moisture needs in hydrozones. Place drought-tolerant plants like sedums and lavender together. Use dedicated irrigated beds for thirstier vegetables to avoid waste and root competition.
Mulch beds with 2–4 inches of organic material to retain moisture and moderate soil temperature. Mulch reduces evaporation and cuts down on watering, making your garden more drought-resistant. It also supports your goal of using water wisely.
Rainwater harvesting is a free source of irrigation. Install rain barrels or a cistern to collect roof runoff for non-edible beds. Use a first-flush diverter to improve water quality and check local rules before adding storage tanks.
Consider using greywater in your garden if local codes allow. Simple systems can feed ornamentals and lawns with biodegradable, low-salt detergents. Avoid using greywater on edible crops and follow local guidelines for safe use.
| Use | Best For | Pros | Cons |
|---|---|---|---|
| Drip irrigation | Vegetable beds, mixed borders, containers | Targets roots, reduces evaporation, conserves water | Requires filtration, occasional emitter cleaning |
| Soaker hoses | Shrub rows, perennial beds | Easy to install, low cost, gentle delivery | Uneven flow if kinked, less precise than drip |
| Sprinklers | Lawns, large ornamental areas | Covers broad areas quickly, simple setup | Higher evaporation, can wet foliage, waste on mixed beds |
| Rainwater harvesting | Supplemental irrigation for non-edibles | Reduces mains use, free water source, eco-friendly | Storage cost, seasonal variability, local regulations |
| Greywater systems | Ornamentals, lawns (where allowed) | Reuses household water, lowers potable use | Regulatory limits, requires safe detergents, not for edibles |
Pathways, Access, and Maintenance Planning
Good access makes gardening easier and more enjoyable. Plan garden pathways so you can reach beds, storage, and water without awkward stretches. Thoughtful access planning saves time during planting, pruning, and harvests while reducing strain on your back and knees.
Designing paths for ease of access and ergonomics
Set path widths to match how you work. Use 18–24 inches for hand-tending, 36 inches for wheelbarrows, and wider main aisles where you carry crates or sit. Arrange a simple work triangle linking your shed, water source, and main beds to cut down on extra steps.
Choose bed widths that fit your reach. A 3–4 foot raised bed lets you work from both sides without stepping onto soil. Place narrower beds against fences when single-sided access is fine.
Material choices for durability and appearance
Pick path materials that fit your budget and style. Gravel, decomposed granite, mulch, pavers, and reclaimed brick each offer a different look and maintenance need. Consider permeability: gravel and mulch drain well, while solid pavers need runoff planning.
Use durable edging like steel, timber, or stone to keep path materials in place. Proper edging extends the life of your paths and keeps beds tidy during routine garden maintenance access.
Planning access points for seasonal tasks and harvests
Design gates or removable panels so equipment can reach larger zones when needed. Plan direct harvest routes from beds to the kitchen or storage to speed up pick-and-pack tasks. Place staging areas for compost, tools, potting, and wash stations near main harvest zones.
Leave turning radii for wheelbarrows and room for temporary items such as cold frames or hoop houses. These small allowances make seasonal swaps smoother and support ergonomic garden design as your needs change.
Integrating Structures and Features into Your Garden
Adding garden structures and features changes how you use outdoor space. Think about sightlines, sun patterns, and daily tasks before placing anything. Small changes in placement make a big difference for function and beauty.
Placing raised beds, greenhouses, and cold frames
For raised bed placement, choose spots with good drainage and easy access to a hose. Orient long beds north–south so plants get even sun. Aim for heights between 8 and 24 inches to suit comfort and mobility.
Greenhouse positioning matters for growth. Put greenhouses in sunny, sheltered places on level ground. Nearby electrical access helps run fans or heaters when frost threatens. Cold frames work well near the house for extra warmth and quick reach during busy seasons.
Using trellises, arbors, and fences effectively
Place trellises on the north side of beds to avoid shading lower crops. Pick durable materials like galvanized steel or cedar so structures last. Use arbors and pergolas to add vertical interest and create shaded microclimates for vining plants.
Fences protect crops from deer and rabbits. Where deer are common, consider tall fencing or mesh. Decorative fencing can boost curb appeal while keeping animals out. Electric options work in rural settings where extra protection is needed.
Designing focal points, seating areas, and wildlife habitats
Garden focal points draw the eye and anchor outdoor rooms. Choose a specimen shrub, a water feature, or a modest sculpture to create balance. Seat your favorite chair so you can view kitchen beds and flowering borders at once.
Make a wildlife-friendly garden by adding native plant patches, pollinator-friendly perennials, and birdbaths. Include brush piles or small logs for insects and shelter. Consult Audubon Society guides and local native plant societies for species recommendations that support birds and beneficial insects.
garden layout planning
Start a simple garden planning process to make your ideas real. First, note down sun, soil, water, drainage, and microclimates. Taking small steps helps avoid big mistakes.
How to use the garden layout planning process step-by-step
- Step 1: Assess site — record sunlight patterns, soil type, moisture, and spots that hold water.
- Step 2: Set goals — pick the garden’s function, look, and how much upkeep you want.
- Step 3: Map and measure — draw a to-scale base map and mark permanent features like trees and utilities.
- Step 4: Design zones — create hydrozones for water needs and work zones for maintenance access.
- Step 5: Select plants — match species to conditions and group by similar needs to simplify care.
- Step 6: Plan irrigation and access — layout efficient watering lines and comfortable paths for chores and harvests.
- Step 7: Implement in phases — begin with priority beds, then expand as you learn what works.
- Step 8: Monitor and adapt — track plant health, soil tests, and adjust layout over seasons.
Common mistakes to avoid during garden layout planning
- Ignoring sun and shade shifts that move across the yard during the year.
- Overcrowding beds without accounting for mature plant size and root spread.
- Poor drainage planning that causes soggy beds or erosion.
- Neglecting access and maintenance, which makes routine tasks harder.
- Mixing plants with different water or soil needs in the same area.
- Starting too large; phased work reduces risk and helps you learn as you go.
Templates, checklists, and planning worksheets you can use
Use planning templates and a garden planning checklist to get started. Look for printable bed layout templates, succession calendars, and soil test guides from places like the University of California Master Gardener Program or Cornell Cooperative Extension.
Download plant spacing charts, irrigation zone planners, and seasonal task lists from trusted sources like Fine Gardening and the National Gardening Association. Create simple spreadsheets for plant inventories, sowing schedules, and amendment logs to track your progress.
Keep a master garden planning checklist for each season. Use it to schedule tests, note mistakes fixed, and save successful templates. This habit helps refine your design and improve yields over time.
Conclusion
This garden planning summary covers the basics. First, check your site and set goals. Then, map your space and choose plants wisely. Make sure they match your soil and light conditions.
Design for water efficiency and easy access. A well-planned garden leads to healthier plants and better harvests. This is true for both vegetable patches and ornamental beds.
For a good start, test your sunlight and soil. Sketch a basic map and focus on one or two areas first. Use checklists, templates, and your local extension for advice on plants and soil.
Remember, gardens evolve. Watch for changes in microclimates, soil, and plant health. Be prepared to adjust your garden each season. Stay adaptable and focused on growth.
Begin now by drawing a simple map and scheduling a soil test. These steps turn your idea into a vibrant garden.