Did you know nearly 35% of new gardeners quit in the first year? They lack the right tools and guidance. This is a lot of effort and plants that don’t thrive.
This guide will help you start your garden with confidence. You’ll learn about the essential tools that make a big difference. This way, you avoid mistakes and save time. It covers tools for planting, soil care, watering, pruning, protection, and transport.
The ten core items we’ll cover include a hand trowel, garden fork, pruning shears, and garden gloves. You’ll also need a hose or watering can, garden rake, and a soil test kit. A wheelbarrow or garden cart, tool storage solutions, and maintenance items like a sharpener and oil for blades are also important.
Using these tools will improve plant health and reduce physical strain. It will also speed up your learning and help you use water and time wisely. Each section has buying tips, care guidance, and budget-friendly strategies. This will ensure your gardening starter kit and equipment for beginners lead to success.
Why you need essential gardening tools to start your garden
Starting a garden is easier with the right tools. A sharp trowel and an ergonomic fork make digging easier. This saves time and prevents muscle soreness, showing why tools are crucial for gardening.
Using tools for specific tasks makes gardening more efficient. A hand weeder removes roots quickly, and a quality rake levels soil fast. Matching tools to tasks saves time and improves results.
How the right tools save time and effort
Choose tools that fit your strength and reach. Long-handled spades reduce bending and protect your back. A sharp trowel makes planting and transplanting faster.
Proper tools mean fewer mistakes. Clean pruners make precise cuts, helping plants recover faster. This makes gardening more enjoyable and keeps you on schedule.
Health and safety benefits of proper tools
Gloves protect your hands from cuts and thorns. Padded knee pads help when planting at ground level. These items show how gardening safety keeps you going longer.
Ergonomic pruners and long-handled tools reduce strain on wrists and back. Sun protection, like a wide-brim hat and sunscreen, is also key for safety.
How tools help you learn gardening basics faster
Hands-on tools make learning gardening basics easy. A soil test kit teaches about pH and nutrients. A garden fork shows the importance of aeration.
Using pruning shears teaches correct cutting angles and timing. These hands-on lessons make learning gardening fast and concrete.
| Tool | Benefit | How it helps you learn |
|---|---|---|
| Hand trowel | Speeds planting and reduces bending | Demonstrates proper planting depth for seedlings |
| Garden fork | Improves soil aeration and reduces effort | Reveals soil layers and texture for better amendments |
| Pruning shears | Delivers clean cuts and lowers strain | Teaches pruning technique and plant health cues |
| Soil test kit | Identifies pH and nutrient needs | Explains fertilizing and lime application with results |
| Work gloves and knee pads | Protect hands and joints for longer sessions | Encourages safe, more frequent practice in the garden |
Choosing the best hand trowel for planting and transplanting
You need a compact tool for seedling pots, small beds, and tight spaces. A hand trowel is great for planting seedlings, transplanting, and mixing soil. Choose a size with a 6 to 8 inch blade and a pointed or slightly scooped shape.
Key features to look for in a hand trowel
Look for features that make your work easier. An ergonomic handle with rubber or contoured wood reduces hand strain. A pointed blade helps penetrate compacted soil.
Measurement markings on the blade ensure you plant at the right depth. A sturdy neck-to-handle connection prevents wobble during use.
Materials and durability considerations
Durable materials are key for long-term use. Stainless steel resists rust and is easy to clean. Heat-treated carbon steel holds an edge longer but needs rust care.
Aluminum is lightweight but less durable under heavy use. For handles, ash or hickory wood offers shock absorption and a classic feel. Fiberglass is low maintenance. Molded rubber provides a sure grip in wet conditions.
Care and maintenance tips for longevity
Good maintenance keeps your tool ready. Clean the blade after each use and dry it before storage. Oil carbon-steel blades with mineral oil to prevent rust.
Sharpen the blade occasionally with a file to make cutting roots easier. Trusted brands in the United States include Fiskars, Corona, and DeWit. Each offers models for various gardening needs.
| Feature | Why it matters | Recommended option |
|---|---|---|
| Blade material | Durability and rust resistance | Stainless steel for low care; heat-treated carbon steel for edge retention |
| Blade shape and size | Penetration and soil holding | Pointed 6–8 inch blade for beds and containers |
| Handle | Comfort and shock absorption | Ash or hickory wood, fiberglass, or molded rubber grip |
| Neck strength | Prevents wobble and breakage | Welded or forged neck-to-handle connection |
| Extras | Ease of planting and accuracy | Measurement markings, tapered scoop, ergonomic contour |
Selecting a durable garden fork for soil aeration
Choosing the right tool is key when you care for your garden. A durable garden fork helps you loosen soil, lift roots, and improve drainage. It’s a must-have for every season.
When to use a garden fork vs spade
Use a garden fork to loosen and lift soil gently. It’s great for heavy clay and compacted beds. A spade is better for clean edges and moving lots of soil.
Handle types and ergonomic design
Straight handles help you push tines into soil. D-handles are better for lifting heavy loads. Choose a fork with a cushioned grip and a shaft that fits you to avoid back pain.
Material and tine choices
Hardened steel tines are strong and won’t bend. Four- or five-tine forks are good for different jobs. Look for brands like True Temper and Bully Tools for durable tools.
Buying tips
Choose a fork based on your garden needs. For loosening and lifting, go for a durable fork. For lighter tasks, an ergonomic fork with a fiberglass shaft is better. Keep your tools sharp and dry to last longer.
Essential pruning shears for healthy plants
A good pair of hand pruners helps you remove dead or diseased stems. They also help shape shrubs and harvest vegetables and flowers. Pruning keeps plants vigorous and reduces pest and disease pressure.
Choose tools that match your plants and strength. Bypass pruners give precise, scissor-like cuts on live green wood. Anvil pruners crush through dry, woody stems with a single flat surface.
For most gardeners, a quality bypass model from Felco, Fiskars, or Corona will handle everyday tasks.
Bypass vs anvil pruners: which is right for you
Bypass pruners work like scissors: two curved blades pass each other for clean cuts. They produce neat wounds that heal quickly. They are ideal for roses, tender stems, and regular maintenance.
Anvil pruners use one straight blade that closes onto a flat anvil. They are tougher on hard, dead wood and saplings. Use anvil pruners when you need extra cutting force and can tolerate a rougher cut.
Blade maintenance and sharpening guide
Clean blades after each use to remove sap and resin. Wash with soapy water or wipe with rubbing alcohol, then dry thoroughly. A drop of light oil on the pivot keeps motion smooth.
To sharpen pruning shears, maintain the bevel on bypass blades with a sharpening stone or a diamond file. Work in small, controlled strokes along the original angle. Replace or realign blades when you see deep nicks. Brands like Felco and Corona offer replaceable parts that extend tool life.
Safety tips for pruning
Lock blades when pruners are idle. Wear sturdy gloves and eye protection for larger jobs. Cut at a 45-degree angle on many plants so water sheds away from the wound and disease risk drops.
Avoid twisting cuts that tear tissue. Sanitize blades between plants to prevent spreading pathogens. Follow these pruning safety steps to protect yourself and keep your garden healthy.
Reliable garden gloves to protect your hands
Gloves keep your hands safe from cuts, splinters, and harmful germs. They also protect against plant irritants like poison ivy. The right gloves make gardening safer and easier.
Leather gloves, like those made from cowhide or goatskin, are great for tough jobs. They’re perfect for handling roses or rough brush. Nitrile-coated gloves are good for tasks that need water resistance and dexterity.
Lightweight knit or cotton gloves are best for light tasks. They let your hands breathe but offer less protection.
Choosing the right fit and grip
Measure your palm to find the right glove size. Gloves that fit well let you handle small plants easily. Look for textured palms for better grip on wet surfaces.
Practical brand and care notes
Wells Lamont, Atlas, and Foxgloves meet different needs. Wells Lamont is for tough leather jobs, Atlas for versatile nitrile, and Foxgloves for a snug fit. Always follow the care label for fabric and nitrile gloves. Let leather gloves dry naturally and condition them occasionally. Replace gloves when they start to wear out.
Choosing a dependable watering tool: hoses and watering cans
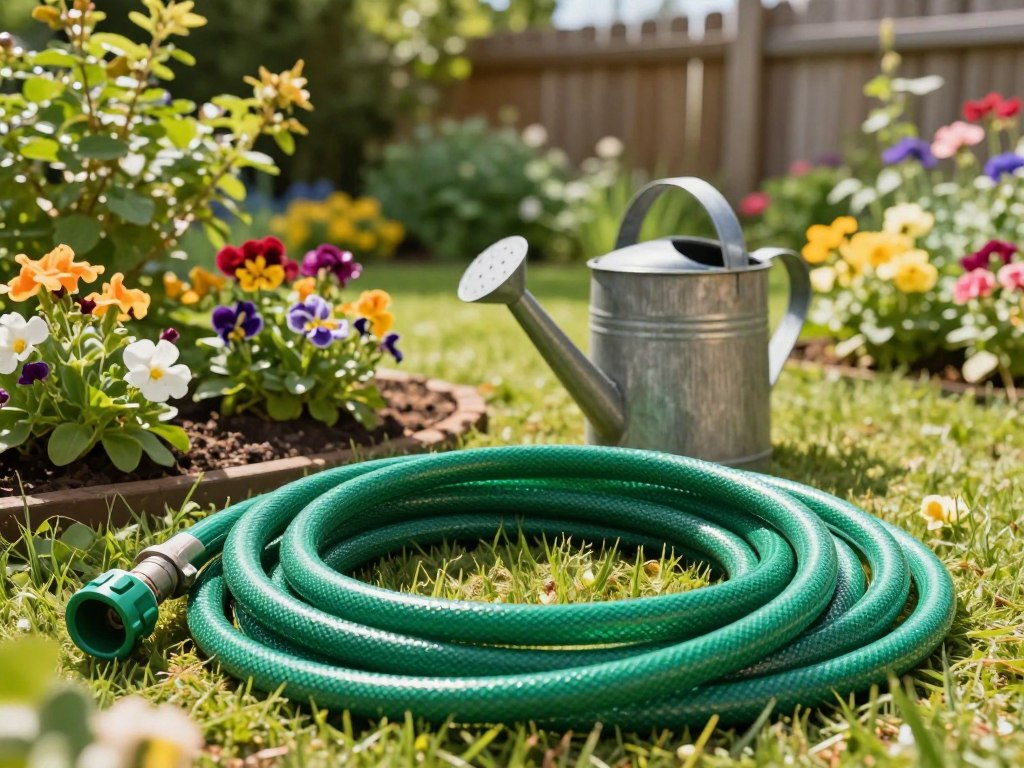
Choosing the right watering tools makes caring for your plants easier. For big areas, a reliable hose saves time. For pots and indoor plants, a watering can gives you control.
Benefits of a quality hose and nozzle
A good hose reduces frustration and saves water. Look for kink-resistant designs and brass fittings for durability. An ergonomic nozzle with different spray patterns helps you adjust your watering.
Adjustable flow control and a pause feature in nozzles are great. Brands like Gilmour, Craftsman, and Dramm offer durable options.
When to use a watering can instead of a hose
Use a watering can for delicate plants, containers, and indoor plants. A 1- to 2-gallon can is perfect for small spaces. But, avoid overfilling to prevent spills.
The watering can helps you water precisely and avoid splashing. Having both a watering can and a hose means you’re ready for any watering task.
Water conservation tips for beginners
To save water, water in the early morning or late evening. This reduces evaporation. Mulch around plants to keep moisture in and group plants by water needs.
Consider using soaker hoses or drip irrigation for steady watering. Use a nozzle with a pause feature to save water. Collect rainwater in barrels to supplement your water supply.
Multipurpose garden rake for clearing and leveling
You need a rake that does more than move leaves. A good multipurpose garden rake removes debris, levels soil, spreads mulch, and breaks up clods. Choosing the right tool saves time when preparing garden beds and keeps young plants safe.
Types of rakes and their uses
There are several styles to know. A leaf rake has flexible tines for light cleanup and gathering loose debris. A garden rake features stiffer tines for leveling soil and moving compost. Bow rakes use strong metal tines for heavy soil, gravel, and breaking compacted clods. Dethatching rakes tackle lawn thatch to improve turf health.
For most gardeners, owning at least two rakes is best. A leaf rake for sweeping and a rigid garden or bow rake for hard work. Brands like Fiskars, Ames, and Corona make reliable options with varied handle materials and tine spacings.
Rake technique for preparing beds and removing debris
Use the right motion for each task. When breaking clumps and leveling, pull a bow or garden rake toward you with short, controlled strokes. This rake technique levels soil without overworking it.
For loose debris, use a leaf rake in a wide sweeping motion to gather leaves without disturbing roots. Avoid stomping beds; soft, even raking compacts soil less and protects seedlings.
Keep tines clean and replace bent ones to limit disease spread. Choose fiberglass handles to reduce weight and resist weathering if you want low maintenance. Wood handles remain comfortable and absorb shock when you work long sessions.
| Rake Type | Best Use | Handle Recommendation | When to Choose |
|---|---|---|---|
| Leaf rake | Gathering leaves, light debris | Fiberglass or lightweight wood | Use for sweeping paths and mulch without disturbing roots |
| Garden rake | Leveling soil, spreading compost | Wood for shock absorption or fiberglass for durability | Choose when preparing garden beds or seedbeds |
| Bow rake | Breaking clods, heavy soil, gravel | Sturdy wood or fiberglass | Pick for hard, compacted ground or masonry work |
| Dethatching rake | Removing lawn thatch | Lightweight wood or metal | Use in spring or fall to improve lawn health |
Soil testing kit to understand your garden’s needs
Start by testing a few spots in your planting area to get a clear picture of soil health. A simple home soil test kit shows pH and basic nutrients. University extension labs give deeper reports if you want lab-grade data.
What nutrients and pH tell you about soil health
Soil pH affects how plants take up nutrients. Most vegetables grow best at pH 6.0–7.0. If you test soil pH and find acidic values, garden lime raises pH. If soil is alkaline, sulfur or acidifying amendments can help.
Soil nutrients NPK measure nitrogen, phosphorus, and potassium. Nitrogen feeds leafy growth. Phosphorus supports roots and blooms. Potassium improves overall hardiness. Micronutrients and organic matter matter too when you plan long-term soil health.
How to use a soil test kit step by step
Collect several samples from the root zone, usually 4–6 inches deep. Mix them in a clean container for a representative sample.
Follow your kit directions to dry and prepare the blend. Use color strips or a meter exactly as the manufacturer instructs. If you want more precise data, send a sample to your local Cooperative Extension Service for lab testing.
Interpreting results and amending soil
Read your report to decide whether to add lime, sulfur, compost, or fertilizer. Use calculated lime or sulfur rates when your test recommends them. Add compost to boost organic matter and improve nutrient retention.
Choose a balanced or targeted fertilizer based on soil nutrients NPK results. Follow label rates to avoid overfeeding. Re-test in one to two years to track progress and adjust how you amend garden soil.
| Action | When to Use | Typical Result | Recommendation |
|---|---|---|---|
| Test soil pH | Before planting or when plants show nutrient stress | Acidic, neutral, or alkaline | Apply lime for acidic soil; sulfur for alkaline soil |
| Check soil nutrients NPK | Annually or when growth is poor | Low, adequate, or high levels of N, P, K | Use targeted NPK blends or balanced fertilizer per results |
| Use a home soil test kit | Quick, on-site checks | Basic pH and nutrient ranges | Follow kit steps on how to use soil test kit; confirm with lab if unsure |
| Send to extension lab | When you need detailed nutrient and lime recommendations | Comprehensive analysis with application rates | Apply recommended amounts and re-test in 1–2 years |
| Add compost | Any time to improve structure and nutrient holding | Improved organic matter and buffering | Work compost into topsoil to help amend garden soil |
Wheelbarrow or garden cart to move heavy loads
Choosing the right tool makes moving heavy stuff easier. A good cart saves you from making many trips. It also protects your back from strain.
Choosing between a single-wheel and a two-wheel yard cart
The debate between wheelbarrows and garden carts depends on the terrain. A single-wheel wheelbarrow is great for tight spaces and uneven ground. But, it needs balance when loaded.
Two-wheel carts, like Gorilla Carts, are more stable for heavy loads. They’re easier to tip when you need to dump material. Think about the tires: pneumatic ones handle rough ground better. Flat-free tires need less upkeep and work well on flat yards.
Look at the tub material and frame too. Steel tubs, like those on Jackson wheelbarrows, are strong for heavy work. Poly tubs resist rust and are lighter. Strong frames and solid axles are key for heavy loads.
Safe lifting and loading practices
Load heavy materials close to the wheelbase for safe lifting. Place heavy items like clay or compost near the center. This reduces strain on your back. Don’t overfill the cart beyond what the maker says.
Use the right lifting technique: bend at the knees, keep your back straight, and lift with your legs. Wear gloves and sturdy shoes to protect your hands and feet. When dumping, tilt slowly and control the dump to avoid sudden shifts.
If you do a lot of heavy lifting, consider a garden cart with a built-in dumping mechanism. These make frequent loads safer and reduce bending.
Essential gardening tools: tool storage and organization
Keeping tools tidy saves time and extends their life. It also lowers the risk of injury. You can find solutions that fit your space and budget. From a single wall hook to a full garden shed, good storage keeps your area ready and safe.
Tool sheds, racks, and wall organizers
For a weatherproof spot, choose compact storage sheds from Rubbermaid or Suncast. They’re great for bags of soil and larger tools. Wall-mounted racks and pegboards are perfect for small spots. Magnetic strips hold metal hand tools within reach.
Slotted racks keep long-handled tools upright. This prevents them from tangling or falling.
Cleaning and seasonal storage tips
Before storing, clean blades and sharpen pruners. Dry metal parts well and oil pivot points to prevent rust. Treat wooden handles with boiled linseed oil to stop cracking.
Inspect each tool for damage and repair or replace parts before winter. This keeps your tools in good shape.
Drain hoses and coil them cleanly. Move them indoors if temperatures drop below freezing. Blow out irrigation lines or drain systems to avoid freeze damage. These steps protect your investments and save on replacement costs.
Keeping a basic garden tool kit for emergencies
Assemble an emergency gardening kit you can grab quickly. Include a hand trowel, pruning shears, gloves, plant labels, spare twine, and a small flashlight. Add a compact first-aid kit for minor cuts and antiseptic wipes for quick cleaning.
Store this kit by your garden gate or in your car for community garden visits. A well-placed emergency gardening kit keeps you productive when a sudden problem appears.
| Storage Option | Best For | Key Benefits | Typical Brands |
|---|---|---|---|
| Plastic compact shed | Small yards, weather protection | Low maintenance, waterproof, locks for security | Rubbermaid, Suncast |
| Wooden shed | Larger tool collections, aesthetics | Durable, customizable shelving, blends with landscaping | Home Depot, Lowe’s prefabricated options |
| Pegboard/wall rack | Garages, sheds, limited floor space | Easy access, flexible layout, keeps tools visible | Husky, Gladiator |
| Magnetic strip | Hand tools and metal items | Saves space, quick reach, simple mounting | Mastercraft, Milwaukee |
| Slotted long-tool rack | Rakes, shovels, hoes | Prevents tangling, upright storage, protects handles | Gardena, Ames |
| Emergency tool kit | On-the-go needs, quick fixes | Portable, contains essentials, improves response time | Milwaukee, Fiskars tools in compact cases |
Budget-friendly tips for buying quality gardening tools
First, plan your garden and list your most common tasks. Spend more on tools that are used a lot and are safe. For example, invest in a good pair of pruning shears, a garden fork, a strong hose, and a wheelbarrow. These tools are worth the money because they last longer and need fewer replacements.
For tools you use less, like a basic hand rake or cheap gloves, go for the budget options. These tools can handle many tasks without breaking the bank.
Timing is key when buying gardening tools. Look for discounts in late fall and winter. Black Friday and end-of-season sales offer great deals. Spring sales can help you get popular items before they sell out.
Compare prices at local stores, big-box retailers, and online. This way, you can find the best deals.
Choose brands known for quality and durability. Felco is great for pruners, while Fiskars and Corona offer solid general tools. True Temper and Jackson make reliable wheelbarrows, and Dramm and Gilmour are good for watering. Opting for top brands means your tools will last longer and be easier to fix.
Always check the warranty and return policy. Look for warranties on handles and steel parts. A good warranty can save you money in the long run and make repairs easier. Make sure you understand what’s covered before you buy.
Consider buying used or refurbished tools. You can find great deals at yard sales, online, or through tool swaps. You can also refurbish tools yourself to save money. Joining a tool library or community garden can give you access to specialty tools without having to buy them.
Make smart choices: spend on tools that are durable and important for safety. For tools that don’t cost much to replace, go for the budget options. This way, you can get quality tools without spending too much, and still find good deals during the season.
| Tool Category | When to Invest | Budget Option | Recommended Brands | Warranty Tip |
|---|---|---|---|---|
| Pruning shears | High-use pruning and woody stems | Simple bypass shears for light pruning | Felco, Fiskars | Look for multi-year blade warranties |
| Garden fork | Heavy soil work and compost turning | Light-duty forks for small beds | True Temper, Jackson | Check handle and tine coverage |
| Hose and nozzle | Frequent watering, long runs | Basic hose for small patios | Dramm, Gilmour | Search for kink-resistant and multi-year guarantees |
| Wheelbarrow / cart | Regular heavy loads and landscaping | Small garden cart for light hauling | True Temper, Jackson | Prefer warranties on frames and wheels |
| Hand tools (rake, trowel) | Specialty tasks or frequent use | Budget hand tools for occasional work | Fiskars, Corona | Simple return policy is useful |
Conclusion
This essential gardening tools recap reminds you that owning ten core items is key for new gardeners. These include a hand trowel, garden fork, pruning shears, gloves, and a hose or watering can. Also, a rake, soil test kit, wheelbarrow or cart, tool storage, and basic maintenance supplies are crucial.
With these tools, you’ll feel more confident in planting, soil care, pruning, watering, and cleanup. This beginner gardening summary is all about making steady progress, not aiming for perfection.
For practical next steps, start with a short garden tool checklist. Buy or borrow the most important items first. Do a soil test before making big changes and learn simple maintenance like sharpening and cleaning blades.
Organize your tools in a small rack or bin to make them last longer and be ready when needed. Use this start gardening guide to make choices that fit your space and budget.
Begin with one small planting area and practice safe, consistent care. Check off items on your garden tool checklist as you go. Keep notes on what works in your yard.
When you follow this beginner gardening summary and stick to the basics, gardening will become more enjoyable. The right tools will make it sustainable and rewarding as your plants—and your confidence—grow.