Did you know up to 70% of houseplant problems are due to simple care mistakes? Not rare diseases or bad genetics. If your indoor plants not growing seems like a mystery, you’re not alone.
You’ve tried watering, rotating, and Googling, but growth is still slow. Many everyday things can cause this, like light, water, soil, and pests. To understand why, you need to check these factors quickly and carefully.
This article will help you find the main cause and fix indoor plant growth. You’ll learn to spot warning signs and tackle environmental and care issues. We’ll also cover maintenance, plant selection, and common myths that keep plants from growing.
It’s for U.S. plant owners, from beginners to intermediate. You’ll get friendly, actionable tips to try today. Quick action checklist: measure light, check soil moisture, inspect for pests, confirm pot size, and adjust feeding and humidity.
This guide is based on university research and advice from the American Horticultural Society. It also uses products from Miracle-Gro and Espoma. Follow this guide to diagnose and fix indoor plant growth, making your houseplants thrive again.
Common Signs Your Indoor Plants Are Not Growing
Spotting early warning signs indoor plants not growing saves time and keeps your collection healthy. Look for subtle changes before stress becomes severe. Use simple checks and a camera to track shifts week to week.
Stalled new growth and lack of new leaves
You may notice stalled growth houseplants keep their existing foliage but fail to produce new leaves or shoots. Growth that used to be steady for a species slows to almost nothing. Compare your plant to species norms.
For example, pothos often sends new leaves every few weeks, while a fiddle leaf fig grows more slowly but still shows regular new leaves in spring and summer.
Track internode length and leaf emergence to judge pace. If new nodes appear spaced farther apart or not at all, that points to nutrient, light, or root issues rather than normal seasonal rest.
Yellowing, browning, and dropped foliage
Chlorosis shows up as yellow leaves indoor plants commonly reveal. Causes include nutrient deficiency, overwatering, or low light. Brown tips often mean salt buildup, underwatering, or low humidity in your home.
Sudden leaf drop signals acute stress from temperature swings, pests, or hidden root problems. When lower leaves yellow and fall first, check roots for damage and adjust care quickly.
Leggy stems and upward stretching
Etiolation happens when plants stretch toward light, creating long internodes and sparse foliage. Succulents, snake plants, and philodendrons can become leggy if placed in dim corners.
Move the pot closer to a bright window or use supplemental lighting. Pruning back long stems encourages bushier growth and denser leaf placement.
Slow root development or root rot symptoms
Slow root growth often shows as stunted top growth and poor vigor. Root rot signs include mushy, black roots, a foul odor, soggy soil, and yellowing lower leaves. Compacted, poorly draining mixes or pots that are too large can hide root trouble.
Gently lift the plant to inspect roots when you suspect problems. Healthy roots are firm and white or light tan. Address any root rot by trimming damaged roots and repotting into a well-draining mix.
Quick diagnostics you can do at home:
- Finger-depth moisture test: push a finger 1–2 inches into the soil to check dampness.
- Light meter apps: measure light where the plant sits and compare with species needs.
- Root check: ease the plant from its pot to inspect root color and texture.
- Internode measurement: photograph stems and measure spacing against expected growth rates for the species.
Photograph your plants and note changes weekly. Regular images make it easier to spot stalled growth houseplants suffer from, catch yellow leaves indoor plants develop, and read early root rot signs before damage spreads.
Light Problems: Too Little or Too Much
Light is often the first thing to go wrong with indoor plants. But it’s also the quickest to fix. If your plants aren’t growing or their leaves look off, light might be the issue. A simple check can help you find the problem and fix it.
How to assess the light level in each room
Start by noting how much direct sun each room gets. South- and west-facing windows get the most sun. East windows offer morning light, while north windows are the dimmest. Remember, light changes a lot from summer to winter.
Use tools to measure light. A smartphone app or a handheld lux meter can give you numbers. Compare these to decide if a spot is low (≤100 lux), medium (100–1,000 lux), or high (over 1,000 lux). Keep a log to plan where to put your plants.
Matching plant light needs to locations
Choose plants based on the light in each spot. Low-light plants include ZZ plant, Sansevieria, and pothos. Medium-light plants are philodendron and peace lily. High-light plants are cacti, succulents, and citrus.
Check plant tags and look up species-specific advice. The Missouri Botanical Garden and the Royal Horticultural Society are good resources. If unsure, choose indirect light and add grow lights as needed.
Using grow lights and positioning tips
LED grow lights are efficient and mimic natural light well. Place them 6–24 inches above plants, depending on the light’s strength. Aim for 12–16 hours of light a day for growth, and use timers for consistency.
Choose the right grow light for your setup. Use slim bars for shelves, panel lights for multiple plants, and clip-on LEDs for single plants. Brands like GE, Spider Farmer, and Phlizon are affordable and easy to find. Make sure to use a fan or ensure good air flow to avoid heat buildup.
Signs of light stress and how to adjust
Under-light plants have pale new growth, long stems, and small leaves. Over-light plants get bleached or brown patches and crispy edges. Watch for these signs when plants are moved.
To fix, move plants closer or farther from the window. Rotate them weekly for even light. Use a sheer curtain to soften intense sun. If natural light is weak, use grow lights and set a regular schedule. Clean windows and trim outdoor obstructions in winter to boost light.
Quick checklist:
- Observe direct sun hours and cardinal exposure daily.
- Use a light meter app to assess room light for plants.
- Match plants to low, medium, or high light locations.
- Install full-spectrum LEDs and set timers for 12–16 hours.
- Adjust placement when you spot light stress leaves and rotate plants regularly.
Watering Mistakes That Keep Plants From Growing
Water is the main reason houseplants don’t grow well. Too much or too little water can cause problems. Here’s a quick guide to help your plants grow strong.
Overwatering versus underwatering: how to tell
Too much water makes leaves turn yellow and stems soft. The soil might smell sour. Plants like peace lilies and ferns show these signs fast.
Not enough water causes leaves to dry out and plants to grow slow. Succulents and cacti show this by shrinking.
Some signs are the same, so check the roots. Healthy roots are firm and light in color. Brown, mushy roots mean rot. Gently remove the plant to see the roots.
Proper watering frequency and technique
Find out how often to water by feeling the soil. Stick your finger into the mix up to the first knuckle. If it’s dry, it’s time to water. A moisture meter helps with container gardens.
Water until water drains from the bottom. Let the top 10–25% of soil dry before watering again. Plants with shallow roots need more checks.
Try bottom-watering for plants like African violets. Place the pot in a tray of water for 15–30 minutes. Succulents need a soak-and-dry method.
Choosing the right pot and drainage
Drainage is key. Use pots with holes to prevent root rot. If you have decorative pots, water in a draining pot first.
Terracotta pots dry faster, good for plants that like dry soil. Plastic pots hold moisture better, for plants that like it steady. Avoid big pots that hold too much water.
Water quality and seasonal timing
Tap water can harm plants with chlorine or minerals. Let it sit 24 hours or use filtered water. This helps plants like Calathea.
Water less in winter and more in spring and summer. Plants use less water when it’s cold and more when it’s warm.
| Problem | Common Signs | Quick Fix |
|---|---|---|
| Overwatering indoor plants | Yellow leaves, soft stems, moldy surface, soggy soil | Inspect roots, repot to fresh mix, improve pot drainage for plants |
| Underwatering signs | Dry, crispy edges, drooping, slow growth, shriveled leaves | Soak thoroughly, follow soak-and-dry for succulents, increase watering frequency |
| Poor pot choice | Slow drying soil, frequent rot, or rapid drying | Use terracotta for fast drying, plastic for moisture retention, avoid oversized pots |
| Water quality | Tip browning, leaf spotting, sensitive species decline | Let tap water sit 24 hours, use filtered or rainwater for Calathea and similar plants |
| Seasonal mismatch | Too-wet pots in winter, drought stress in summer | Water less during winter dormancy, increase in spring and summer growth |
Soil and Potting Mix Issues Affecting Growth
Your plant’s potting mix can make a big difference. Indoor plants need a mix that drains well and doesn’t get too dense. Regular backyard dirt is not good for pots because it can harm roots.
Why garden mixes fail in containers
Garden soil gets too dense in pots. This can cause roots to rot because it holds too much water. It also limits oxygen and can create bad spots for roots.
How to choose or mix a well-draining potting soil
For most houseplants, use a mix from brands like Espoma, FoxFarm, or Miracle-Gro. These mixes are clean and airy. If you want to make your own, mix 2 parts peat moss or coco coir, 1 part perlite, and 1 part pine bark for tropical plants.
Cacti and succulents need something different. Use more perlite or pumice and add coarse sand. This makes the soil drain fast. Adding orchid bark or coarse grit helps with bigger roots.
When and how to repot for healthy growth
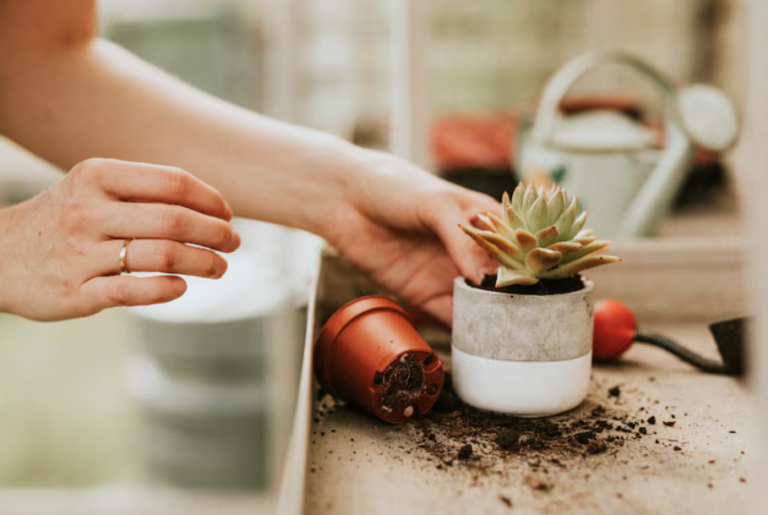
Repot when roots come out of the holes, or if the plant is too top-heavy. Spring is the best time because plants are growing fast.
To repot, pick a pot that’s 1–2 inches bigger for small plants. For big ones, go up to two sizes bigger. Gently loosen the roots and remove up to 25% of the old soil. Put new mix around the roots, settle the plant, and water well to get rid of air pockets.
Sterilization, additives, and pH notes
Avoid using unsterilized garden compost unless you pasteurize it first. Add a slow-release fertilizer at repotting or a light liquid feed later. Products like mycorrhizae from Mycorrhizal Applications can help roots absorb nutrients better.
Some plants need acidic soil. Blueberries and azaleas are examples. If your plant shows signs of nutrient lockout, test the soil pH and adjust as needed.
| Plant Type | Recommended Mix | Key Additives | Pot Size Change |
|---|---|---|---|
| Tropical foliage (philodendron, pothos) | 2 parts coco coir or peat + 1 part perlite + 1 part pine bark | Perlite, orchid bark | +1–2 inches |
| Succulents and cacti | 1 part potting soil + 1 part pumice/perlite + 1 part coarse sand | Pumice, coarse sand | +1 inch |
| Orchids (epiphytic) | Loose bark mix with charcoal and sphagnum | Orchid bark, charcoal | Match media, avoid much larger pots |
| Seedlings and cuttings | Sterile seed mix or 1 part peat + 1 part perlite | Perlite for drainage | Small increases as roots develop |
Nutrition and Fertilizer Tips for Stunted Plants
Healthy growth starts with the right food. Many houseplants grow slowly due to nutrient gaps, timing issues, or too much fertilizer. Check leaves, stems, and soil before changing care to fix the real issue, not just symptoms.
Recognizing nutrient deficiencies
Look for patterns in your plants. A lack of nitrogen makes them yellow and grow slowly. Iron deficiency shows as yellow veins on new leaves. Magnesium issues cause yellowing between veins on older leaves. Potassium problems lead to brown leaf edges.
These signs can look like watering or light problems. So, check the soil moisture and light before treating.
Types of fertilizers and feeding schedules
Liquid fertilizers like 10-10-10 or 20-20-20 are good. Dilute them every 2–4 weeks when plants are growing fast. Slow-release granules like Osmocote provide nutrients for 3–6 months when added at repotting.
Organic fertilizers like fish emulsion, kelp, or worm castings are gentle. They also improve soil health.
Sample routines help plan. Light feeders, like ferns, need feeding every 4–6 weeks. Heavy feeders, such as monstera, need more frequent feeding in spring and summer. Stop feeding in winter when plants are dormant.
How to avoid fertilizer burn and overfeeding
Always follow the label’s dilution instructions. Start new products at half-strength. Too much fertilizer can cause brown tips, leaf drop, and a hard soil surface.
If salts build up, flush the soil with lots of water. Repot if the problem persists after flushing.
Keep a record of what you feed your plants. This helps avoid overfertilizing and answers questions about how often to feed.
Adjust feeding with the seasons. Feed less in fall and winter when plants grow slower. Start feeding more in spring, gradually increasing as growth picks up.
Pests and Diseases That Inhibit Growth
When your plants stall, unseen attackers or infections are often at work. Regular checks and basic hygiene keep many problems small. Catching issues early saves time and prevents spread to other pots.
Common indoor pests and how to spot them
Look closely at new growth, the undersides of leaves, and the soil surface. Mealybugs show up as white cottony clusters. Spider mites leave fine webbing and tiny stippled marks on leaves. Scale looks like brown or white bumps you can scrape off. Aphids form tight clusters on tender shoots. Thrips create silvery streaks and distorted blooms. Fungus gnats appear as small flies that hover near wet soil.
Preventive care and organic treatment options
Quarantine new arrivals for two to four weeks. Inspect plants weekly and wipe leaves with a damp cloth to remove dust and early pests. For many soft-bodied insects, insecticidal soap, neem oil, or horticultural oil works well when applied carefully to all leaf surfaces.
If infestations get heavy, consider targeted products from trusted brands such as Bayer or Safer, or a systemic insecticide used with caution. For fungus gnats, let the top inch of soil dry, place yellow sticky traps, or cover the surface with sand. Use Bacillus thuringiensis israelensis (Bt-i) products like Mosquito Bits for larvae control.
Identifying and treating fungal and bacterial issues
Fungal leaf spots and powdery mildew are visible as discolored patches or a white dusty film. Root rot shows brown, mushy roots and wilting despite wet soil. For leaf diseases, remove affected tissue and raise air circulation around the plant.
For root rot treatment, repot into a fresh, fast-draining mix. Trim dead roots, rinse healthy roots, and let the plant dry slightly before watering again. Mild cases of fungal disease can respond to neem oil or copper-based fungicides. Bacterial soft rot moves fast; isolate the plant and cut away infected areas. If the infection is severe, disposal may be the safest option to protect the rest of your collection.
Hygiene and when to seek help
Sanitize pruners and stakes with isopropyl alcohol after each use. Avoid overhead watering that wets foliage. Balance humidity with good airflow to discourage fungal growth. Keep pots and saucers clean to reduce breeding sites for pests.
If infestations persist or spread widely, contact your local extension service or a reputable nursery for diagnosis and treatment plans. Expert guidance helps when simple measures no longer work.
| Problem | Signs to Watch For | First Steps | Effective Treatments |
|---|---|---|---|
| Mealybugs | White cottony clusters on stems and leaf joints | Isolate plant; wipe with alcohol on cotton swab | Insecticidal soap, neem oil, repeat every 7–10 days |
| Spider Mites | Fine webbing; stippled, yellowing leaves | Spray foliage with water to reduce numbers | Horticultural oil, miticides for severe cases |
| Scale | Brown or white shell-like bumps on stems | Scrape gently with fingernail; isolate | Neem oil, systemic insecticide if widespread |
| Fungus Gnats | Tiny flies near soil; larvae damage roots | Let topsoil dry; use sticky traps | Sand top layer, Bt-i (Mosquito Bits) in water |
| Powdery Mildew | White dusty coating on leaves | Remove affected leaves; increase airflow | Neem oil or sulfur/copper fungicides |
| Root Rot | Wilting, yellowing leaves; brown mushy roots | Repot to fresh mix after trimming dead roots | Improve drainage; follow root rot treatment steps |
| Bacterial Soft Rot | Wet, soft, foul-smelling tissue | Isolate and remove infected tissue immediately | Sanitation; discard if infection is extensive |
Humidity and Temperature Factors for Healthy Growth
Keeping your plants healthy means watching the air’s heat and moisture. Small changes in temperature or dry air can harm growth and leaves. Here’s a quick guide to check your home and make changes.
Ideal temperature ranges for most houseplants
Most houseplants thrive in daytime temperatures of 65–75°F (18–24°C) and cooler nights of 55–65°F (13–18°C). Tropical plants like Monstera and Calathea like it warmer.
Succulents and cacti can handle bigger temperature swings. Keep them away from cold drafts and extreme heat to prevent stress.
How low humidity affects growth and leaf quality
Humidity below 40% can cause brown tips and edges on leaves. It also slows down new growth. Plants lose water faster, making them look wilted even when the soil is moist.
Dry air also increases the risk of spider mites and makes it harder for plants to absorb nutrients. Be careful not to overwater when trying to keep humidity up.
Practical ways to raise humidity and stabilize temperature
Use a humidifier from brands like Vornado or Levoit to control humidity. A hygrometer helps you keep an eye on humidity levels.
Grouping plants together creates a microclimate. Pebble trays with water help if pots sit above the waterline. Misting is good for quick relief but not for long-term humidity.
Place plants in bathrooms or kitchens if they get enough light. In winter, indoor heating lowers humidity. Run a humidifier and group pots to prevent temperature stress.
Pruning, Training, and Plant Maintenance
Keeping your plants healthy and looking good is easy with regular care. Small steps can prevent big problems and help plants grow. Create a routine that fits your life using these simple tips.
When pruning encourages new growth
Plants grow best when they’re not too focused on one spot. Cutting off the top tip makes them branch out more. Prune in spring to get new shoots.
Get rid of dead leaves to help the plant focus on growing. Cut just above a node and angle the cut to prevent moisture from sitting on the wound. Sharp tools make clean cuts that heal faster.
Techniques for shaping and supporting plants
Pinching and heading cuts make plants bushier. Pinch small shoots for herbs and young stems. Use a heading cut on woody stems for more side shoots.
Thin out crowded areas to let light and air in. Train climbers like Monstera and Philodendron on moss poles or trellises. Use stakes for tall plants like Ficus lyrata.
For example, prune a trailing pothos to make vines fuller. Cut 1/4 inch above a node on the main vine. Place the cutting in water or soil to root. Do this every few months for dense vines.
Example: To get a fiddle leaf fig to branch, cut off the leader stem just above a node. You’ll see new shoots in weeks.
Cleaning leaves and routine maintenance tasks
Dust blocks light and harms photosynthesis. Gently wipe leaves with a damp microfiber cloth. A light shower can also clean plants and get rid of pests.
Rotate pots to ensure even light on all sides. Add a thin layer of compost or fresh potting mix to refresh the soil.
Check for pests during each maintenance session. Look at leaf undersides, new growth, and the soil. Do a full check every quarter, including a root assessment when repotting.
Use sharp, clean pruning shears from brands like FELCO or Fiskars. Clean blades between cuts to avoid spreading disease. Keep a small kit with gloves, shears, and soft ties ready for quick maintenance.
| Task | When to Do It | Tool/Method | Benefit |
|---|---|---|---|
| Prune leggy stems | Spring | Sharp shears, heading cuts | Encourages branching and fuller growth |
| Pinch new shoots | During active growth | Fingers or small snips | Promotes bushier habit |
| Train climbers | As vines grow | Moss pole, trellis, soft ties | Supports structure and increases foliage display |
| Clean plant leaves | Monthly or as needed | Damp microfiber cloth, gentle shower | Improves photosynthesis and pest detection |
| Top-dress soil | Quarterly | Compost or fresh potting mix | Refreshes nutrients and soil texture |
| Pest and root check | Quarterly | Visual inspection, gentle root check when repotting | Early detection of issues and timely intervention |
Choosing the Right Plants for Your Home Environment
Before you bring a new plant home, check your home’s light, humidity, temperature, and space. Measure the light at different times and note the winter sun hours. Also, record the indoor temperatures. Think about pets and children when picking plants; some can be toxic.
Choose plants that fit your daily routine. If you travel a lot or forget to water, pick plants that can handle it. If you can keep humidity steady and water weekly, tropical plants will thrive. Local nursery staff at Home Depot, Lowe’s, or independent shops can help you find the right plant for your home.
Low-light and beginner-friendly picks
- Pothos — fast-growing and forgiving; one of the best houseplants for low light.
- Snake plant (Sansevieria/Dracaena trifasciata) — drought-tolerant and tough for first-time owners.
- ZZ plant (Zamioculcas zamiifolia) — survives low light and infrequent watering.
- Philodendron — adaptable and a solid option among beginner houseplants.
- Peace lily (Spathiphyllum) — shows when it needs water; better in moderate care setups.
- Succulents and cacti — ideal for bright, low-maintenance spots.
- Spider plant (Chlorophytum comosum) and Boston fern — pet-safe choices for higher humidity areas.
How to buy healthy specimens
- Inspect leaves for pests, yellowing, or wilting before purchase.
- Check the rootball for firm, white roots and recent new growth.
- Avoid pots with standing water or soil that smells bad; that often signals rot.
- Ask nursery staff about the plant’s recent care and whether it has been treated for pests.
Match plant difficulty to your care level. Choose easy plants if you want low-effort greenery. Pick more demanding plants like Calathea or Alocasia only if you can provide steady humidity and attention. This will help your plants thrive and save you time and money.
Common Care Myths That Prevent Growth
Many houseplant myths spread online. You might think plants need constant wet soil or that misting fixes humidity. These beliefs can harm your plants. Here are some myths debunked to help your plants grow better.
Debunking overwatering myths and other false tips
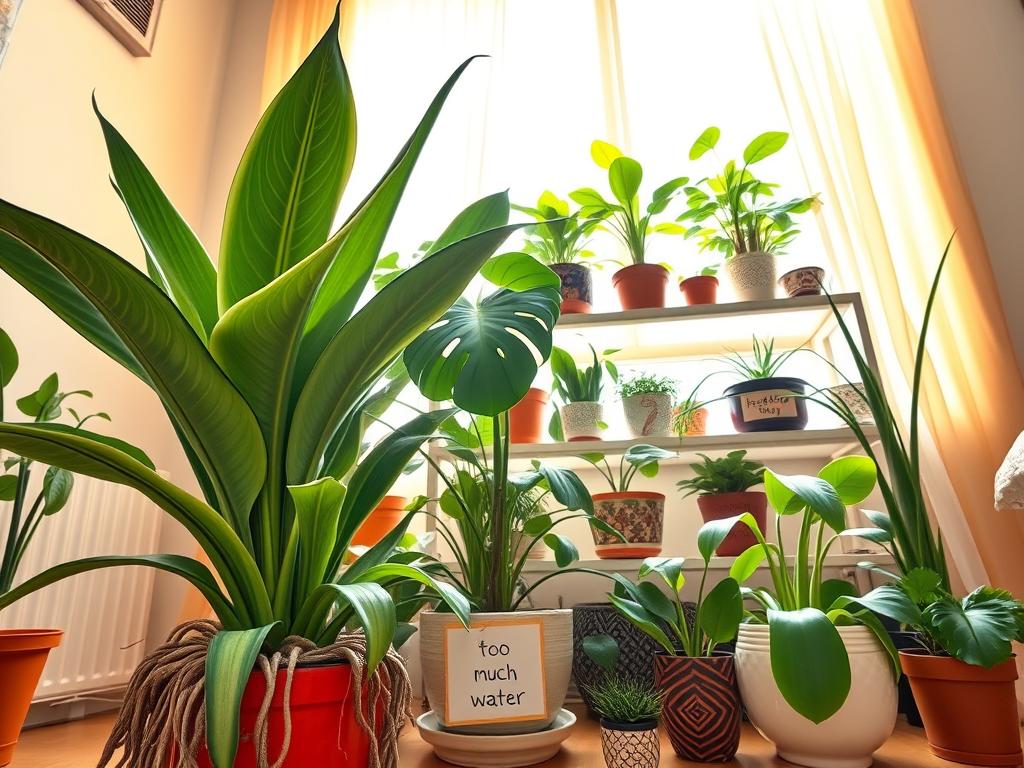
The myth about constant wet soil is wrong. Most plants need a mix of wet and dry periods. This lets roots breathe. Too much water can kill roots and cause rot.
Too much fertilizer can also harm plants. It can build up salts that burn roots. Using a balanced fertilizer like Miracle-Gro Indoor Plant Food is safer.
Putting plants in bathrooms for humidity only works if they get enough light. If the light is poor, the plant may not do well. Check soil, leaves, and light before changing care.
Why misting isn’t always enough for humidity
Misting plants is not enough to keep humidity high. It only moistens leaves briefly. For lasting humidity, use a humidifier or group plants on a pebble tray.
Frequent misting can also attract pests. This can lead to problems like botrytis and powdery mildew.
Understanding dormant periods and seasonal growth
Knowing when plants are dormant helps you understand slow growth. Shorter days and cooler nights make many plants rest. During this time, water less and don’t feed heavily.
Avoid repotting or pruning unless your plant looks stressed. Test one change at a time to see results. Check light, soil moisture, and temperature before making changes.
Use a moisture meter or the finger test. Track changes for a week. Critical thinking is better than quick fixes. Look at all symptoms and make changes that fit your plant’s needs.
Conclusion
You can bring your indoor plants back to life by first spotting the signs of trouble. Look for no new leaves, yellowing or droopy leaves, and leggy stems. Also, check if the roots are healthy.
Start by checking the light and water your plants get. Make sure they get enough light by moving them or using grow lights. Also, check if the soil is too wet or dry.
Next, examine the roots and soil. If the roots are brown and slimy, it’s time to repot them in fresh soil. Trim any rotten parts. Adjust how often you feed them and use a humidifier to increase the humidity.
Look for pests and diseases and treat them quickly. Early action can prevent bigger problems. This helps your plants grow well again.
Follow a step-by-step plan to fix your plants. First, check the light and adjust it if needed. Then, check the soil moisture and drainage. Next, inspect the roots and repot if necessary.
Adjust the feeding and humidity levels. Treat any pests or diseases you find. Start regular care to keep your plants healthy.
Keep learning from trusted sources like the American Horticultural Society. Your local county extension office and university plant clinics are also great resources. Read good plant care books for more advice.
Make small, consistent changes and watch your plants closely. With time and effort, you’ll have happy, healthy houseplants that make your home beautiful.