Did you know a single cubic yard of compost can improve the health of up to 100 square feet of garden soil? This fact shows why learning how to use compost is crucial for every gardener in the United States.
Compost is an affordable, natural soil amendment. It improves plant health, reduces synthetic fertilizer use, and supports sustainable gardening. In this guide, you’ll learn clear, practical steps on composting basics and how to use compost.
You’ll discover how to use compost as a soil amendment, topdressing, and mulch. You’ll also learn how to use it in containers and raised beds. Plus, how to make simple compost tea and avoid common mistakes.
This article is for home gardeners, container gardeners, community garden volunteers, and small-scale landscapers. Follow this advice to see better soil structure, improved water retention, and stronger root systems. You’ll also see higher vegetable yields and more resilient ornamentals.
Read on, and return to specific sections for troubleshooting. This is important when choosing the right compost or avoiding unfinished material. This way, you can get the full benefits of compost for your plants.
What compost is and why it matters for your garden
Compost is a dark, crumbly material that feeds plants and fixes soil. It’s made from yard waste, kitchen scraps, leaves, grass clippings, and manure. These items break down into stable organic matter through biological activity.
Compost formation has a clear process. First, it heats up above 120°F as microbes work fast. This kills pathogens and weed seeds. Then, it cools down as fungi and invertebrates finish the job.
To make compost well, you need balanced inputs, moisture, air, and the right size of particles. There are two ways to compost: hot composting, which is fast, and cold composting, which is slower but easier.
Definition of compost and how it forms
Simply put, compost is organic matter transformed by soil life. Microorganisms, fungi, and invertebrates turn complex materials into stable humus. You can help this process by chopping materials small, keeping the pile moist, and turning it to let oxygen in.
Benefits of compost for soil structure and plant health
Compost does a lot for your garden. It makes soil better for air and water to move through. This helps roots breathe and get moisture better.
In sandy soils, compost helps hold water. In heavy clay, it makes the soil easier to work with and improves drainage. It also gives plants nutrients slowly, reducing the need for synthetic fertilizers.
Plants that get compost regularly grow stronger, flower better, and have more fruit. They also handle drought and pests better. This is because compost gives them steady nutrition and improves their root environment.
How compost supports beneficial soil life and microorganisms
Soil life depends on compost. When you add compost to soil, it feeds beneficial microbes. These microbes help cycle nutrients and build stable soil aggregates.
These microbes also fight diseases and form partnerships with roots. Over time, compost use increases earthworm counts and boosts biological activity in the root zone.
| Topic | What to expect | Practical tip |
|---|---|---|
| Compost formation stages | Thermophilic heating, cooling, curing | Turn the pile during the hot phase for faster results |
| Inputs | Browns (carbon), Greens (nitrogen), moisture, oxygen | Mix 2–3 parts browns to 1 part greens for balance |
| Soil structure benefits | Improved aggregation, aeration, water retention | Work a 1–2 inch layer into topsoil before planting |
| Nutrient and plant effects | Slow-release nutrients, better flowering and yield | Reduce synthetic fertilizer rates when using compost |
| Soil life impact | Boosted soil microorganisms, earthworms, mycorrhizae | Apply compost annually to build biological resilience |
how to use compost as a soil amendment
Compost can greatly improve soil health and plant growth. First, check the condition of the soil you’re working with. Different areas like new beds, established beds, and containers need different approaches. Here’s how to add compost without harming the soil.
How to incorporate compost into garden beds
For new plants, mix compost into the top 6–12 inches of soil. This ensures roots grow in rich, easy-to-work soil.
For no-dig beds, spread 1–3 inches of compost on top. Lightly fork it in or let nature blend it over time. This keeps the soil structure intact.
With established beds, remove the top mulch first. Add compost directly to planting holes or trenches. This avoids disturbing the roots and soil layers.
Choosing the right tools is important. Use a wheelbarrow and shovel for big areas, a broadfork for aeration, and a hand trowel for spot treatments.
Recommended application rates for annuals, perennials, and veggies
For annuals and veggies, mix 1–2 inches of compost into the top 6–8 inches of soil. This usually means 1–3 cubic yards per 100 square feet, depending on depth and soil quality.
Perennials and shrubs benefit from 1–3 inches of compost around the planting area. Mix it into the root zone at planting time. For existing shrubs, top-dress with 1–2 inches to refresh the soil.
If you’re starting new beds or improving very poor soil, add up to 3–4 inches before planting. For trees, blend compost into backfill at about 10–20% by volume. Avoid too much compost that can limit root growth.
Timing: best seasons and conditions for amending soil
Fall and spring are the best times to amend soil with compost. Fall additions allow compost to integrate over winter. Spring work prepares beds for growth.
Avoid adding fresh, immature compost right before planting sensitive seedlings. Let it cure for a few weeks to prevent nitrogen drawdown and heat stress.
Work compost into soil when it’s easy to do so. Don’t work with clay when it’s too wet or dry. Proper timing prevents soil compaction and maximizes compost benefits.
| Garden Situation | Recommended Amount | How to Apply |
|---|---|---|
| Annual vegetables and flowers | 1–2 inches (1–3 yd³ per 100 sq ft) | Mix into top 6–8 inches before planting |
| Perennials and shrubs (new) | 1–3 inches | Mix into root zone at planting |
| Perennials and shrubs (established) | 1–2 inches (top-dress) | Spread around drip line; do not deep-turn |
| New beds / poor soils | 3–4 inches | Incorporate into entire bed to build structure |
| Tree planting | 10–20% compost by volume in backfill | Blend with native soil; avoid 100% rich backfill |
Choosing the right compost for different plants and soils
Finding the right compost for your garden is key. Below, you’ll find options and tips for matching materials to plants and soil. This will help you use compost with confidence.
Types of compost
Finished compost is great for most gardens. Use it in beds, around shrubs, and in potting mixes. Composted manure, from animals like cows or horses, is very nutrient-rich. But make sure it’s well aged to avoid harming plants.
Leaf mold is soft and keeps moisture. It makes soil better without adding too many nutrients. Worm castings are packed with nutrients and microbes. Add a little to seedlings, potting mixes, and soil for a quick boost.
Matching compost to soil
Sandy soils need compost to hold water and nutrients. Add 2–3 inches each year if you can. Clay soils benefit from compost to improve drainage and structure. Mix in 1–3 inches, but avoid working wet clay to prevent compaction.
Loam soils do well with a little compost. Add 1–2 inches to keep soil healthy. Remember, too much compost can change soil texture. Add it slowly for the best results.
Reading compost labels
When buying compost, read the labels carefully. Look for what’s in it and how organic it is. Check for tests for pathogens and weed seeds. Also, watch for salt content and avoid biosolids or industrial waste unless it’s safe.
Choose products with the US Composting Council Seal of Testing Assurance (STA). Or get advice from local extension services.
Avoiding contaminants
For gardens where you eat what you grow, pick tested compost. Avoid untested leaf litter that might have herbicides. Look for labels that say sewage sludge or unknown waste. Reliable brands and certified mixes are safer for plants and people.
How to use compost as a topdressing and mulch
Finished compost as a surface layer feeds soil life and improves texture. It adds slow-release nutrients without digging. A light compost topdressing warms microbial activity and encourages earthworms while leaving established roots undisturbed.
Benefits of topdressing with compost
Spreading compost on beds and turf supplies steady nutrition and boosts water infiltration. For lawns, compost topdressing helps smooth uneven spots and deepens root growth. It also raises drought tolerance when paired with aeration.
In garden beds, compost mulch encourages worms and microbes to work the soil surface into the profile over time. This slow integration improves structure and reduces the need for frequent fertilizer applications.
How thick to apply compost as a mulch without harming plants
For turf, topdress lawn surfaces with a thin, even layer of finished compost—about 1/4 to 1/2 inch. This amount avoids smothering grass and sets up steady organic matter gains.
For flower beds and vegetables, aim for 1/2 to 1 inch of compost as a maintenance topdress. Around shrubs, you can use up to 2 inches of compost mulch thickness. Keep material a few inches away from stems or trunks to prevent rot and pest sheltering.
Never use fresh, high-nitrogen unfinished compost as a thick mulch. Stick to finished compost to avoid ammonia release and reduce pathogen risks.
Seasonal compost tips for topdressing lawns and garden beds
In spring, topdress before the main growth flush to feed seedlings and wake soil microbes. A spring application helps roots access nutrients as the season begins.
During summer, use compost mulch to conserve moisture and cut watering needs. Avoid piling compost close to stems and crowns during hot months.
Apply compost in fall to allow organic matter to integrate over winter. For lawns, combine fall topdressing with aeration and overseeding to improve seed-to-soil contact and long-term turf health.
- Use finished compost for all topdressing tasks.
- Measure compost mulch thickness carefully for each area.
- Topdress lawn or beds at the season that matches your goals: spring for growth, summer for moisture, fall for winter integration.
Using compost in container gardening and raised beds
Containers and raised beds need a mix that holds moisture but doesn’t get soggy. Start with a mix of peat or coco coir and perlite or coarse sand. Then, add compost to improve fertility and structure. This keeps roots healthy and lets you adjust the mix for different plants.
Mix ratios for potting mixes
For general use, mix coir (or peat), perlite (or coarse sand), and soil in equal parts. Then, add 20–30% finished compost. For heavy feeders like tomatoes and peppers, use 30% compost and keep enough perlite to prevent waterlogging.
Seedlings and cuttings need a gentler start. Use only 10–15% compost, or add 5–10% worm castings. This gives a cleaner, nutrient-rich start and lowers damping-off risk.
How compost improves water retention and nutrient availability
Compost in containers holds water and releases nutrients slowly. This means you feed plants less often. In small mixes, compost feeds microbes that help nutrients and support roots.
But don’t overdo it. Too much compost can make the mix too wet and cause root rot. Mix organic matter with aerating ingredients for the best drainage.
Reusing potting mix and refreshing between seasons
To refresh potting soil, sift out old roots and mix used mix with 20–30% fresh compost. Add perlite or pumice for aeration. This keeps nutrients and looseness without losing structure.
If a container had disease or pests, discard or sterilize the mix. Don’t reuse it for edibles unless pathogens are gone. Or, let it fully compost before using it in ornamental beds.
Mid-season, topdress containers with a thin compost layer. For more growth, apply a low-dose slow-release fertilizer after refreshing.
Compost tea and liquid feeds for faster nutrient uptake
Compost tea is a mix of compost and water that’s rich in nutrients and microbes. It’s great for quick plant growth, helping stressed plants, or supporting soil life after transplanting. Think of it as a supplement, not a full replacement for soil.
Use compost tea for a quick nutrient boost or to add beneficial microbes. A well-made tea can quickly provide minerals and beneficial organisms to plants. It can also help fight some diseases. But, don’t rely on it alone for building soil.
How to make a simple compost tea at home
To make an aerobic tea, mix 1–2 cups of mature compost with 5 gallons of dechlorinated water. Let it steep for 24–48 hours. Use an aquarium pump to aerate it. Add 1 tablespoon of molasses or liquid kelp per gallon for microbes. Use only high-quality compost to avoid risks.
For a quick cold-water steep, mix compost with water, let it sit for 24 hours, then strain and dilute. Avoid using bad-smelling or anaerobic brews, as they can be contaminated.
Application methods: foliar spray vs. soil drench and safety tips
Foliar spray delivers nutrients and microbes directly to leaves. Spray in the early morning or late afternoon to protect from sun. Use a fine mist and avoid spraying edible crops too close to harvest unless they’re food-safe.
Soil drench delivers the liquid feed to the roots. Apply at transplanting, during growth, or to boost soil biology. Dilute the tea as recommended and water plants lightly after to help microbes reach the roots.
Remember, compost tea safety is key: brew aerobically and use it within 8–12 hours. Clean all equipment between uses. Don’t use homemade teas on commercial produce without following local guidelines. When treating edible plants, prefer soil drenches and wait a safe time before harvest.
Common mistakes to avoid when using compost
Compost can make your soil and plants healthier. But, some mistakes can harm your garden. Here are some tips to help you avoid these problems.
First, check if your compost is ready. If it smells sour or like ammonia, it’s not ready. Look for food scraps, a slimy texture, or wood that won’t break down. If the pile is too hot or too cold, it’s a sign of trouble.
Using compost that’s not ready can be risky. It might not have enough nutrients for plants. This can cause weak growth and even kill young plants. Also, unfinished compost can have harmful bacteria. Wait until it’s crumbly and smells earthy before using it.
Don’t overdo it with the compost. Too much can make plants grow weak and attract pests. It can also pollute waterways. Follow the right amounts for different plants and avoid big piles on slopes.
Be careful about what you put in your compost. Some materials, like grass clippings, can have harmful chemicals. These can hurt your plants. Choose clean materials or ask suppliers about testing.
Here are some quick fixes to avoid these problems:
- Test or buy STA-certified compost for edible gardens.
- Screen compost to remove undecomposed chunks and visible weed seeds.
- Use thermophilic composting or hot-pile methods to kill pathogens and weed seeds in compost.
- Follow recommended application rates to avoid nutrient overloads and runoff.
| Problem | Signs | Practical Fix |
|---|---|---|
| Immature compost | Sour or ammonia odor; visible food scraps; slimy texture; unstable temperature | Allow curing until crumbly and earthy; turn pile and monitor temperature; finish before use in seedbeds |
| Compost over-application | Salt buildup on soil surface; lush weak growth; poor fruit set; high phosphorus on tests | Apply recommended inches/volumes; blend with soil; avoid thick layers on slopes |
| Compost contaminants | Weed seeds in compost; persistent herbicide damage; presence of plastic or glass | Source tested, STA-certified compost; screen material; avoid suspect feedstocks like treated hay |
| Pathogen risk | Disease outbreaks after application; foul, putrid odors | Use hot composting to reach thermophilic temps; purchase lab-tested compost for edibles |
Tips for maintaining healthy compost and sustainable practices
Keeping compost healthy makes your garden stronger and cuts waste. A short routine will help you store compost correctly, cure compost fully, and fold sustainable composting into everyday care. Below is a practical guide you can use this season.
How to store and cure finished compost before use
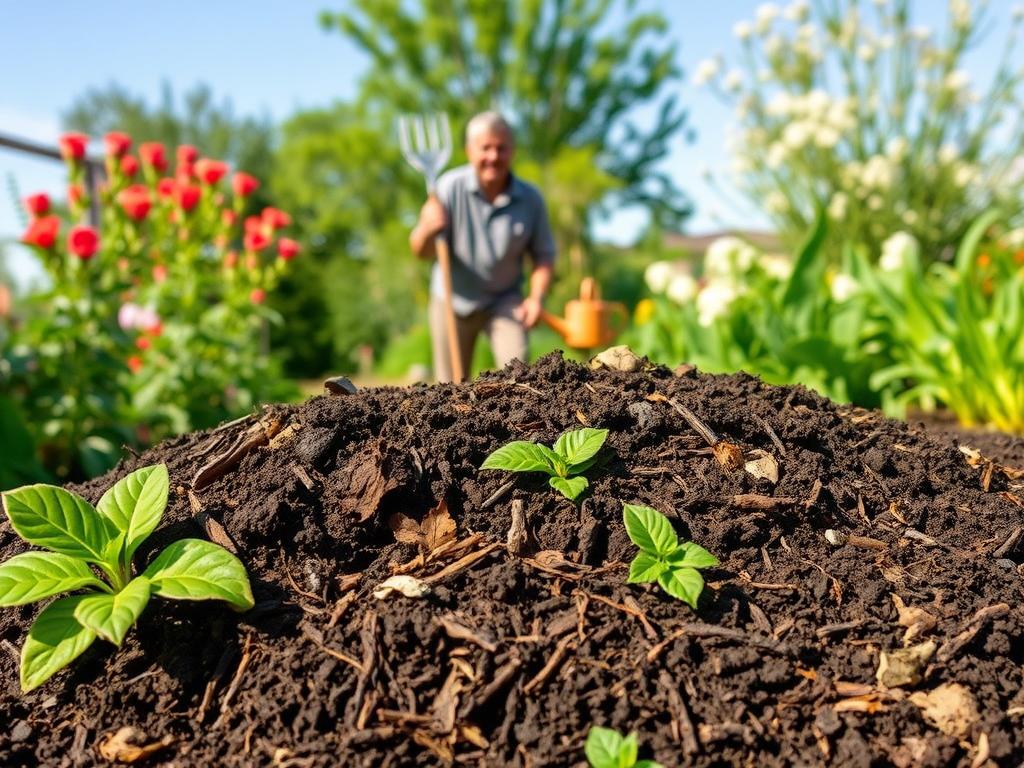
Curing is the final rest stage where active breakdown slows and humus forms. To cure compost, keep it in a covered pile or a weatherproof bin for 4–8 weeks. Keep the material damp but not waterlogged and turn it once a week to keep air moving.
Covering the pile prevents nutrient loss from heavy rain. Store compost away from foundations and root zones. Use pallets or a tarp under the bin to avoid soil contamination. Label bins when you use different feedstocks so you know the source and best uses.
Integrating composting into sustainable garden routines
Set up a simple kitchen scrap container and empty it into a backyard bin on a regular schedule. Layer greens and browns to keep the mix balanced. If you prefer low effort, use a tumbler and turn every few days.
Keep meats, dairy, and diseased plant material out of backyard piles. If local rules restrict items, use municipal green-waste services. Routine composting reduces trash, lowers fertilizer costs, and improves soil water retention in raised beds and lawns.
Local resources: where to buy quality compost and community programs
When you need to buy compost, look for products with the US Composting Council Seal of Testing Assurance (STA). County cooperative extension offices at Cornell, UC ANR, and Penn State can recommend trusted suppliers and testing advice.
Community options include municipal composting, community gardens, and compost cooperatives. Big-box stores such as Lowe’s and Home Depot carry tested blends, but local independent nurseries often stock region-specific mixes. Check your local master gardener program for vetted sources and details about community compost programs.
| Need | Practical tip | Best local resource |
|---|---|---|
| Store compost safely | Use covered bins, keep damp, turn weekly, place on pallets | County extension office guidance |
| Cure compost | Let finished material rest 4–8 weeks in a sheltered pile | Master gardener program recommendations |
| Start sustainable composting | Set a kitchen scrap routine, layer greens and browns, avoid meats | Community compost programs or municipal green-waste services |
| Buy compost | Choose STA-tested blends and read labels for feedstock | Lowe’s, Home Depot, local nurseries, certified suppliers |
| Find local support | Attend workshops, request supplier lists, and test soil | University extension offices and local garden centers |
Conclusion
Learning how to use compost is key to growing healthier plants and stronger soil. Start with finished compost and choose the right type for your soil. When planting, mix in 1–3 inches of compost into the soil.
For containers, add compost in small amounts to help with water retention. This prevents overfeeding. Remember, compost is a supplement, not the only food for your plants.
Be careful with compost tea and use it sparingly. Avoid using immature compost or any with contaminants. This keeps your plants healthy and prevents water pollution.
Stay curious and get to know your local soil. Talk to your county extension and buy compost from trusted sources. Begin with a small test, like a topdressing or a compost-amended pot. Watch how your garden changes over time.
Your hands-on efforts will show you the power of compost. You’ll see how it makes your plants stronger and healthier.