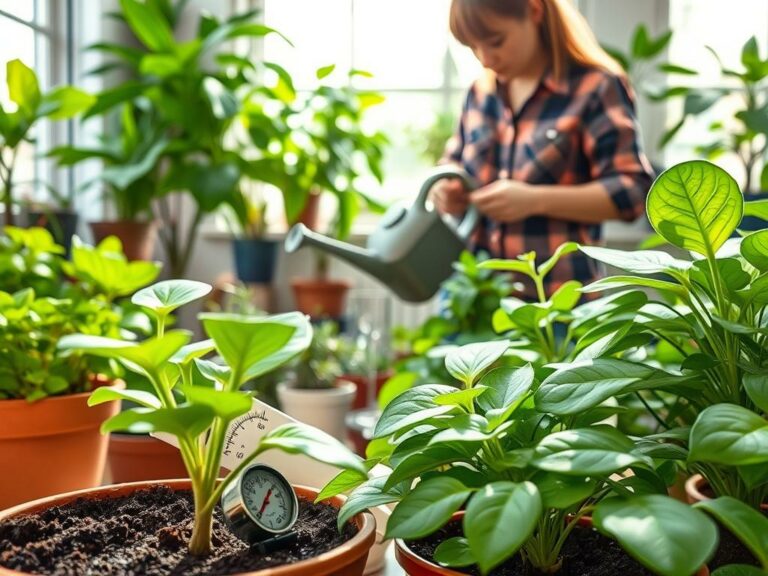
Nearly 70% of houseplant problems come from roots. Many of these issues are caused by bad repotting. This shows how important a good repotting can be for your plant’s health.
This guide will teach you to repot plants right. You’ll learn easy steps for stress-free repotting. These steps help your plants recover quickly and grow stronger.
By the end of this guide, you’ll know when to transplant and how to pick the best pot and soil. You’ll also learn how to remove plants gently and care for them afterwards. Most houseplants do well with the right timing, handling, and care.
Follow this guide and you’ll feel sure about repotting without stress. This will help your plants grow better, take in more nutrients, and live longer.
Why repotting matters for plant health
Repotting is more than just giving your plant a bigger home. It refreshes the root environment and corrects soil chemistry. It also reduces stress that limits growth. By spotting early warning signs and acting, your houseplants will grow stronger, have healthier leaves, and grow steadier.
Signs your plant needs repotting
Look for roots poking from drainage holes or a visible root mass at the soil surface. If water runs straight through or pools on top, the soil might be hydrophobic or packed. Slowed or stunted growth, despite proper light and feeding, is another clue. Frequent wilting soon after watering and yellowing lower leaves are classic signs.
How repotting affects root growth and nutrient uptake
Fresh potting mix restores aeration and balances water retention. New soil supplies nutrients and beneficial microbes. This improves nutrient uptake after repotting. Giving roots room to expand eases competition and improves water and fertilizer uptake.
Healthy root architecture supports hormone signaling for growth. Repotting lets you correct pH and reduce salt buildup. This makes your plant use fertilizer more efficiently.
Common problems from neglected repotting
Leaving roots crowded can strangle the system and reduce stability. Soil degradation follows, with compaction lowering oxygen and drainage worsening. Overcrowded roots problems lead to greater risk of root rot in compacted, waterlogged soil or drought stress.
Neglected repotting means reduced flowering, poor vigor, and higher susceptibility to pests and disease. Spotting root bound symptoms early and correcting overcrowded roots problems can prevent a slow decline and keep your plants thriving.
| Issue | Signs | How Repotting Helps |
|---|---|---|
| Root-bound plants | Roots circling, pot lifting, slowed growth | Creates space for root expansion and better stability |
| Compacted or degraded soil | Water pools or runs through, poor drainage | Restores aeration and water-holding balance |
| Salt buildup and pH drift | Leaf burn, nutrient lockout, poor uptake | Replaces media to correct pH and lower EC for improved nutrient uptake after repotting |
| Frequent wilting or drought stress | Wilting shortly after watering, dry surface soil | Reduces overcrowded roots problems so soil retains moisture more evenly |
| Root rot risk | Soggy soil, yellowing lower leaves, foul smell | Improves drainage and oxygenation to lower root rot chances |
When is the best time to repot plants
Choosing the right time to repot plants is key. It helps them recover quickly and reduces stress. Match your repotting to the plant’s natural cycle and the seasons.
Seasonal timing for different plant types
Spring is the best time to repot most houseplants. This includes plants like pothos, philodendron, and spider plants.
Flowering plants should be repotted after they finish blooming. This avoids cutting off buds on plants such as African violets and cyclamen.
Succulents and cacti do well when repotted in spring or early summer. Avoid repotting them in winter when they are dormant.
Tropical houseplants prefer spring or early summer. This is when warmth and light help them recover faster.
How to tell if your plant’s growth cycle is ready
Look for new leaves, shoots, or swollen buds. These signs mean the plant is ready to grow and needs more space.
Check your indoor temperatures. Most houseplants can handle repotting when temperatures stay above 60°F (15°C). Stable light and temperatures reduce stress.
Avoid repotting during deep dormancy or right after a big change. Wait until conditions settle and growth resumes.
Exceptions: when to delay repotting
If a plant is heavily flowering or fruiting, delay repotting. Repot after the blooms fade.
Do not repot when the plant faces pests, active disease, or extreme stress. Treat these issues first to avoid spreading problems into fresh soil.
Skip repotting during heatwaves or cold snaps. Sudden temperature extremes can cause transplant shock and slow recovery.
When upsizing, choose small, frequent jumps. Don’t increase pot diameter by more than one size at a time for most species. This prevents overwatering and root issues.
| Plant Type | Ideal Season | Signs to Repot | When to Delay |
|---|---|---|---|
| Most houseplants (pothos, philodendron) | Spring | New growth, roots at drain holes | During dormancy or after recent move |
| Flowering plants (African violet, cyclamen) | After bloom finishes | Reduced vigor, root crowding | While in bloom |
| Succulents and cacti | Spring to early summer | Outgrowing pot, slowed growth in warm season | Winter dormancy |
| Tropical houseplants (monstera, calathea) | Spring or early summer | New shoots, tight root ball | During pests, disease, or temperature stress |
repot plants correctly
Repotting is easy with a simple plan. Start by getting the new pot and soil ready. This way, your plant’s roots won’t be exposed for long. Water the plant a day or two before to keep the roots hydrated but not too wet.
Step-by-step approach to minimize transplant shock
Repotting should be calm and steady. Gently remove the plant from its pot. Only trim dead roots and untangle circling ones if needed. Place the plant at the right depth in the new pot, fill it with soil, and water well.
After repotting, give your plant a week or two in a shaded, stable spot. Keep the humidity and light levels consistent. This helps the roots adjust without stress.
Pot selection: size, material, and drainage
When picking a pot, choose one only slightly larger. For small to medium plants, go 1–2 inches wider. For bigger plants, 2–4 inches wider is better. Avoid pots that are too big, as they can hold too much water.
Think about the material too. Terracotta is good because it breathes. Plastic holds moisture longer but is easy to move. Glazed ceramic looks nice but needs drainage holes. Make sure your pot has at least one hole for drainage.
Using nursery pots or saucers is okay for temporary growth. But, pots with reservoirs are only for plants that like constant moisture. Choosing the right pot is key to healthy roots.
Soil choice and mixing for healthy roots
Choose the right potting mix for your plant. Use a good houseplant mix for most plants. Succulents and cacti need a dry mix, while orchids need bark-based mixes.
Adjust the mix to balance air and water. Add perlite or pumice for air and drainage. Use coco coir or peat moss for moisture. Stir in compost or worm castings for nutrients. A mix of 2 parts peat or coco coir, 1 part perlite, and 1 part compost works well.
Avoid using plain garden soil alone. It can compact and block drainage. With the right mix and careful repotting, your plant will thrive.
Preparing your plant for a stress-free move
Before you lift a plant from its pot, take a few simple steps. This will make the move smooth. You’ll reduce shock, protect roots, and speed up repotting by planning ahead.
Watering strategy
Watering before repotting is key. Soak most plants 24–48 hours before. This keeps the root ball moist and intact.
Avoid soil that’s too dry or too wet. Both make it hard to remove the plant. For succulents, water lightly a few days before or skip for a week if roots are soft.
Pruning and root inspection tips
Check roots for color and firmness when you remove the plant. Healthy roots are firm and pale. Brown, mushy roots need to be cut off.
Use sharp shears to prune dead roots and shorten long ones. If the plant is root-bound, gently tease out circling roots. Make shallow vertical cuts to encourage growth.
Trim too much top growth only when necessary. This balances the reduced root mass after pruning.
Gathering the right tools and materials
Prepare your workspace with a tarp or newspaper and a bucket for debris. Get repotting tools: clean pruning shears, a hand trowel, a soft brush, gloves, and a knife for stuck pots. Also, have a new pot with drainage, fresh potting mix, and amendments like perlite or pumice.
Sanitize tools between plants with isopropyl alcohol or a mild bleach solution. This prevents disease spread. With the right tools and a calm routine, you’ll reduce stress for your plant and finish confidently.
How to remove a plant from its current pot gently
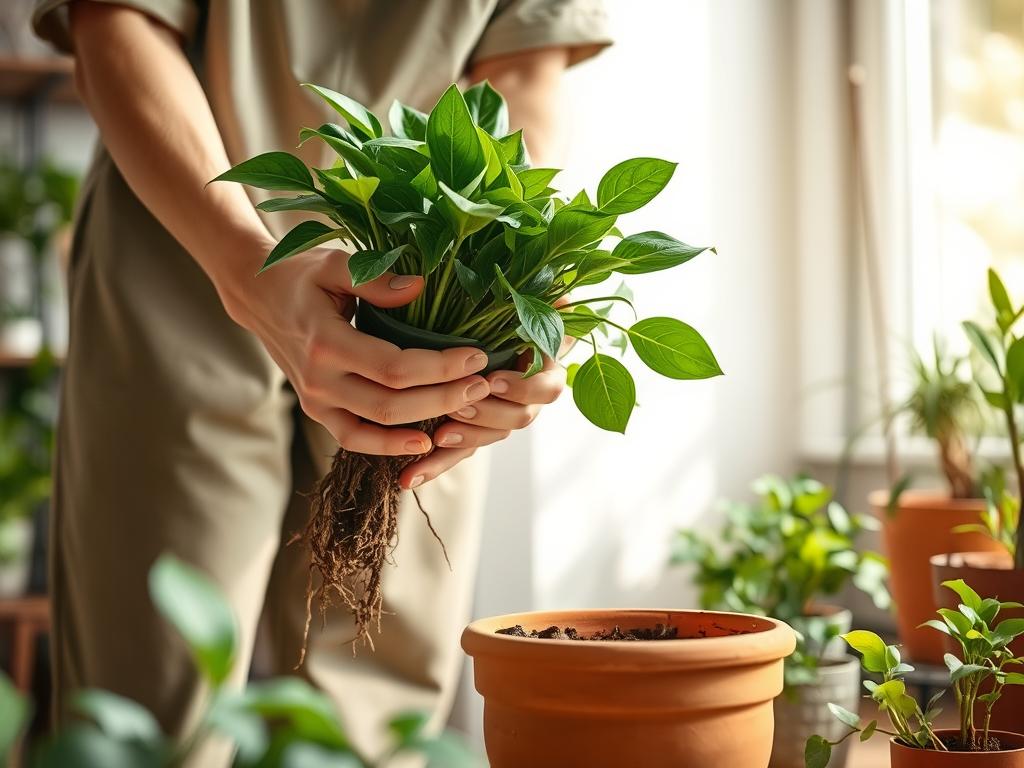
Removing a plant from its pot needs calm hands and a plan. Protect roots and foliage with gentle care. Work on a clean bench in a draft-free area. Gather a basin, sanitized shears, a blunt knife, and a small trowel.
Techniques for loosening root-bound plants
Turn the pot on its side and support the plant at the base. Tap the rim lightly to loosen the root ball. For stubborn pots, slide a blunt knife or spatula around the inner wall to break suction.
With plastic nursery pots, squeeze the sides to free the root mass. If soil is compacted, soak the pot for 10–20 minutes in a basin of water. Avoid long soaks that can soften fragile roots.
When the root ball feels very tight, use a small trowel or fork to work from the pot edge inward. Loosen outer roots. These steps help remove the plant with minimal stress.
What to do with circling roots and root tangles
For moderately circling roots, gently tease them outward with your fingers or a root hook. This encourages new growth into fresh soil.
When facing a dense root mat, make one to three vertical cuts through the root ball with a clean knife. These cuts stimulate fresh roots to grow outward. Remove only the soil you must and leave intact root structure for species that dislike heavy disturbance.
Trim dead, mushy, or black roots back to healthy tissue using sanitized shears. Follow careful pruning to preserve as much healthy root as possible while addressing root tangles.
Handling delicate stems and foliage during removal
Cradle the root ball and lower stems with both hands rather than pulling on top growth. This prevents snapped stems and torn foliage during gentle plant removal.
If a plant is top-heavy, secure stems with soft ties before you lift it. Work calmly to limit time out of soil and move the plant between shaded areas to avoid shock.
For brittle or older stems, consider light pruning before extraction to reduce weight and stress. Protect tender leaves by keeping the workspace draft-free and by covering the crown briefly if needed.
| Task | Method | When to use |
|---|---|---|
| Freeing stuck pots | Tap rim, slide blunt knife, squeeze plastic sides | Any pot that resists gentle pulling |
| Loosening compacted soil | Soak 10–20 minutes; use small fork from edges inward | When soil is hard or root ball won’t budge |
| Dealing with circling roots | Tease roots outward; vertical root-ball cuts for severe mats | Moderate to severe root-bound plants |
| Removing damaged roots | Trim to healthy tissue with sanitized shears | Any dead, black, or mushy roots |
| Protecting foliage and stems | Cradle root ball, use soft ties, prune top if needed | Top-heavy or brittle-stemmed plants |
Potting and positioning your plant in its new container
Before you lift the root ball, prepare your repotting area. Place the pot on a stable surface. Think about where the plant will go. Good placement reduces stress and helps your plant recover faster.
Choose the right soil depth for repotting. The top of the root ball should be 1–2 inches below the rim. This space is for watering and a light mulch. Make sure the planting depth matches the plant’s previous level to avoid burying the crown or graft union.
For tall root balls, create a small soil mound at the pot bottom. Place the root ball on this mound. Check that stems meet the soil line as they did before. Keep graft unions or crowns above the soil surface.
Backfill soil around the root ball in stages. Gently press with your fingers to remove air pockets. Don’t compact the soil; roots need air to breathe and grow.
Water lightly while backfilling to help the soil settle. Finish with a thorough soak to drain excess water. Add a thin top-dress of mulch if the species tolerates it, avoiding heavy mulch against the stem.
Center the plant for even growth unless you want an artistic tilt. If stems are top-heavy, stake the plant temporarily. Rotate the container a few degrees every week to promote balanced canopy growth.
Choose a sheltered spot with suitable light and humidity while roots reestablish. Keep the pot stable to prevent tipping. Give your plant time to anchor itself after you position it in the pot.
| Step | Action | Tip |
|---|---|---|
| 1 | Set planting height | Leave 1–2 inches below rim; match previous crown height |
| 2 | Build base if needed | Use a small soil mound for tall root balls to avoid deep planting |
| 3 | Backfill slowly | Gently firm with fingers to remove air; avoid compaction |
| 4 | Water during and after backfill | Light rinses while filling, then a thorough soak to settle soil |
| 5 | Stabilize plant | Center for balance; stake top-heavy plants with soft ties |
| 6 | Place for recovery | Find a stable, sheltered spot with proper light and humidity |
Aftercare: helping your plant recover quickly
After repotting, focus on steady care to help roots recover. Start with a deep soak to settle the soil and remove air pockets. Make sure to let all excess water drain to prevent root rot.
Change your watering routine from frequent surface wetting to checking the pot’s weight and soil feel. For most houseplants, wait until the top inch of soil is dry before watering again. Succulents need even longer to avoid rot.
Give your plant bright, indirect light but avoid strong sun for 7–14 days. This helps tender roots recover. As new growth appears, gradually increase the sun exposure to prevent leaf scorch.
Manage humidity and temperature to reduce stress. Most houseplants prefer indoor temperatures between 65–75°F. Use a pebble tray or a small humidifier for tropical plants in dry air. Stay away from drafts and vents that cause sudden temperature changes.
Decide when to fertilize based on the potting mix. If you used a nutrient-rich mix or slow-release fertilizer, wait 4–6 weeks. For inert mixes like perlite or pumice, start a light feed after 2–3 weeks at quarter to half strength.
When fertilizing, choose a balanced water-soluble formula and reduce the strength to avoid root burn. Watch for signs like yellow leaves or tip burn and adjust if needed.
Keep your repotted plants moist but not soggy. Regular checks for pot firmness and leaf changes are more important than a calendar. With proper aftercare, your plants will recover quickly and show strong growth soon.
Troubleshooting common repotting issues
Repotting can help plants grow better by loosening tight roots. But, you might face problems that surprise even careful gardeners. A quick check of soil, roots, light, and pests can help solve most issues quickly.
First, check if the soil is too wet or too dry. If leaves are wilting or turning yellow, it could be because of too much water or not enough. Gently pull the plant out of its pot to see if the roots are firm and healthy.
Look for any circling roots or compacted soil that might be blocking water uptake. If roots are brown and mushy, or smell bad, cut off the rotten parts. Then, put the plant in fresh, well-draining soil. If the roots look good but the plant is still struggling, it might be due to light, temperature, or nutrient issues.
Wilting, yellowing, or slowed growth—what to check
Check if the plant is getting enough light and is in a draft-free spot. Low light or cold air can slow down growth and cause yellow leaves. Move the plant to a spot with stable, indirect light if needed.
If yellow leaves keep coming back, it might be a nutrient problem. Try a small amount of fertilizer or get a soil test to find out what’s missing without stressing the roots too much.
Pest and disease risks after repotting
Repotting can bring out pests like fungus gnats and root mealybugs. Look at the soil surface and root crowns for tiny bugs or sticky stuff.
Use sticky traps for fungus gnats and treat root mealybugs with a labeled product. Clean your pots and tools well to stop diseases from spreading between plants.
Steps to take if a plant shows signs of transplant shock
Put the plant in a quiet spot with indirect light and steady temperatures. Water a bit less, but don’t let the soil dry out completely.
Don’t fertilize until you see new growth. Prune only the dead or damaged leaves so the plant can focus on healing. If the plant still looks bad, check for rot or pests and consider repotting into cleaner soil.
| Symptom | Likely Cause | Immediate Action | Follow-up |
|---|---|---|---|
| Wilting after repotting | Overwatering, underwatering, root damage | Check soil moisture and root color; adjust water | Repot if roots are rotten; improve drainage |
| Yellow leaves after repotting | Light stress, nutrient shortfall, transplant shock symptoms | Move to indirect light; hold off on fertilizer | Soil test and gentle feeding after recovery |
| Slowed growth | Compacted root ball, low light, cool temps | Loosen roots; reposition to warmer, brighter spot | Monitor new growth over 2–4 weeks |
| Visible pests | Fungus gnats, root mealybugs, introduced with soil | Isolate plant; set sticky traps; treat top and root zone | Repeat inspections; sanitize tools and pots |
| Foul-smelling soil | Root rot or fungal infection | Remove affected roots; repot in sterile, airy mix | Improve watering routine and pot drainage |
Special considerations for different plant types
Repotting needs vary by plant type. You must match soil, pot size, and handling to species to avoid stress. Below are practical, type-specific tips to guide your next repotting session.
Succulents and cacti:
When repotting succulents, use a fast-draining mix with coarse sand, perlite, and pumice. Add a small amount of organic matter to hold moisture. Let any cut roots callus for a day or two before watering to reduce rot risk.
Choose shallow pots with big drainage holes and wait one to two weeks before the first deep watering. For spiny species, wear thick gloves or use tongs to avoid injury. These cactus repotting tips keep roots dry and healthy.
Houseplants with delicate root systems:
If you care for orchids, ferns, or sensitive aroids, avoid aggressive root teasing. Preserve as much of the root ball as possible and remove only decayed tissue. Use media made for the species, like orchid bark or airy peat mixes.
After repotting delicate root houseplants, raise humidity and cut back bright light briefly to reduce transpiration stress. If your goal is soil refreshment rather than growth, repot into the same size container to keep stress low.
Large or mature plants and bonsai-specific advice:
Repotting large plants often requires two people, a trolley, or staged moves to avoid breaking stems and roots. Limit pot size increases to reduce shock. Refresh the top layer of soil when a major repot isn’t needed.
Bonsai repotting uses precise root pruning timed to active growth. Use bonsai mixes like akadama, pumice, and lava rock for superior drainage. Plan logistics when moving heavy specimens outdoors and secure sturdy pots for stability.
| Plant Type | Soil Recommendation | Pot Advice | Post-repot Care |
|---|---|---|---|
| Succulents & Cacti | Coarse sand, perlite, pumice, small organic fraction | Shallow, large drainage; allow 1–2 week dry interval | Delay watering; handle spines with tongs or gloves |
| Orchids & Epiphytes | Orchid bark, sphagnum moss mix | Same size or slightly larger; secure root ball | Increase humidity; avoid bright direct sun |
| Ferns & Aroids | Airy, peat-based mix with perlite | Keep size consistent to reduce shock | Keep moist but not waterlogged; gentle light |
| Large Mature Plants | Well-draining potting blend; add structural support | Small pot increase; use two people or equipment | Stabilize stems; avoid heavy pruning at repot |
| Bonsai | Akadama, pumice, lava rock blends | Shallow, specific drainage suited to species | Time root trimming to growth period; careful watering |
Conclusion
Repotting plants right is all about timing, choosing the right pot, and the soil mix. Pick the best season and container, prepare the plant, and gently remove it. These steps help your plant recover well.
Follow the steps we’ve outlined to reduce transplant shock and build good repotting habits. After repotting, water carefully, manage light and humidity, and don’t overfeed. Over time, your plants will get better as their roots grow back.
Start today by checking your plants for signs they need repotting. Get your tools and soil mixes ready. Plan your work for the best season for each plant. With patience and the right technique, your plants will flourish, making repotting a breeze.