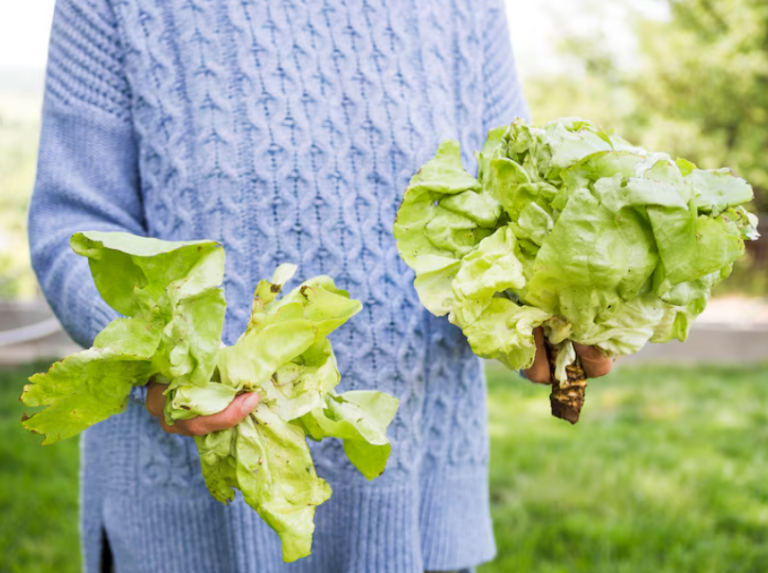
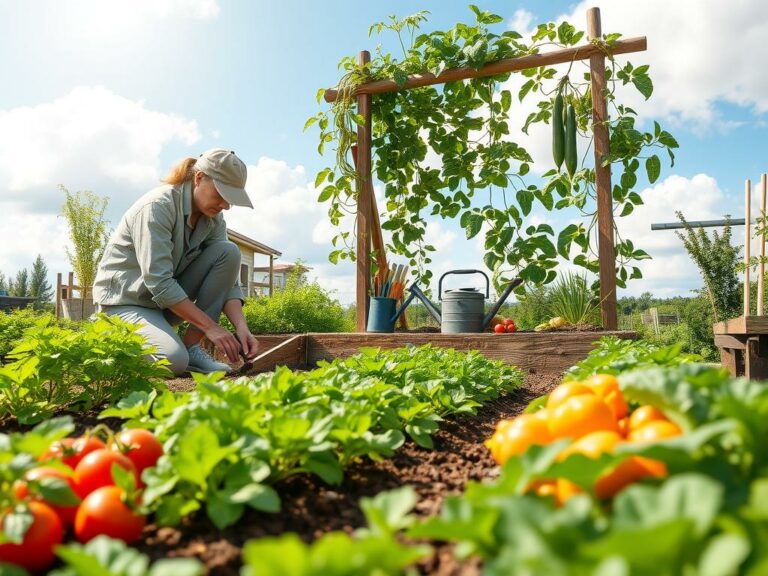
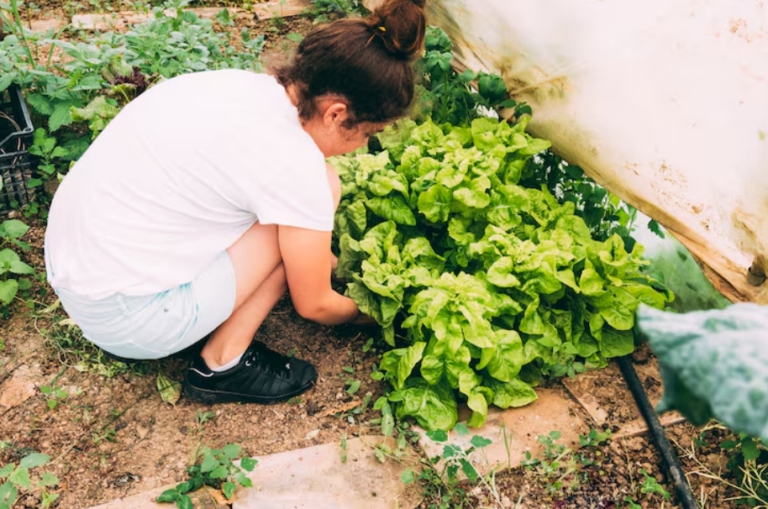
Nearly 35 million households in the United States now grow food at home. Container vegetable gardening has become one of the fastest-growing gardening trends. You can join this movement starting today.
Growing vegetables in containers puts fresh produce right at your fingertips. This works whether you live in a city apartment or a suburban home.
Container vegetable gardening breaks down the barriers that stop most people from starting a garden. You don’t need a big yard, perfect soil, or years of experience. Your balcony, patio, or even a sunny windowsill becomes your garden space.
You can harvest lettuce, tomatoes, peppers, and herbs within weeks of planting. Starting with vegetables in containers requires minimal investment.
A few pots, some quality potting mix, and seeds or seedlings get you going. You control exactly what goes into your soil and near your plants. This means fresher, cleaner produce for your kitchen table.
Container vegetable gardening works for absolute beginners. You learn by doing, and mistakes teach valuable lessons. Each season brings new chances to improve.
Your success doesn’t depend on having a green thumb. It depends on choosing the right vegetables, containers, and giving your plants basic care.
This guide walks you through everything you need to know about container vegetable gardening. You’ll discover which vegetables thrive in pots and how to pick the perfect containers. You’ll also learn the tips that separate struggling gardens from abundant ones.
Benefits of Growing Vegetables in Containers
Container gardening opens up new possibilities for growing fresh vegetables right where you live. This gardening method fits your lifestyle, whether you have a tiny apartment or sprawling yard. Small space vegetable gardening has changed how people grow their own food.
You get to enjoy fresh produce without needing a traditional garden plot. The advantages of this approach go far beyond simple convenience.
Understanding these key benefits helps you make the best choice for your growing situation. Each advantage builds on the others to create an ideal growing environment for your plants.
Flexibility for Limited Space
Your patio vegetable gardening setup can move whenever you need it to. Containers sit on patios, balconies, windowsills, and steps. You can reposition your vegetables to follow the sun throughout the day.
Bad weather coming? Move your plants to shelter. This flexibility means you control where your garden lives, not the other way around.
Small space vegetable gardening works perfectly in urban settings where ground space is scarce. Your containers become your garden bed.
Enhanced Soil Control
You have complete power over your growing medium with containers. Create custom soil mixes that match each vegetable’s needs. Adjust drainage, add nutrients, and control pH levels exactly how you want them.
- Choose premium potting soil for better results
- Customize nutrient content for specific plants
- Avoid poor soil conditions found in some yards
- Prevent soil-borne diseases from spreading
Better Pest Management
Raised containers naturally block many ground pests like slugs and certain insects. You spot problems faster when plants sit at eye level. Patio vegetable gardening reduces weed competition around your vegetables.
Your plants stay healthier with fewer environmental stressors.
| Pest Control Method | Container Advantage | Ground Garden Challenge |
|---|---|---|
| Slug Prevention | Elevated height keeps slugs away | Ground-level access for pests |
| Early Detection | Easy visibility at eye level | Bent posture needed for inspection |
| Weed Competition | Minimal weeds in potting mix | Constant weeding required |
| Disease Spread | Isolated soil prevents transmission | Soil-borne diseases spread easily |
Your small space vegetable gardening journey starts with understanding these powerful benefits. Container growing gives you control, flexibility, and success.
Choosing the Right Containers
Picking the right container is just as important as selecting the best vegetables for pots. Your container choice affects how well your plants grow and how much food you can harvest. Many options work great for container garden vegetables.
Size Matters: What You Need to Know
Different vegetables need different amounts of space for their roots to spread out. Containers that are too small cramp your plants and prevent them from reaching their full potential.
Here’s what you need to know about sizing:
- Large vegetables like tomatoes and peppers need at least 5-gallon containers
- Medium plants like beans and zucchini do well in 3-5 gallon pots
- Smaller vegetables such as lettuce and herbs thrive in 1-2 gallon containers
- Root vegetables like carrots need 8-12 inches of soil depth minimum
Giving your container garden vegetables enough room means better growth and higher yields. Roots that have space to stretch produce stronger, healthier plants.
Drainage: Ensuring Your Vegetables Thrive
Drainage holes are absolutely essential for success. Without them, water sits at the bottom and rots the roots. Your vegetables cannot survive in waterlogged soil.
To improve drainage in your containers:
- Always use pots with holes in the bottom
- Add a 1-2 inch layer of gravel at the pot’s base
- Place pot feet or small stones underneath to lift the container off the ground
- Use well-draining potting soil made for containers
Materials: Plastic, Clay, or Fabric?
Each material has different strengths. The best choice depends on your climate and the types of vegetables you’re growing.
| Material | Benefits | Best For | Drawbacks |
|---|---|---|---|
| Plastic | Lightweight, affordable, retains moisture well | Hot climates, frequent moving | Less attractive, can degrade in sunlight |
| Clay/Terracotta | Breathable, attractive appearance, classic look | Moisture-loving plants, decorative gardens | Heavy, breaks easily, dries out faster |
| Fabric Grow Bags | Excellent drainage, air prunes roots, portable | All vegetable types, best for beginners | Dries out quickly in hot weather |
Fabric grow bags are becoming popular because they help roots grow stronger through air pruning. Plastic works well for beginners since it’s affordable and easy to manage. Clay pots look beautiful but need more frequent watering in warm weather.
Your container selection sets the foundation for growing the best vegetables for pots. Take time to pick containers that fit your specific vegetables and local climate.
Ideal Vegetables for Beginners
Starting your journey with growing vegetables in pots doesn’t need to feel intimidating. Choosing the right potted vegetable plants makes all the difference in building your confidence. The vegetables below are nearly foolproof options that deliver results quickly.
Lettuce: Quick and Easy to Grow
Lettuce is one of the fastest crops you can harvest in pots. Most loose-leaf varieties reach maturity in just 30 to 45 days. The best part is that you don’t need deep containers—a shallow pot works wonderfully.
You can pick outer leaves as they grow, allowing the center to keep producing. This continuous harvest means you get fresh salad greens all season long. Loose-leaf varieties like Buttercrunch and Oak Leaf thrive in containers and tolerate cooler temperatures.
Radishes: Fast Harvest for Instant Gratification
Want nearly instant results? Radishes mature in as little as 3 to 4 weeks. These speedy root vegetables are extremely forgiving and tolerate various growing conditions without complaint.
You’ll know exactly when they’re ready because they push themselves up from the soil. Harvesting becomes obvious and simple.
- Varieties like Cherry Belle and French Breakfast perform well in containers
- They need minimal care and water
- You can plant new seeds every two weeks for continuous harvests
Green Onions: Regrow from Kitchen Scraps
Green onions offer an economical trick that amazes most beginners. Take store-bought bunches with root ends attached and place them in soil. Within weeks, you’ll have fresh green onions growing at home.
These vegetables grow continuously, allowing you to snip what you need while they keep producing. They’re incredibly forgiving and require minimal attention. Your kitchen scraps transform into endless supplies of fresh green onions for cooking.
| Vegetable | Days to Harvest | Container Depth | Special Features |
|---|---|---|---|
| Lettuce | 30-45 days | 6-8 inches | Continuous leaf picking |
| Radishes | 3-4 weeks | 6-8 inches | Self-indicating readiness |
| Green Onions | 2-3 weeks | 4-6 inches | Regrows from scraps |
These three vegetables represent your foundation for growing vegetables in pots successfully. Start with these beginner-friendly options to build skills and confidence. Then you can move on to more challenging crops.
Tomatoes: Container Growing Essentials
Growing tomatoes is one of the most rewarding container gardening experiences. These plants need more care than other vegetables to grow in containers. The taste of sun-ripened fruit makes every effort worthwhile.
Tomatoes thrive in containers when you meet their specific needs. Provide proper support, watering, and nutrients for best results.
Selecting the right tomato variety is your first step toward success. You have two main choices: determinate and indeterminate types.
Types of Tomatoes for Containers
Determinate tomatoes are compact, bush-type plants that stay small and manageable. Varieties like Patio Princess and Tiny Tim work perfectly for containers. They reach just 2 to 3 feet tall.
These types produce their entire crop within a short window. This makes them ideal for smaller spaces.
Indeterminate tomatoes grow as vining plants and produce fruit throughout the season. They need larger containers and more support structures. Choose cherry or grape tomato varieties for containers.
Sweet 100 cherry tomatoes and Black Cherry varieties perform well in confined spaces.
- Determinate varieties: Patio, Balconi, Tumbling Tom
- Cherry tomatoes: Sweet 100, Sungold, Black Cherry
- Grape tomatoes: Favorita, Tomatito
Support Structures: Cages vs. Stakes
Your vegetables to grow in containers will need support as they develop fruit. Tomato cages offer all-around support and are easy to install. Place the cage over your plant when it’s young.
Stakes work better for space-conscious gardeners. Use 5 to 6-foot bamboo stakes for indeterminate varieties. Tie the main stem loosely every 8 to 12 inches.
Use soft twine or cloth strips for tying. This method saves space but requires regular attention.
| Support Method | Best For | Maintenance |
|---|---|---|
| Tomato Cage | Determinate varieties, beginners | Minimal after setup |
| Bamboo Stakes | Indeterminate varieties, space-limited areas | Regular tying and pruning |
Watering and Fertilizing Tips
Tomatoes are heavy drinkers and feeders. Water deeply at the soil level every morning. Aim for 1 to 2 inches per week.
During hot weather, you may need to water daily. Avoid wetting the leaves, which can cause fungal diseases.
Feed your vegetables to grow in containers every two weeks with balanced fertilizer (10-10-10). Once flowers appear, switch to fertilizer higher in phosphorus (5-10-10). This encourages fruit production.
Watch for calcium deficiency signs—blossom end rot appears as dark, sunken spots. Prevent this by maintaining consistent soil moisture.
“The secret to perfect tomatoes in containers is consistency—steady water, regular feeding, and proper support mean the difference between struggling plants and abundant harvests.”
- Water at soil level early morning
- Use balanced fertilizer for first 4 weeks
- Switch to phosphorus-rich fertilizer at flowering
- Check soil moisture daily in containers
- Mulch soil surface to retain moisture
Peppers: Spicy and Sweet Options
Peppers rank among the best vegetables for a balcony vegetable garden. They thrive in containers and produce abundant harvests with minimal fuss. Unlike tomatoes, peppers are more forgiving and compact for outdoor spaces.
You can grow both sweet and hot varieties. Choose based on your cooking preferences and available room.
Bell Peppers vs. Hot Peppers
Choosing between bell peppers and hot peppers depends on your needs. Bell peppers require larger containers—at least five gallons. They also take longer to mature into full-sized fruits.
Hot pepper plants like jalapeños and Thai chilies occupy less space. They fit beautifully in three-gallon containers.
Hot pepper plants bring extra benefits to your balcony vegetable garden. These varieties are often more decorative with colorful fruits. They produce prolifically throughout the season without taking up much room.
| Pepper Type | Container Size | Maturity Time | Space Requirements |
|---|---|---|---|
| Bell Peppers | 5+ gallons | 60-90 days | Larger footprint |
| Hot Peppers | 3 gallons | 50-80 days | Compact growth |
Sunlight Requirements for Peppers
Peppers love sunshine and need six to eight hours of direct light daily. Position your containers where they receive maximum morning and early afternoon exposure. Place pepper containers on the sunniest side of your balcony vegetable garden.
- Place containers on south or west-facing areas when possible
- Rotate containers every few days for even light exposure
- Avoid heavy shade from nearby buildings or trees
- Use reflective surfaces to bounce light onto plants
When and How to Harvest Peppers
Harvest timing depends on your preferences. Green peppers are simply unripe fruits that will change color later. Pick peppers at any stage, but ripe peppers taste sweeter.
Regular harvesting encourages more production. Use sharp scissors or pruners to cut peppers from the stem. This protects your plant and keeps it producing throughout the season.
A healthy plant can produce twenty or more peppers during one growing season.
- Wait until peppers reach desired size and color
- Cut the stem above the pepper fruit using clean pruners
- Harvest regularly to stimulate new growth
- Pick peppers in the morning for best flavor
Herbs: Flavor Boosters for Your Kitchen
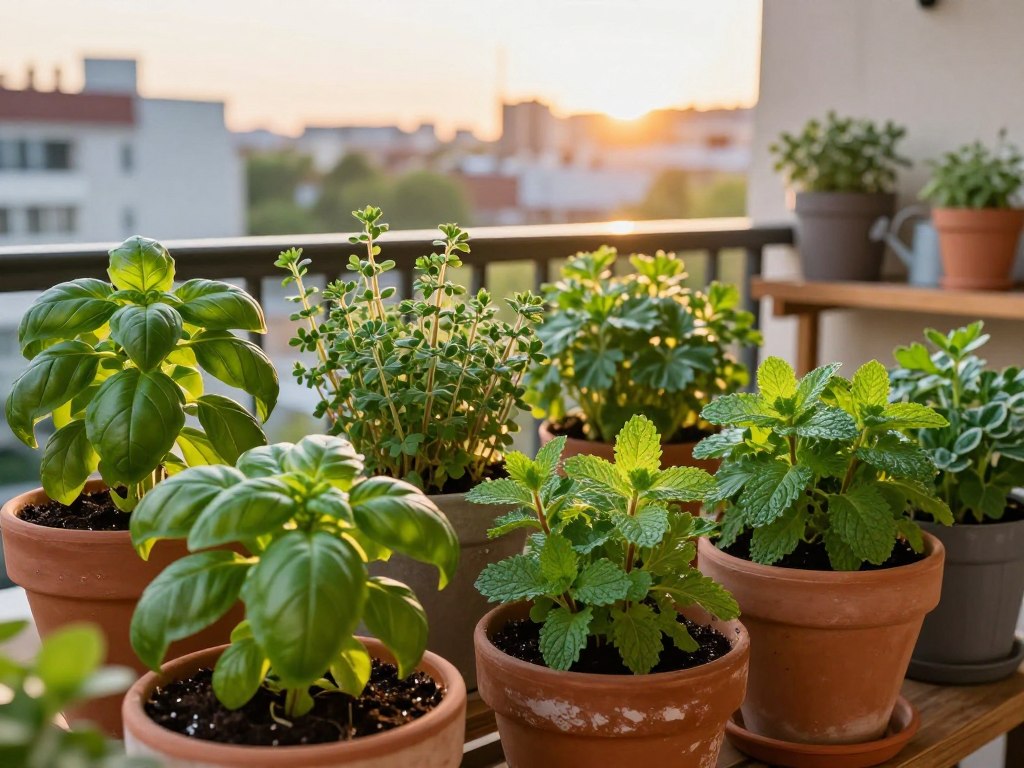
Fresh herbs transform your cooking while being among the easiest plants to grow. Growing herbs in containers gives you maximum flavor with minimal space requirements. You can harvest fresh basil, parsley, and cilantro right from your windowsill.
Herbs become the perfect entry point into urban container gardening. They need less maintenance than vegetables but deliver big taste rewards. Container herbs thrive in tight spaces like apartments or small balconies.
Popular Culinary Herbs to Grow
Start your herb journey with these must-grow varieties that work beautifully in containers:
- Basil – Perfect for Italian dishes, needs warmth and plenty of sunlight
- Parsley – A biennial that provides fresh greens for two years
- Cilantro – Grows fast but bolts quickly in heat
- Rosemary – A woody perennial that tolerates dry conditions well
- Thyme – Low-maintenance ground cover with great flavor
- Mint – Vigorous grower best kept separate to prevent spreading
Group plants with similar water and sunlight needs together in the same container.
Care Tips for Container Herbs
Most herbs prefer well-draining soil and benefit from regular harvesting. Picking leaves frequently makes your herbs grow bushier and more productive. Herbs need less fertilizer than vegetables.
Excessive fertilizer actually reduces the essential oils that give herbs their amazing flavor.
Water your container herbs when the top soil feels dry to your touch. Make sure your containers have drainage holes. Empty standing water after watering to prevent root rot.
Companion Planting for Better Growth
Certain herbs grow beautifully together while others work best alone:
| Herb Combination | Benefits |
|---|---|
| Basil with Tomatoes and Peppers | Basil enhances flavor and repels common pests |
| Thyme with Rosemary | Similar watering needs; both tolerate dry conditions |
| Parsley with Chives | Compatible growth rates and water requirements |
| Dill Separated from Other Herbs | Prevents flavor transfer and cross-pollination issues |
Certain herbs like dill and fennel should be separated from other plants. Strategic companion planting creates a more resilient urban container gardening ecosystem.
Herbs can help repel pests from your other container vegetables. This reduces your need for pesticides.
Carrots: Root Vegetables in Small Spaces
Many people think carrots need deep garden beds to grow well. Carrots work great in container vegetable gardening when you pick the right varieties. You can enjoy fresh, homegrown carrots from your patio or balcony year-round.
Root vegetables like carrots seem tricky for container vegetable gardening. They are easier than you might expect. The key lies in understanding what each carrot variety needs to thrive.
Choosing the Right Carrot Varieties
Not all carrots work equally well for container growing. Select varieties bred for small spaces and shorter growth patterns.
- Thumbelina carrots grow round and compact at just 1-2 inches long
- Paris Market varieties develop small, round roots perfect for shallow containers
- Little Finger carrots reach 3-4 inches with a slender shape ideal for pots
- Danvers Half Long varieties grow 6-7 inches and need deeper containers
Soil Depth Requirements
Your container’s depth directly affects which carrot varieties you can grow successfully. Matching depth to carrot length ensures your roots develop fully and stay healthy.
| Carrot Variety | Root Length | Minimum Container Depth | Best For Container Vegetable Gardening |
|---|---|---|---|
| Thumbelina | 1-2 inches | 6-8 inches | Shallow pots and window boxes |
| Paris Market | 2-3 inches | 6-8 inches | Small decorative containers |
| Little Finger | 3-4 inches | 8-10 inches | Medium-sized containers |
| Danvers Half Long | 6-7 inches | 12+ inches | Large buckets and deep pots |
Deeper containers generally work better than shallower ones. Extra depth helps your carrot roots develop straight. It also allows soil to retain moisture more effectively throughout the growing season.
Tips for Growing Perfect Carrots
Success with container vegetable gardening and carrots depends on several important practices. Start with loose, stone-free soil since carrots need a smooth path for root growth. Use quality potting mix instead of regular garden soil to prevent rocky obstacles.
Watering consistency matters greatly for carrot development. Keep soil evenly moist but not waterlogged. Irregular watering leads to cracking and splitting.
Thin your seedlings properly to give each carrot room to grow. Space them about 2 inches apart once they sprout. Crowded seedlings produce small, misshapen roots.
Your carrots are ready when the shoulder reaches about the width of your pinky finger. Pull them gently from the soil and enjoy your harvest.
Growing Leafy Greens in Containers
Leafy greens are perfect for small space vegetable gardening. You can grow nutritious vegetables in compact containers with minimal effort. Enjoy harvests throughout the entire growing season.
Many greens thrive in shallow containers. This makes them perfect for balconies, patios, and small yards. You get continuous harvests from a single planting.
Types of Leafy Greens to Consider
You have plenty of options for your containers. Spinach works wonderfully as a cool-season crop packed with iron. Kale stands out as a hardy, cold-tolerant superfood.
Swiss chard offers colorful stems and heat tolerance. Arugula delivers a peppery flavor and grows quickly. Asian greens like bok choy and mizuna add diversity.
- Spinach – Rich in iron, prefers cool temperatures
- Kale – Hardy variety, survives frost
- Swiss Chard – Heat-tolerant with colorful stems
- Arugula – Fast-growing, peppery taste
- Bok Choy – Tender Asian green, quick harvest
- Mizuna – Delicate leaves, mild flavor
Many greens prefer cooler temperatures in spring and fall. You can extend your growing season beyond summer.
Best Practices for Leafy Green Care
Your leafy greens need consistent moisture to thrive. Water regularly to keep soil moist but not waterlogged. Wide, shallow containers work best for small space vegetable gardening.
Place containers where they receive partial shade during hot weather. This prevents bolting, which happens when plants go to seed early. Feed your greens every two weeks with nitrogen-rich fertilizer.
Quality potting soil works better than garden soil in containers. Greens are less demanding than tomatoes or peppers. They make excellent choices for beginners.
Harvesting Techniques for Leafy Greens
The “cut and come again” method transforms your harvest. Pick the outer leaves while letting the center continue producing. This approach extends your harvest for weeks or months.
- Wait until greens develop 4-6 leaves before harvesting
- Pinch or cut outer leaves first
- Leave the center intact for continued growth
- Harvest in the morning for crispest leaves
- Continue picking throughout the season
This technique maximizes your container space. You’ll enjoy fresh, tender greens from your setup week after week.
Beans: Easy to Grow and Nutritious
Beans stand out as one of the best choices for growing vegetables in pots. These protein-packed plants thrive in containers and give you rewarding harvests with minimal effort. Beginners and experienced gardeners both achieve great results with beans.
Growing vegetables in pots like beans means you get fresh, delicious produce right from your balcony or patio. Beans are nitrogen-fixing plants, which means they need less fertilizer than many other vegetables. This quality makes them perfect for container gardening.
You should wait until after the last frost date in your area before planting. Beans prefer warm soil and won’t germinate well in cold conditions. Choose a location with full sunlight for best growth and production.
Bush vs. Pole Beans: What Works Best?
Your container space determines which bean type works best for you. Bush beans stay compact at just 1 to 2 feet tall and produce their entire crop at once. These varieties work perfectly for smaller containers and tight spaces.
Popular bush bean varieties include Blue Lake Bush and Contender beans. Pole beans climb upward, reaching 6 to 10 feet, and produce fresh beans over a longer period. Pole beans maximize your vertical growing area when growing vegetables in pots.
| Bean Type | Height | Container Size | Best For | Harvest Pattern |
|---|---|---|---|---|
| Bush Beans | 1-2 feet | 5-gallon containers | Small spaces, patios | All at once |
| Pole Beans | 6-10 feet | 10+ gallon containers | Vertical gardening | Over several weeks |
Support Systems for Climbing Beans
Pole beans need proper support structures to grow successfully. You can use several methods when growing vegetables in pots:
- Bamboo teepees – Create an attractive structure by tying bamboo stakes together at the top
- Trellises – Attach wooden or metal trellises directly to your container edges
- String supports – Tie sturdy strings vertically from a top frame to the soil
- Balcony railings – Use existing structures on decks or patios for climbing support
Install your support system at planting time. This prevents root damage that occurs when you add stakes after the beans sprout. Make sure your support structure can handle the plant’s weight when fully grown and loaded with beans.
Maintenance Tips for Healthy Growth
Keeping your bean plants healthy requires consistent care. Water your containers regularly, keeping the soil moist but never waterlogged. Overwatering causes root rot and kills your plants.
Check soil moisture daily during hot weather. Growing vegetables in pots requires more frequent watering than ground gardens since containers dry out faster.
Watch for common bean pests like aphids and bean beetles. Inspect both sides of leaves weekly and remove pests by hand when you spot them. Neem oil spray works well for pest control if infestations get heavy.
Harvest your beans regularly every 2 to 3 days when pods snap off easily. Regular harvesting encourages continuous flower and bean production throughout the season. Beans taste best when picked young and tender.
Skip any picking sessions, and older pods stay on the plant, signaling it to stop producing new flowers.
- Water deeply but infrequently for stronger root systems
- Fertilize every 2 to 3 weeks with low-nitrogen food
- Pick beans in the morning when pods are cool and crisp
- Remove any yellowing leaves to improve air circulation
Zucchini: Abundant Harvests in Containers
Zucchini might seem like a sprawling garden plant. Yet it ranks among the best vegetables for pots with the right varieties. Growing zucchini in containers lets you enjoy fresh produce from a small balcony or patio.
These plants reward you with generous yields from just one or two containers. The key to success involves choosing compact varieties. You also need to provide enough space for root development.
Choosing Container Varieties of Zucchini
Not all zucchini varieties work well in pots. Select container-friendly options that produce abundant fruit without taking over your space. These varieties thrive in the controlled environment that containers provide.
| Zucchini Variety | Growth Pattern | Minimum Container Size | Fruit Characteristics |
|---|---|---|---|
| Astia | Compact, bred for containers | 5 gallons | Dark green, standard size |
| Raven | Manageable, semi-compact | 10 gallons | Deep green, medium length |
| Eight Ball | Compact, space-efficient | 5-10 gallons | Round, dark green, unique shape |
| Patio Star | Dwarf, perfect for small spaces | 5 gallons | Light green, tender, prolific |
Most zucchini plants need containers at least 5 gallons in size. Ten gallons is ideal for better results. Larger containers support vigorous root systems and heavy fruit production.
Pollination: Helping Zucchini Fruits Set
Zucchini plants produce separate male and female flowers. Female flowers have a tiny swelling at the base that becomes the fruit. Sometimes flowers drop without developing zucchini, which frustrates gardeners.
You can hand-pollinate your zucchini to ensure fruit development:
- Watch for female flowers opening in early morning
- Use a small paintbrush or cotton swab to collect pollen from male flowers
- Gently brush pollen onto the female flower’s center
- Repeat this process on multiple flowers for better success
Hand-pollination works especially well when bee activity is low. This simple technique can boost your container zucchini productivity. It makes zucchini one of the best vegetables for pots.
Ways to Prevent Zucchini Diseases
Container-grown zucchini can develop powdery mildew, blossom end rot, and bacterial wilt. Prevention strategies keep your plants healthy and productive:
- Space plants to allow air circulation around leaves
- Water at soil level, avoiding wet foliage
- Remove affected leaves promptly when disease appears
- Rotate containers with fresh soil each growing season
- Mulch around the base to prevent soil splash
- Check plants regularly for early disease signs
Growing zucchini in containers gives you control over soil quality and plant spacing. These advantages make zucchini among the best vegetables for pots. Your care will be rewarded with continuous harvests throughout the season.
Container Gardening Best Practices
Success with container garden vegetables depends on mastering a few key techniques. Getting these fundamentals right prevents most common problems. Your containers deserve attention to detail, from soil to watering schedules.
Soil Selection for Container Gardening
Never use garden soil for your container garden vegetables. Garden soil compacts in containers and drains poorly. It may carry pests or diseases that damage your plants.
Instead, invest in a quality potting mix designed for containers.
Look for mixes containing:
- Peat moss or coconut coir for moisture retention
- Perlite or vermiculite for drainage and aeration
- Compost for slow-release nutrients
You can customize your soil blend for different container garden vegetables. Leafy greens prefer slightly more moisture, so add extra coir. Peppers and tomatoes like faster drainage, so increase perlite.
Check the pH of your mix. Add lime if needed to reach the right level for your specific plants.
Importance of Regular Watering
Container plants dry out much faster than in-ground gardens. Heat, wind, and sunshine pull moisture from pots quickly. Your container garden vegetables need consistent watering to thrive.
Check soil moisture by pushing your finger one to two inches deep. Water when the soil feels dry at that depth. Most container plants need watering once daily in warm weather.
Consider these watering solutions:
- Self-watering containers that release water gradually
- Drip irrigation systems for automatic moisture
- Watering globes for vacation periods
- Mulch on top of soil to slow evaporation
Seasonal Considerations for Container Vegetables
Plan your container garden vegetables around your local climate. Cool-season crops like lettuce, spinach, and peas grow best in spring and fall. Warm-season plants like tomatoes, peppers, and zucchini need heat and sunshine.
Try succession planting to harvest continuously. Plant lettuce every two weeks from early spring through fall. Start tomato seedlings indoors in late winter for transplanting after frost danger passes.
Use cold frames or row covers to extend seasons. These protect tender plants from unexpected freezes.
Rotate your container garden vegetables each season to prevent soil depletion. This reduces disease buildup. Fresh potting mix every year keeps your containers healthy and productive.
Troubleshooting Common Issues
Your patio vegetable gardening journey may hit some bumps along the way. Potted vegetable plants face unique challenges that differ from ground gardens. The good news is that container plants are easier to inspect and treat than traditional gardens.
Learning to spot problems early helps you save your crops before damage becomes serious.
Pests: Identification and Control Measures
Container gardens attract common pests that feed on your potted vegetable plants. Aphids cluster on new growth and cause leaf curling. Spider mites create stippled, yellowing leaves that look dusty.
Whiteflies hide on the undersides of leaves and fly up when disturbed. Caterpillars chew visible holes in your foliage.
You can fight these pests with organic methods that work well in small spaces. Insecticidal soap removes soft-bodied insects like aphids and whiteflies. Neem oil tackles spider mites and other stubborn pests.
Hand-picking works for larger caterpillars. Planting flowers like marigolds attracts ladybugs and other beneficial insects that eat pests naturally.
Nutrient Deficiencies: Signs and Remedies
Your potted vegetable plants show nutrient problems through their leaves and color. Yellowing leaves signal nitrogen deficiency. Purple-tinged leaves mean phosphorus is lacking.
Brown edges on leaves point to potassium shortages. Yellowing between leaf veins indicates iron or magnesium problems.
You can fix these issues by adjusting your feeding routine. Use a balanced fertilizer to prevent nitrogen problems. Apply phosphorus-rich fertilizers when you see purple tints.
Potassium supplements help prevent brown leaf edges. Magnesium or iron chelates treat yellowing between the veins. Testing your soil before planting saves you time fixing deficiencies later.
Dealing with Poor Growth or Failure
Weak growth in your patio vegetable gardening setup usually traces back to a few common causes. Insufficient light produces leggy, pale plants that reach for sunlight. Overwatering or underwatering causes wilting and yellowing.
Wrong container sizes stunt plant development. Temperature stress damages tender plants.
You should diagnose the problem systematically before giving up on struggling plants. Move potted vegetable plants to brighter spots if they look pale and stretched. Check soil moisture by sticking your finger two inches deep.
Upgrade to larger containers if roots circle the bottom. Protect plants from sudden temperature drops with row covers. Start fresh with new seeds if plants show severe damage from root rot or disease.
Learning from each failure makes your next patio vegetable gardening season more successful.