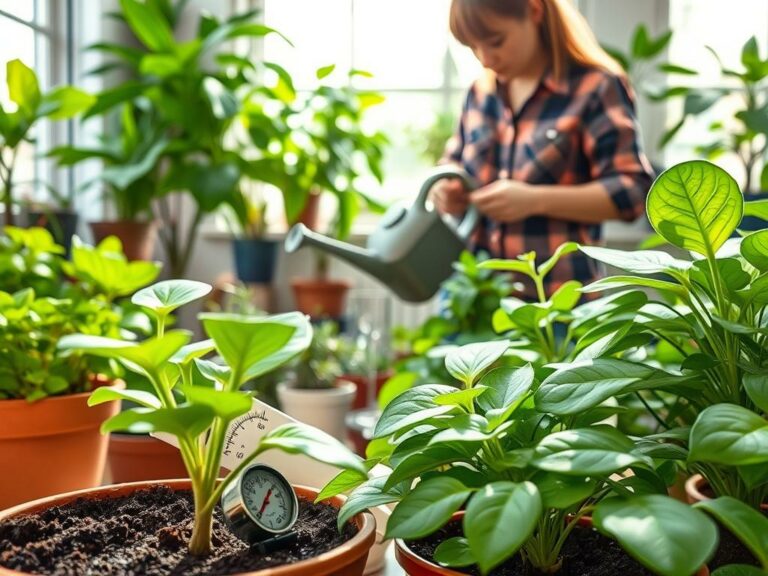
60% of potted houseplants show signs of stress caused by poor soil. This is more than light or pests. The wrong mix can choke roots or dry out too fast.
You’re about to learn how the best soil mix for plants can make containers and garden beds thrive. This guide will tell you what makes a good potting mix. It will also explain the difference between soil for indoor and outdoor plants.
It will show why container gardening soil is key for root health and resilience. You’ll find practical potting mix recipes and DIY blending tips. You’ll also learn when to choose commercial brands like Miracle-Gro or Espoma versus custom mixes.
There will be troubleshooting steps for common problems, feeding and amendment advice, and seasonal care tips. You’ll also find sustainable options for U.S. gardeners.
Use this as your map: first, why soil matters; then components and textures. Next, ready-made and specialized recipes; DIY mixing and sourcing; commercial vs. homemade; amendments and fertilizing; problem prevention; seasonal care; and a final wrap-up to keep your plants strong and low-maintenance.
Why soil mix matters for your indoor and outdoor plants
Good soil is key for healthy gardens and houseplants. It gives water, oxygen, and nutrients and holds roots in place. Knowing about soil importance helps you manage how plants handle stress, drought, and feeding.
How soil affects root health and plant growth
Your soil’s job is to balance moisture and air for roots. Roots need oxygen to get nutrients. If the soil is too tight or wet, roots can’t breathe and plants grow slowly.
Soil structure supports good microbes and fungi that help plants get nutrients. Nutrients like nitrogen, phosphorus, and potassium are important. They depend on organic matter and soil pH.
Soil texture and porosity let roots grow and stay stable. A good mix makes transplanting easier and lets roots expand without getting stuck.
Differences between indoor and outdoor soil requirements
Indoor soil needs to drain well, stay light, and not compact. Containers get hot and dry faster than ground. Sterile parts in potting mixes help fight off diseases.
Outdoor soil must support long-term nutrient cycling and keep moisture. Adding organic matter to native soil improves it over time.
Outdoor soils face frost and heavy rains. Indoor vs outdoor soil choices reflect these differences in volume, temperature, and disease risk.
Signs your current soil mix needs improvement
Look out for slow growth, yellow leaves, or wilting after watering. These signs often mean the soil is not draining well or lacks nutrients.
Staying damp, bad smells, or pests mean the soil is too wet or contaminated. A hard surface or roots that can’t penetrate show the soil has lost its structure.
For outdoor beds, watch for runoff, a crust after rain, or plants that can’t grow. These signs mean it’s time to improve the soil, regrade, or refresh the mix.
| Issue | Likely Cause | Quick Fix |
|---|---|---|
| Wilting after watering | Poor drainage or root rot | Repot with fast-draining mix; prune damaged roots |
| Slow plant growth | Nutrient deficiency or compaction | Add compost or balanced N-P-K fertilizer; loosen soil |
| Yellow leaves | pH imbalance or micronutrient lack | Test pH; amend with lime or sulfur; foliar iron if needed |
| Foul odor in pots | Anaerobic, waterlogged soil problems | Improve drainage, refresh potting mix, reduce watering |
| Crusting or runoff in beds | Low organic matter, surface compaction | Top-dress with compost; add mulch and aerate |
Understanding soil components and their roles
To make the best mix for your plants, you need to know about the main soil components. Each one plays a key role in how roots grow, water moves, and nutrients are absorbed. Start with a mix of organic matter, aeration materials, and mineral amendments. This lets you control the texture, moisture, and pH for both indoor pots and outdoor beds.
Organic matter feeds microbes and holds moisture. Compost from municipal programs or brands like Black Kow adds nutrients and structure. Peat moss holds water but is nonrenewable. Coconut coir, sold as compressed bricks by Sunleaves or FoxFarm, is a renewable alternative with neutral pH and good moisture retention. Mixing compost and coco coir boosts fertility without overcompacting the mix.
Aeration materials keep roots oxygenated and prevent compaction. Perlite is lightweight volcanic glass; Miracle-Gro and Espoma perlite products are easy to find and work well in most potting mixes. Pumice is heavier and long-lasting, ideal for succulents and long-term containers. Coarse horticultural sand improves drainage and weight in bonsai or cactus blends. Combine perlite or pumice with organic matter to balance water retention and drainage.
Minerals and pH determine nutrient availability. Lime raises pH and can add magnesium when you choose dolomitic lime. Elemental sulfur lowers pH for acid-loving plants like blueberries; apply it only after a soil test. Gypsum helps sodium-affected soils, rock phosphate supplies slow-release phosphorus, and greensand provides potassium and trace soil minerals. Use a soil test from your county extension or kits like Rapitest or Soil Savvy to guide pH adjustment and amendment choices.
| Component | Primary Benefit | Common Use |
|---|---|---|
| Compost | Supplies nutrients, supports microbes, improves structure | General potting mixes, garden beds (use well-aged municipal or backyard compost) |
| Coco coir | Moisture retention, renewable, neutral pH | Peat substitute in mixes, seed starting, container blends |
| Perlite | Lightweight aeration, improves drainage | Pots and indoor mixes where fast drainage is needed |
| Pumice | Durable aeration, adds weight, long-term stability | Succulent and bonsai mixes |
| Horticultural sand | Increases drainage and bulk density | Cactus, bonsai, and gritty mixes |
| Lime | Raises pH; dolomitic lime adds magnesium | Acidic garden soils, per soil test recommendations |
| Elemental sulfur | Lowers pH for acid-loving plants | Blueberries, azaleas; apply cautiously after testing |
| Rock phosphate / Greensand / Gypsum | Slow-release phosphorus, potassium, and improved soil structure | Long-term amendments for poor soils or specific nutrient needs |
When blending mixes, start small. Match compost with coconut coir for moisture and fertility, add perlite or pumice for aeration, then test and adjust pH as needed. This approach makes your mix flexible for different plants and seasons, while preserving essential soil minerals for healthy growth.
Soil textures and drainage for different plant types
Knowing about soil texture helps pick the right mix for each plant. Texture is a mix of sand, silt, clay, and organic matter. This mix affects how well water drains and stays around roots.
How texture influences water retention
Particle size controls water movement. Sandy soil has big pores, letting water flow fast. It holds little water. Clay, on the other hand, holds water tight and can be soggy, cutting off oxygen to roots.
Silt is in the middle, holding more water than sand but draining better than clay. Organic matter, like compost, changes this. It boosts water retention without blocking pores. This lets roots get moisture while staying aerated.
Matching soil texture to succulents, tropicals, and vegetables
Succulent soil needs to dry fast to avoid rot. Use a mix with perlite, pumice, and coarse sand. Keep organic matter low for good drainage.
Tropical plants like a mix that holds moisture but is airy. Use coco coir or peat with perlite and compost. This mix supports steady water retention and good root oxygen.
Vegetable soil should be loamy and rich in nutrients. It needs to balance drainage and water retention. Add high-quality compost, aged manure, and mineral amendments for steady growth and deep roots.
Improving drainage in heavy soils
For compacted clay, improve it with coarse sand, gypsum, and lots of organic matter. These additions break up tight clumps and increase air and water movement.
Physical solutions also help. Raised beds, mounded rows, or a gravel layer under the root zone speed up drainage. For deep compaction, subsoiling can open up deeper layers for root growth.
Use these tips to adjust mixes for different plants. This way, your succulent, tropical, and vegetable soils will provide the right water retention and airflow for each plant to thrive.
Best soil mix for plants
Choosing the right mix makes potting and planting easier. A good blend gives roots air, water, and nutrients in the right balance. Below are practical recipes and brand options to help you make the best potting mix for common needs.
All-purpose mix recipe for general houseplants and container gardening
For everyday houseplants, mix 40% high-quality potting soil or composted bark, 30% coco coir or peat moss, 20% perlite, and 10% compost or worm castings. This mix balances water retention and drainage. So, pothos, philodendron, and snake plant will thrive.
You can buy ready-made options like Espoma Organic Potting Mix, FoxFarm Ocean Forest, or Miracle-Gro Indoor Potting Mix. They offer convenience and consistent results.
Specialized mix for succulents and cacti
Succulents need a fast-draining blend to avoid root rot. Use a succulent soil recipe with 50% coarse pumice or perlite, 30% coarse sand, and 20% gritty compost or coir. Keep organic matter low so water flows through quickly.
If you prefer a store mix, try Miracle-Gro Cactus Potting Mix. It’s a no-fuss option that mimics a gritty, airy medium.
Potting mix for orchids, epiphytes, and air plants
Epiphytic orchids like Phalaenopsis prefer large-bark mixes with charcoal and some perlite. Choose orchid potting media such as BarkWorks or Sakata Orchid Bark for better airflow around roots.
Air plants need no soil. Mount Tillandsia on cork, wood, or use sphagnum moss. Provide regular misting or weekly soaks. For other epiphytes, include coir chips and large orchid bark, avoiding fine soils that trap moisture.
Outdoor garden bed mix for vegetables and perennials
Improve garden beds by adding 2–4 inches of well-aged compost per top foot of soil and mixing into native soil. For raised containers, combine native topsoil, compost, and coarse sand or perlite. This mix supports roots and drainage.
Run a soil test before adding fertilizer. If results show nutrient gaps, add a balanced slow-release fertilizer. This supports vegetables and perennials through the season.
DIY soil mix recipes and step-by-step blending tips
Making your own potting mix saves money and lets you control the mix’s texture, drainage, and nutrients. Below are practical recipes, a shopping checklist with trusted U.S. retailers, and simple tests to ensure your homemade blend works well for indoor and outdoor plants.
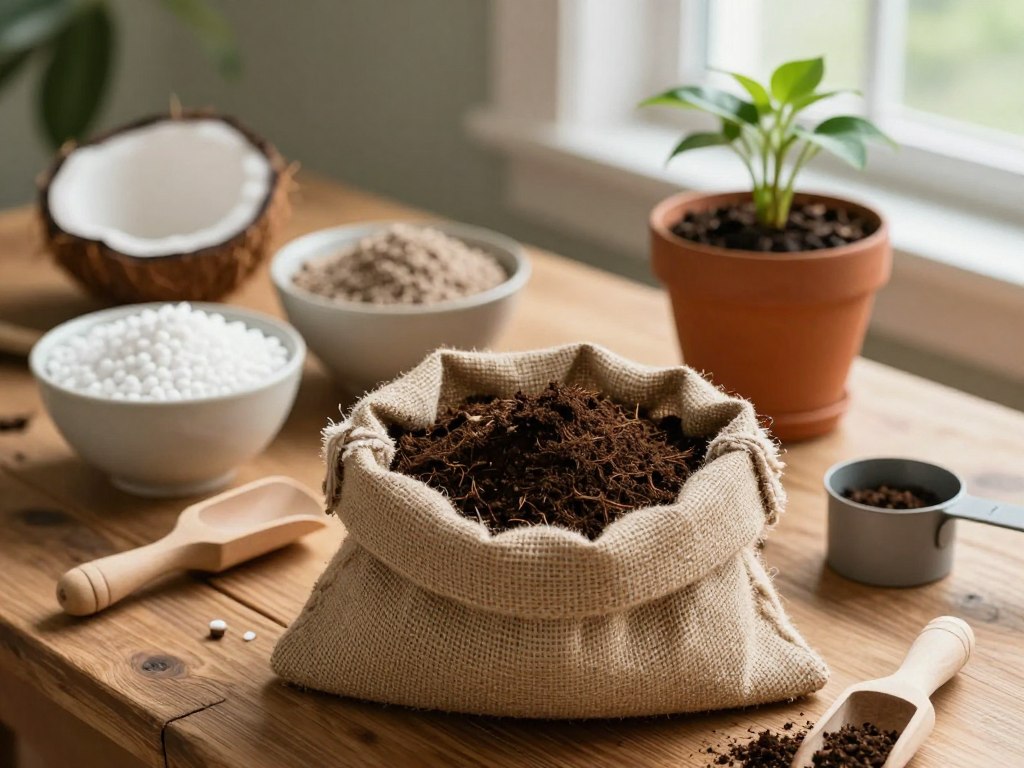
Ingredients checklist and where to buy them in the United States
- Compost — pick up at local garden centers, municipal compost programs, or stores like The Home Depot and Lowe’s.
- Coco coir — available from Amazon, Home Depot, and brands such as FoxFarm.
- Perlite or pumice — buy Miracle-Gro, Espoma, or nursery brands at Walmart or Gardener’s Supply.
- Coarse sand — sourced from landscape suppliers or big-box stores for drainage mixes.
- Worm castings — look for Uncle Jim’s or Unco Industries online and in specialty nurseries.
- Orchid bark — found at local nurseries and through national retailers for epiphyte mixes.
Basic recipes using parts (volume)
- All-purpose indoor mix: 2 parts coco coir : 1 part compost : 1 part perlite.
- Succulent/cactus mix: 1 part coir : 1 part coarse sand : 1 part perlite : 1 part compost (small amount).
- Vegetable container mix: 2 parts compost : 1 part coir : 1 part perlite : ½ part worm castings.
Measuring and mixing for consistency
Use volume measures like cups, buckets, or parts to keep recipes repeatable. Hydrate dry coco coir before use so it blends evenly. Sift compost to remove large debris. Mix on a clean tarp, in a wheelbarrow, or a 5-gallon bucket for small batches.
Wear mixing gloves and a dust mask when handling dusty materials. Clean tools between batches to avoid contamination. For larger runs, keep a master batch ratio printed and check by feel: the mix should be loose, not compacted.
Simple tests to validate your blend
- Squeeze test — compress a handful; it should hold shape but crumble easily. That shows good moisture retention without compaction.
- Drainage test — pour water through a potted sample and time how fast it exits. Aim for steady flow, not pooling.
- pH check — use a Rapitest kit to check acidity. Adjust with lime to raise pH or sulfur to lower it.
When deeper analysis helps
If you want precise nutrient data, send a sample to a lab such as Soil Savvy or your county extension. Labs give recommendations you can act on. Pair lab results with routine soil testing at home to fine-tune feeding and amendments.
Practical tip: Keep a small log of each batch: ingredient ratios, where to buy soil ingredients, and results from mixing potting soil tests. That record helps you repeat successful mixes and troubleshoot any issues.
When to use commercial potting mixes vs homemade blends
Choosing between commercial potting mix and DIY blends depends on convenience, cost, and plant needs. Ready-made bags save time and ensure sterility and texture. Homemade mixes let you control drainage, nutrients, and sustainability.
Benefits of high-quality commercial mixes
Brands like Espoma, FoxFarm, and Miracle-Gro offer top-notch commercial potting soil. These mixes have balanced ingredients, pre-measured fertilizers, and wetting agents. They provide a uniform blend that helps seedlings and sensitive plants.
Cost and customization advantages of DIY blends
DIY mixes save money, mainly for large quantities. You can use coco coir instead of peat, add perlite or pumice, and include local compost. This approach allows for tailored soils for specific plants.
How to read commercial mix labels and ingredient lists
When looking at potting mix labels, check for specific ingredients like sphagnum peat moss or coco coir, perlite or pumice, and composted bark. Look for N-P-K numbers and notes on sterilization and mycorrhizae. Avoid vague terms like “soil” without detail.
Certifications are important. OMRI-listed products are good for organic gardens. The US Composting Council Seal ensures quality compost. A detailed label helps you decide if the bag is right for your plants or if you need to add extra ingredients.
Consider convenience and control when deciding. Commercial mixes are quick and low-risk. DIY mixes offer tailored texture and sustainability.
Amendments, fertilizers, and slow-release options
Choosing the right additives for your soil helps plants thrive. Use soil amendments to adjust texture and nutrient holding. Pick fertilizers that match plant needs so you avoid waste and burn.
Choosing the right fertilizer for your soil mix
For containers, water-soluble options like Jack’s Classic or Miracle-Gro let you feed on a tight schedule when plants are active. Use Osmocote Smart-Release if you prefer a slow-release fertilizer that cuts down on weekly feeding. For outdoor beds, granular slow-release fertilizer works well in spring. Side-dress with compost or well-rotted manure to keep soils fertile without spikes in salts.
Match N-P-K ratios to plant goals. Leafy greens need higher nitrogen. Flowering and fruiting crops benefit from more phosphorus and potassium. Follow label rates to avoid fertilizer burn and watch plant response closely.
Organic amendments to boost microbial life
Organic fertilizers like worm castings, compost, kelp meal, bone meal, and blood meal feed plants and soil microbes at the same time. Brands such as Uncle Jim’s or FoxFarm Happy Frog offer worm castings that improve structure and nutrient availability.
Rock minerals like greensand and azomite add trace elements. Mycorrhizal inoculants such as MycoApply or Great White help transplants establish roots and access phosphorus. Use compost tea occasionally to stimulate beneficial soil microbes without overstimulating plants.
Timing and methods for feeding indoor and outdoor plants
Indoor plants benefit from dilute liquid feeding every 2–4 weeks during spring and summer. If you use slow-release products, reapply every 3–6 months depending on label guidance. Adjust feeding schedules when growth slows in fall and winter.
For outdoor plantings, apply in early spring and again midseason for long-season crops. Incorporate compost in fall to feed soil biology over winter. Always calibrate amounts, and observe plants for signs of over- or underfeeding.
| Use Case | Recommended Product Type | Common Brands | Timing |
|---|---|---|---|
| Indoor containers | Water-soluble; slow-release pellets | Jack’s Classic, Miracle-Gro, Osmocote Smart-Release | Liquid every 2–4 weeks; slow-release every 3–6 months |
| Outdoor beds | Granular slow-release; compost; well-rotted manure | Osmocote, local compost suppliers, farm manure | Early spring, midseason; add compost in fall |
| Boosting soil biology | Worm castings, compost tea, mycorrhizae, rock minerals | Uncle Jim’s, FoxFarm Happy Frog, MycoApply, Azomite | At planting and during active growth; compost tea monthly |
| Flowering/fruiting plants | Higher phosphorus and potassium blends | Tomato-specific organic blends, bone meal options | At planting and during bloom/fruit set |
Addressing common soil problems and disease prevention
Start by spotting soil problems early. Look for mushy roots, a foul smell, or plants that wilt even when wet. These signs mean root rot and waterlogged soils need quick action.
Dealing with root rot and waterlogged soils
If you find root rot, remove the plant and gently rinse the roots. Trim black or mushy tissue with sterile scissors. Repot into a fresh mix and let the root ball dry for a day before watering.
Add perlite or pumice to improve drainage and ensure pots have holes. For severe cases, use fungicides like phosphorous acid. But first, try airing out the soil and adjusting your watering.
Preventing soil-borne pests and pathogens
Use sterilized potting mixes for seedlings and avoid garden soil in containers. Solarize outdoor beds in hot months to lower pathogen loads. Check plants often for fungus gnats and other pests.
Use sticky traps to control adult pests. For gnat larvae, try products like Gnatrol. Rotate crops and keep tools clean to prevent disease spread in vegetable beds.
Sanitizing pots and refresh strategies for old soil
Scrub pots and soak them in a 10% bleach solution or 70% isopropyl alcohol. Rinse well and let them dry before reuse. When refreshing potting soil, remove the top 1–2 inches, add fresh compost, and a slow-release fertilizer.
If you reuse a lot of potting mix, mix in 20–50% fresh mix. For small batches, re-sterilize by baking or solarizing. These steps help prevent disease and keep your containers productive.
Seasonal soil care and repotting guidelines
Here’s a quick guide for repotting and caring for your soil all year. Good soil care keeps plants healthy and strong. It also helps fight off pests and diseases.
When to repot and how
Repot in spring when plants start growing again. Do it sooner if your plant’s roots are circling, growth is slow, or the soil dries out fast.
Here’s what to do: carefully lift the plant, cut off dead roots, and pick a pot that’s 1–2 inches bigger. Add fresh soil, water well, and then care for it as usual. Some plants, like Sansevieria, can handle being a bit root-bound without needing a bigger pot.
Preparing outdoor beds seasonally
In spring, test your soil, add compost, and adjust the pH if needed. Make raised beds if your soil doesn’t drain well. This is key for planting and early growth.
In summer, check if the soil is compacted and add compost after harvesting. In fall, spread a thick layer of compost or organic mulch to feed microbes over winter. Plant cover crops to prevent erosion and add nitrogen for spring planting.
Monitoring moisture and watering adjustments
Change your watering schedule with the seasons. Water less in winter when plants grow slower to avoid root rot. Water more in hot, dry weather. Adjust based on your soil type—sand drains quickly, while clay holds water longer.
Use a moisture meter or the finger test to see if your soil needs water. Mulch helps keep moisture in outdoor beds and means you won’t need to water as often.
Keep this guide and checklist handy. They’ll help you make the right choices for your indoor and outdoor plants all year.
Eco-friendly and sustainable soil practices
Improving your garden and container soils is easy with simple steps. Start by using compost and local materials wisely to reduce waste and enrich your soil. Small actions can make a big difference in protecting your soil and keeping water clean.
Using compost and local materials responsibly
Get compost from local programs or certified suppliers to avoid harmful contaminants. Making your own compost? Use hot composting to kill weed seeds and reach safe temperatures. Cold composting is okay for yard trimmings, but avoid fresh manure on veggies without aging it first.
Community composting and backyard systems help return organics to the soil and cut down landfill waste. Check your county Cooperative Extension for tips on what to compost and how to test it for safety.
Reducing peat use and choosing sustainable alternatives
Peat mining harms bog ecosystems and releases carbon. Opt for peat alternatives like coconut coir, well-rotted compost, or composted bark in potting mixes. Espoma Organic Potting Mix is a peat-free option for many gardeners.
Coconut coir is a good choice for water retention and aeration, with less environmental harm than peat. Mix coir with amendments to balance nutrients and prevent soil compaction over time.
Mulching and cover crops for outdoor soil health
Mulching with wood chips, straw, or shredded leaves saves moisture and fights weeds. It also adds organic matter slowly as it breaks down. Apply a 2–4 inch layer around beds, keeping mulch a few inches away from stems to avoid rot.
Cover crops like clover, rye, and vetch protect soil, improve its structure, and add nitrogen when turned under. Choose species based on your region and planting schedule. Local extension offices can suggest the best mixes.
| Practice | Benefits | Practical Tip |
|---|---|---|
| Composting | Builds organic matter, supports microbes, reduces waste | Use hot compost for food scraps; test finished compost before using on vegetables |
| Peat alternatives | Lower ecological impact, renewable options, good water retention | Mix coconut coir with compost and perlite for balanced potting mixes |
| Mulching | Moisture conservation, weed suppression, slow nutrient release | Apply 2–4 inches, avoid piling against stems and trunks |
| Cover crops | Erosion control, nitrogen fixation, improved soil structure | Plant clover or vetch in fall; mow and incorporate before flowering for best green manure |
| Local sourcing | Reduces transport emissions, supports community programs | Check county Cooperative Extension for supplier lists and testing services |
Conclusion
Remember, balanced soil is key for healthy plants. Look for a mix that holds water and nutrients, like compost or coir. It should also have air pockets from perlite or pumice. Adjust the pH or minerals with lime or sulfur.
This mix varies for indoor pots and outdoor beds. Choose the right texture for your plants, whether they’re succulents, tropicals, or vegetables.
Start by testing your soil and picking the right mix. Use fertilizers and organic amendments wisely. Begin with a DIY mix or a trusted commercial one from Miracle-Gro or Espoma.
Refine your mix based on how your plants do and a simple soil test. You can get this from a home improvement store or your county extension service.
Get the right supplies and watch your soil’s moisture and root health. Use compost and cut down on peat. This will help your plants grow stronger and more resilient.
Try a recommended potting mix recipe and see how your plants react. Adjust the mix as needed. Your plants will thank you with better growth and health.