About 76 million American households grow food at home. Spring is the peak season for vegetable planting. This shows how eager people are to grow fresh produce when weather warms up.
Spring offers the perfect window to start your vegetable garden. The soil warms up and daylight hours get longer. Many vegetables thrive during this season.
Knowing what to plant and when makes all the difference. Your success depends on choosing the right vegetables. Experience level doesn’t matter as much as timing.
Your spring garden can produce delicious vegetables in just weeks. Cool-season crops like lettuce and peas grow quickly. Warm-season vegetables like tomatoes need more time but reward patience.
This guide covers everything you need about spring vegetable planting. You will learn which vegetables work best for your region. We’ll show you how to prepare soil and grow healthy plants.
By the end, you will feel confident starting your spring garden. Fresh vegetables straight from your yard are within reach. Let’s get growing!
Why Spring is Ideal for Planting Vegetables
Spring brings the perfect weather for starting your vegetable garden. The soil warms up, daylight increases, and moisture levels balance out naturally. You get the best conditions for seeds to sprout and plants to grow strong.
Understanding when and where to plant makes all the difference in your gardening success. Spring offers advantages that fall and winter simply cannot match. Your plants get the jump-start they need for a bountiful harvest.
Benefits of Seasonal Planting
Planting vegetables during spring gives you real advantages over other seasons. Here’s what makes this time special:
- Soil temperatures rise to levels seeds need to germinate
- Rainfall becomes more regular, reducing watering work
- Longer days give plants more sunlight for growth
- Spring pests haven’t reached peak levels yet
- Young plants mature before intense summer heat arrives
- You harvest vegetables at their peak flavor and nutrition
Spring planting aligns with nature’s rhythm. Your vegetables grow faster and stronger when planted at the right time. You’ll spend less time fighting against weather patterns.
Understanding Growing Zones
Your location determines your ideal planting dates. The United States uses growing zones to help gardeners know when frost ends. Each zone has different spring timelines.
| Growing Zone | Last Frost Date Range | Spring Planting Window |
|---|---|---|
| Zone 3 | May 15 – May 31 | Late May to June |
| Zone 5 | May 1 – May 15 | Mid-May to June |
| Zone 7 | April 15 – April 30 | Late April to May |
| Zone 9 | March 15 – April 15 | Early April to May |
Find your zone using the USDA Plant Hardiness Zone Map online. Know your last frost date to plant cool-season crops before it and warm-season crops after it. This simple knowledge prevents frost damage and wasted seeds.
Top Vegetables to Plant in Spring
Spring brings exciting opportunities to grow fresh vegetables in your garden. Choosing the right crops for this season determines your gardening success. You can plant two types of vegetables in spring.
Cool-season crops love mild temperatures. Warm-season crops need warmth to thrive. Understanding which vegetables work best for your area helps you plan an abundant harvest.
Cool-Season Crops
Cool-season vegetables grow best when temperatures stay between 40°F and 70°F. You should plant these crops 4-6 weeks before your last frost date. You can also plant as soon as the soil can be worked.
These vegetables dislike heat. Planting them early in spring gives them time to mature before summer arrives.
Radishes are perfect for impatient gardeners and kids because they mature in just 25-30 days. Peas should be planted as soon as the soil can be worked. They dislike heat and produce better in cool conditions.
Other excellent cool-season choices include lettuce, spinach, broccoli, cabbage, and carrots.
| Vegetable | Days to Maturity | Planting Time | Growing Tip |
|---|---|---|---|
| Radishes | 25-30 days | 4-6 weeks before last frost | Plant every two weeks for continuous harvest |
| Peas | 60-70 days | As soon as soil can be worked | Plant early because they prefer cool weather |
| Lettuce | 45-60 days | 4-6 weeks before last frost | Harvest outer leaves for extended production |
| Spinach | 40-50 days | 4-6 weeks before last frost | Direct seed for better root development |
| Broccoli | 55-100 days | 4-6 weeks before last frost | Start as transplants indoors for earlier harvest |
| Carrots | 70-80 days | 4-6 weeks before last frost | Thin seedlings to prevent crowding |
Warm-Season Crops
Warm-season vegetables need temperatures above 60°F to grow well. Spring is still the ideal planting time for these crops. You plant them now for a summer harvest.
Most gardeners in the United States plant warm-season crops from late April through early June. This depends on their growing zone.
Plant warm-season crops 1-2 weeks after your last frost date. Make sure soil has warmed to at least 60°F. These vegetables include tomatoes, peppers, cucumbers, squash, zucchini, beans, corn, and eggplant.
Most of these crops are typically started as transplants. Beans and corn are exceptions. This gives them a head start on the growing season.
- Tomatoes: Start as transplants indoors 6-8 weeks before planting. They need full sun and warm soil.
- Peppers: Begin indoors 8-10 weeks early. They require consistent warmth and patience to fruit.
- Cucumbers: Plant as transplants or direct seed after all frost danger passes. They grow quickly in warm weather.
- Squash and Zucchini: Direct seed or use transplants after the soil warms. These vigorous growers produce abundantly.
- Beans: Direct seed when soil reaches 60°F. They dislike transplanting, so plant seeds where you want them to grow.
- Corn: Direct seed after frost danger ends. Plant in blocks for better pollination.
- Eggplant: Start indoors 8-10 weeks before transplanting. It needs warmth and patience to produce fruit.
Timing your planting correctly prevents frost damage. It also ensures your vegetables mature during ideal growing conditions. Check your local frost dates to plan your spring garden accurately.
Planting Techniques for Spring
Getting your spring garden off to a strong start means choosing the right planting method. You have two main options: direct seeding and using transplants. Each approach works best for different vegetables.
Direct Seeding vs. Transplants
Direct seeding means planting seeds straight into your garden soil. This works great for carrots, beans, peas, and radishes. Plant seeds 2-3 times as deep as the seed is wide.
Getting the spacing right matters too—follow your seed packet instructions for distance between seeds. Keep the soil moist until germination by checking your garden daily. Water gently so the soil stays consistently damp but not waterlogged.
Transplants are seedlings you start indoors 4-8 weeks before planting out. You can also purchase them from local nurseries. This method works best for tomatoes, peppers, eggplant, and brassicas like broccoli and cabbage.
Before moving your transplants outside, you need to harden them off. This means gradually acclimating them to outdoor conditions over 7-10 days. Place them in a sheltered spot for a few hours on day one.
Increase outdoor time each day. This toughens up the plants and prevents shock.
Companion Planting Strategies
Companion planting is a traditional technique that maximizes garden space and plant health. Smart plant pairing means your vegetables grow better. You get more from your garden.
Try these beneficial combinations:
- Plant lettuce between tomato transplants—lettuce matures quickly and will be harvested before tomatoes need space
- Grow basil near tomatoes to improve flavor and repel pests naturally
- Interplant radishes with carrots since radishes mature quickly and break up soil for slower-growing carrots
- Use the classic “Three Sisters” approach of corn, beans, and squash together
Stay away from certain pairings. Keep onions away from beans and peas—they don’t grow well together.
Build a spring vegetable planting schedule using succession planting. Stagger plantings every 2-3 weeks for crops like lettuce and radishes. This ensures continuous harvest rather than one overwhelming abundance.
| Planting Method | Best Vegetables | Timeline | Key Advantage |
|---|---|---|---|
| Direct Seeding | Carrots, beans, peas, radishes | Plant after last frost | Fast and economical |
| Transplants | Tomatoes, peppers, eggplant, broccoli, cabbage | Start indoors 4-8 weeks before planting | Head start on growing season |
| Succession Planting | Lettuce, radishes, spinach | Every 2-3 weeks throughout spring | Continuous harvest all season |
Soil Preparation for Spring Gardening
Getting your soil ready in spring sets the foundation for a successful vegetable garden. Healthy soil means your plants will grow stronger and produce better harvests. The work you do now will pay dividends throughout the entire growing season.
Before you plant anything, take time to understand what your soil needs.
Testing Your Soil
Start by testing your soil to learn what nutrients it contains. A soil test tells you important information about your garden bed. You’ll discover the pH level, nitrogen, phosphorus, and potassium levels.
Most vegetables prefer a pH level between 6.0 and 7.0. If your soil test shows a pH below 6.0, your soil is too acidic. If it’s above 7.5, your soil is too alkaline.
These numbers matter because they affect how plants absorb nutrients from the ground.
You can get soil tests through your local university extension office. You can also use a home testing kit from garden centers like Burpee or Johnny’s Selected Seeds. Understanding these numbers helps you plant vegetables that will thrive in your specific conditions.
| Nutrient | What It Does | Signs of Deficiency |
|---|---|---|
| Nitrogen | Helps leaves grow green and strong | Yellow leaves, slow growth |
| Phosphorus | Builds strong roots and flowers | Purple-tinted leaves, weak roots |
| Potassium | Improves plant health and disease resistance | Brown edges on leaves, weak stems |
| Micronutrients | Support plant functions and flavor | Yellowing between leaf veins |
Nutrient Amendments to Consider
Once you have your soil test results, you can fix any problems. Start with organic matter—this is the best solution for almost every soil type. Spread 2 to 3 inches of compost, aged manure, or leaf mold over your garden bed.
Work it into the top 6 to 8 inches of soil. Organic matter lightens heavy clay and helps sandy soil retain moisture. It also feeds beneficial soil microorganisms that keep your garden healthy.
If your soil is too acidic (below 6.0), add lime to raise the pH level. Spread it across your garden according to package directions. If your soil is too alkaline (above 7.5), mix in sulfur or add more organic matter.
For specific nutrient needs, try these amendments:
- Nitrogen deficiency: Add compost, aged manure, or organic fertilizers like blood meal
- Phosphorus deficiency: Use bone meal mixed into the soil
- Potassium deficiency: Apply greensand or kelp meal to boost levels
Timing matters for spring soil preparation. Start as soon as the ground can be worked, but wait until the soil isn’t too wet. Squeeze a handful of soil in your hand.
If it forms a muddy ball, it’s too wet. If it crumbles apart easily, you’re ready to work. This simple test prevents soil damage and gives your vegetables the best start possible.
Pest and Disease Prevention in the Spring
Spring brings new growth to your vegetable garden, but it also invites unwanted visitors. Pests and diseases thrive during warmer months when moisture levels rise. You need to stay alert and protect your plants early in the season.
Taking action now prevents bigger problems later. A healthy garden starts with smart prevention strategies that keep your vegetables strong and productive.
Common Spring Pests
Spring pests can damage your young plants quickly. You’ll want to identify these troublemakers before they cause serious harm to your vegetable crops.
- Aphids – Small insects that cluster on new leaves and stems
- Cutworms – Larvae that cut seedlings at ground level
- Slugs and snails – Mollusks that create holes in leaf tissue
- Flea beetles – Tiny jumping insects that damage young plants
- Spider mites – Microscopic pests that cause yellowing leaves
| Pest Name | Signs of Damage | Affected Vegetables | Peak Activity |
|---|---|---|---|
| Aphids | Sticky residue, curled leaves | Lettuce, cabbage, kale | April–June |
| Cutworms | Severed seedlings | Tomatoes, peppers, beans | May–July |
| Slugs | Irregular holes in leaves | Lettuce, spinach, chard | March–June |
| Flea beetles | Tiny round holes | Cabbage, radish, eggplant | April–August |
| Spider mites | Fine webbing, yellowed leaves | Peppers, squash, beans | May–September |
Natural Remedies to Keep Plants Healthy
You don’t need harsh chemicals to protect your spring vegetables. Natural solutions work effectively and keep your garden safe for you and your family.
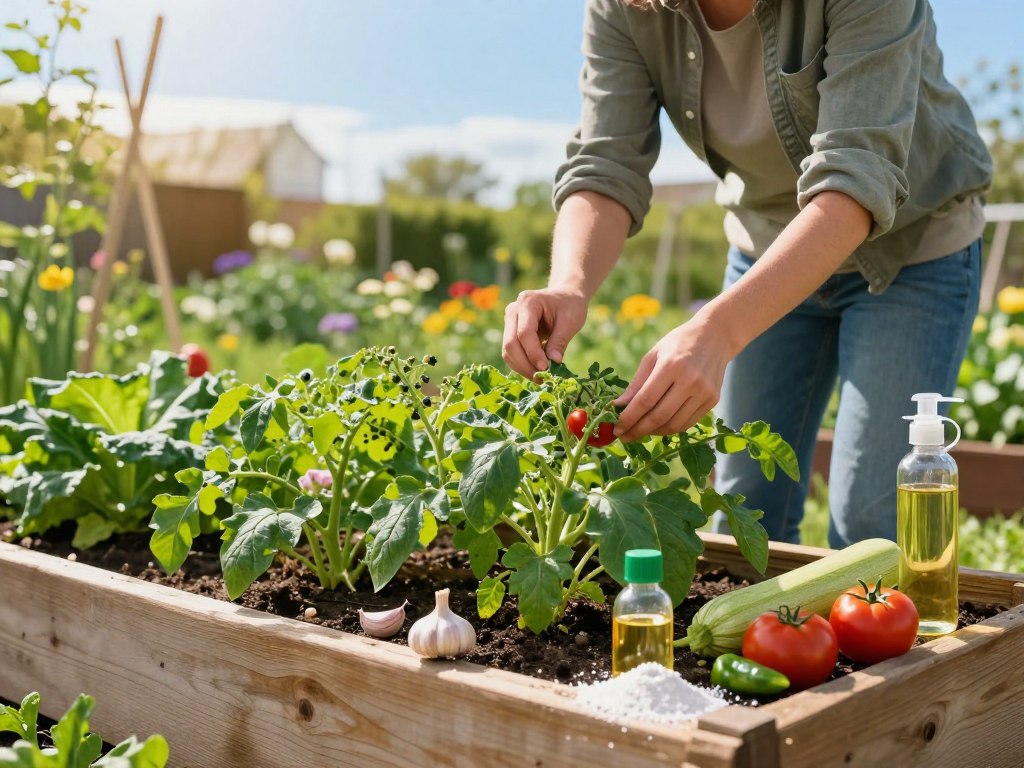
- Neem oil spray – Apply every 7–10 days to control aphids and spider mites
- Diatomaceous earth – Dust food-grade powder on leaves to manage flea beetles and slugs
- Insecticidal soap – Use on soft-bodied insects like aphids and whiteflies
- Companion plants – Plant garlic, chives, and nasturtiums to repel common pests
- Hand-picking – Remove larger pests like slugs and caterpillars by hand
- Copper tape barriers – Create slug and snail barriers around vulnerable plants
Inspect your plants regularly during spring. Catching problems early makes treatment easier. You’ll notice healthier growth when you stay on top of pest management.
Watering Practices for New Plants
Watering your spring vegetables correctly sets the foundation for a healthy, productive garden. Many new gardeners struggle with finding the right balance between too much and too little water. Learning your plants’ water needs helps them thrive during their critical early growth stages.
Spring brings unpredictable weather patterns. Understanding how to monitor and adjust your watering approach becomes essential for success.
Understanding Plant Water Requirements
Your vegetables need consistent moisture to grow strong roots and produce quality crops. Most vegetables need about 1-1.5 inches of water per week from rain or irrigation combined. You should not rely solely on spring rainfall, even though spring typically provides more natural rainfall.
During dry spells, you must actively monitor soil moisture. This ensures your plants receive adequate water.
Check your soil regularly to determine when watering is necessary. Stick your finger 2-3 inches into the soil. If it feels dry at that depth, it’s time to water.
This simple test tells you what’s happening below the surface where roots actually grow. Avoid guessing based on surface appearance alone.
Container vegetables require special attention since they dry out faster than in-ground plants. Pots lack the surrounding soil that helps retain moisture. You should water container vegetables more frequently.
As your plants mature and weather shifts from cool spring to hot summer, adjust your watering schedule. Seedlings need gentle moisture, while established plants tolerate deeper, less frequent watering.
Strategies for Efficient Watering
The method you choose for watering affects both plant health and water conservation. Drip irrigation and soaker hoses deliver water directly to the root zone with minimal waste. These systems prove especially valuable during warm weather when surface water evaporates quickly.
If you use sprinklers or hand-watering, apply water in the morning. This timing allows foliage to dry during the day. It reduces disease risk from fungal issues.
Wet leaves sitting in cool morning temperatures are less prone to problems. Damp foliage during warm afternoons causes more issues.
- Water deeply but less frequently to encourage roots to grow deeper into the soil
- Shallow, frequent watering keeps roots near the surface where they’re vulnerable to heat and drought
- Apply mulching strategies to conserve soil moisture and regulate temperature
- Check soil moisture regularly rather than following a rigid watering schedule
- Adjust watering frequency as temperatures rise throughout spring and into summer
Proper watering of vegetables to plant in spring depends on consistency and observation. Watch your plants closely, feel the soil regularly, and respond to changing weather conditions. This approach works better than any fixed schedule because every garden is different.
Seasonal Care for Your Spring Vegetables
Keeping your spring vegetable garden healthy requires consistent maintenance. Two essential practices—weeding and mulching—work together to create a thriving garden space. These tasks might seem simple, but they make a real difference in your plants’ success.
Spending just 15 minutes every few days on these activities beats spending hours fighting an overgrown jungle later.
Weeding Techniques
Weeds compete with your vegetables for water, nutrients, and sunlight. The good news is that you have several effective methods to remove them. Timing matters greatly when you weed.
The best time to weed is right after watering or rain. Soft soil allows roots to come out more easily.
Choose your weeding method based on your garden size and weed situation:
- Hand-pulling works best for small garden areas and when soil is moist. Grasp weeds at the base and pull steadily to remove the entire root system
- Hoeing is great for larger areas, cutting weeds just below the soil surface with quick, shallow strokes
- Shallow scraping near vegetables prevents root damage that deep cultivation can cause
Regular weeding prevents small problems from becoming big ones. Consistent maintenance beats occasional heavy-duty sessions every time.
Mulching Benefits
Mulching is one of the smartest investments you can make in your garden. A 2-3 inch layer of organic mulch serves multiple important purposes at once. Materials like shredded leaves, straw, grass clippings, or wood chips work wonderfully.
| Mulching Benefit | How It Works | Your Garden Impact |
|---|---|---|
| Weed Suppression | Blocks light from reaching weed seeds | Fewer weeds to pull, less time weeding |
| Moisture Conservation | Reduces soil evaporation | Less frequent watering needed |
| Temperature Moderation | Keeps soil cooler in late spring and early summer | Protects roots from heat stress |
| Soil Improvement | Adds organic matter as it breaks down | Richer, healthier soil over time |
Timing and technique matter for applying mulch. Wait until the soil warms in spring and your plants are established before mulching. Keep mulch several inches away from plant stems to prevent rot and pest problems.
As mulch decomposes throughout the season, replenish it to maintain that protective 2-3 inch layer.
Organic mulches are preferable to inorganic options like landscape fabric for vegetable gardens. Organic materials improve soil as they decompose, creating an ecosystem that supports healthy plant growth. For vegetables to plant in spring, mulching proves especially valuable as weather transitions.
Think of weeding and mulching as investments in your garden’s future. These maintenance tasks save you time and effort in the long run. They create a healthier, more self-sustaining garden ecosystem.
Harvesting Your Spring Vegetables
Knowing when and how to harvest your spring vegetables makes all the difference in your garden’s success. Growing your own vegetables means picking them at peak ripeness and flavor. Fresh vegetables picked at the right moment taste better and contain more nutrients than store-bought produce.
Timing your harvest correctly ensures you get the best quality crops. Each vegetable type has its own signs telling you it’s ready to pick. Learning these signals helps you gather vegetables when they’re most tender and delicious.
Signs of Ripeness
Different spring vegetables show readiness in different ways. Lettuce and spinach leaves should feel tender and crisp when you touch them. Peas in the pod should feel full and slightly firm to the touch.
Broccoli heads work best when they’re tight and dark green, before the buds start to flower. Radishes are ready when they reach about one inch in diameter. You can gently pull back the soil to check their size.
Carrots develop their sweetest flavor when they’re medium-sized. Asparagus spears should be firm and about six to eight inches tall.
- Look for vibrant colors on all vegetables
- Feel the texture to check for firmness
- Check size guides for each vegetable type
- Harvest early in the morning for best flavor
Best Practices for Harvesting
Use clean, sharp tools when picking your vegetables. A sharp knife or pruning shears prevents damage to your plants and other nearby crops. Cut vegetables rather than pulling them to avoid disturbing roots in the soil.
Harvest regularly to encourage more growth. Picking vegetables when they’re young keeps plants producing throughout the season. Don’t wait too long to harvest, as overripe vegetables become tough and less flavorful.
After harvest, proper storage keeps your vegetables fresh. Most spring vegetables keep best when refrigerated. Store leafy greens in plastic bags with paper towels to absorb moisture.
Keep root vegetables in the crisper drawer away from fruits that produce ethylene gas. Tomatoes should be stored at room temperature to preserve their flavor.
| Vegetable | Harvest Size | Storage Method | Shelf Life |
|---|---|---|---|
| Lettuce | 6-8 inches tall | Refrigerate in plastic bag | 7-10 days |
| Peas | Full but tender pods | Refrigerate in bag | 5-7 days |
| Broccoli | Tight green heads | Refrigerate in bag | 7-10 days |
| Radishes | 1 inch diameter | Refrigerate with tops removed | 10-14 days |
| Carrots | Medium size | Refrigerate in bag | 14-21 days |
| Tomatoes | Full color, slight give | Room temperature | 5-10 days |
Handle your freshly picked vegetables gently to avoid bruising. Bruised spots can cause vegetables to spoil faster. Rinse vegetables just before eating rather than right after harvest.
Excess moisture encourages mold growth during storage. The reward for all your garden work comes when you bite into vegetables you grew yourself. That fresh, crisp taste and vibrant flavor remind you why home gardening brings such joy.
Troubleshooting Common Spring Gardening Issues
Spring gardening brings excitement and fresh possibilities for your vegetable garden. Yet weather swings and germination delays can test your patience. These challenges are normal and manageable.
Understanding how to handle them keeps your garden on track for success.
Dealing with Weather Variations
Spring weather shifts quickly. One day brings warm sunshine, and the next brings frost. These temperature swings stress young plants.
Cold snaps can damage tender seedlings you planted early. Protect your plants by watching the forecast closely. If frost threatens, cover seeded areas with light mulch or burlap.
Row covers work great for this purpose. Remove covers during the day if temperatures climb above 60 degrees.
Early plantings sometimes struggle due to cold, wet soil. If your first planting disappoints, don’t feel discouraged. Later plantings often perform better once soil warms up naturally.
Handling Slow Germination
Some seeds test your patience more than others. Carrots and parsley are naturally slow germinators, taking 10-21 days to sprout. This doesn’t mean something went wrong.
- Water gently with a fine spray to keep soil moist without washing seeds away
- Keep soil consistently damp during the germination window
- Be patient and resist the urge to dig up seeds to check them
- Mark rows clearly so you don’t accidentally plant over them
Maintain steady moisture by covering seeded areas with light mulch or burlap. This keeps soil temperature stable and prevents crusting. Check soil daily and water gently when the top feels dry.
Germination timing varies by seed type and soil temperature. Later sowings often germinate faster as conditions improve. Your persistence pays off with healthy seedlings.
Enjoying Your Fresh Vegetables
Your spring garden is now full of fresh, homegrown vegetables. It’s time to enjoy all your hard work by cooking with these vibrant ingredients. Fresh vegetables from your garden taste better than store-bought options.
They’re packed with nutrients and flavor that make your meals special.
Simple Recipe Ideas
Start with easy recipes that let your vegetables shine. Fresh spinach and lettuce work great in salads with a simple vinaigrette. Roast your carrots and radishes with olive oil and garlic for a tasty side dish.
Tomatoes, once they appear, pair well with basil in a classic Caprese salad. Broccoli and peas steam quickly and taste amazing with just a bit of butter.
You can toss your spring vegetables into pasta dishes, stir-fries, and soups. Peas work perfectly in rice bowls with soy sauce and ginger. Leafy greens blend into smoothies for extra nutrition.
Zucchini noodles create a light, fresh pasta alternative. These recipes take less than thirty minutes to prepare.
Preserving Your Harvest
Not all your vegetables ripen at once. Learn ways to keep them fresh longer. Wash and dry your produce well before storing it in the refrigerator.
Most vegetables last longer in the crisper drawer where moisture stays controlled. Herbs like basil stay fresh when you place stems in water like a bouquet.
For long-term storage, try freezing extra vegetables. Blanch peas, beans, and broccoli in boiling water for two to three minutes. Then freeze them in bags.
You can also pickle vegetables like cucumbers and radishes for tangy snacks. Canning tomatoes creates pasta sauce you’ll enjoy through winter. Dried herbs from your garden add flavor to meals year-round.