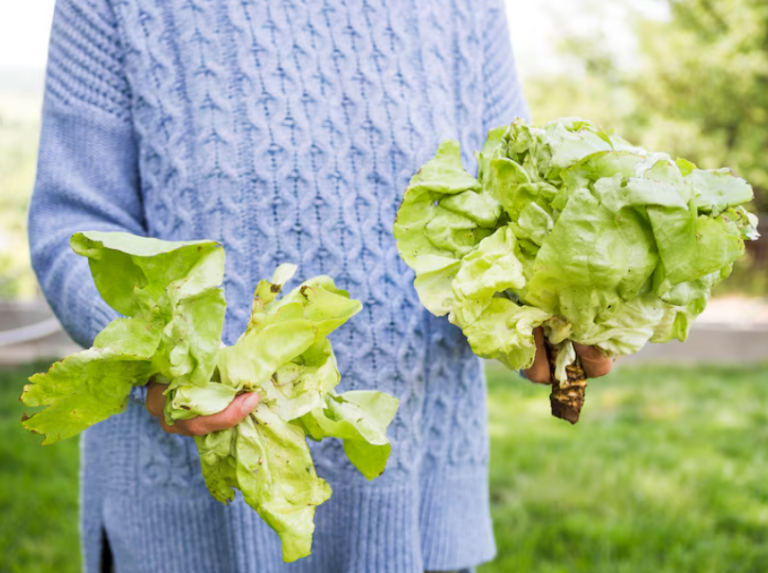
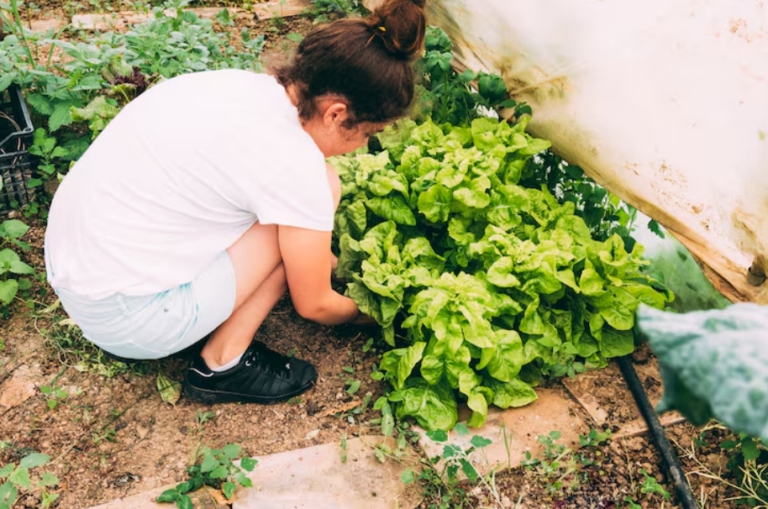
Did you know a single 4-shelf grow-light rack can produce as much lettuce in a year as a 500-square-foot backyard garden? This shows why many people grow veggies indoors for fresh produce all year.
This guide will teach you how to grow veggies indoors all year. You’ll learn to get fresher produce, save money, and enjoy the mental benefits of gardening at home.
Winter can stop outdoor gardens in northern states or if you live in an urban apartment. Indoor gardening gives you control. It works from a single herb pot to a big LED setup for a family.
The article will guide you step-by-step. You’ll learn about the best plants, lighting, containers, and soil. You’ll also learn about watering, fertilizing, pest control, and managing temperature and humidity.
Read on for checklists, schedules, and product recommendations. You’ll find out about LEDs, potting mixes, and timers. This will help your indoor gardening project succeed, whether you’re growing basil or a full indoor garden.
Why grow vegetables indoors: benefits of year-round gardening
Bringing vegetables inside lets you control their growth. You can adjust light, temperature, humidity, and CO2 levels. This helps plants grow faster and ensures a steady supply of fresh produce.
Control over growing conditions for consistent harvests
Managing light and temperature helps seedlings grow smoothly. Stable humidity and air exchange reduce disease and improve root health. This leads to reliable harvests.
Access to fresh produce regardless of season
Growing indoors means fresh greens and herbs all year. You can pick herbs for dinner and salad greens for lunch. This keeps your food full of vitamins and flavor.
Reduced pest problems and improved food safety
Indoor gardens have fewer pests like aphids and slugs. This means less need for pesticides. Still, watch for pests like fungus gnats and keep your garden clean.
| Advantage | What you control | Practical benefit |
|---|---|---|
| Environmental control | Light, temperature, humidity, CO2 | Faster growth and predictable timelines for consistent harvests |
| Year-round access | Continuous sowing and harvesting cycles | Fresh, nutrient-rich produce on demand regardless of season |
| Pest and pathogen reduction | Cleaner media, filtered water, quarantined plants | Fewer pesticide needs and safer, safe homegrown vegetables |
| Convenience | Proximity to kitchen, harvest timing | Better meal planning and less food waste |
How to grow vegetables indoors: choosing the best plants for indoor growing
Choosing the right plants makes indoor gardening easy and fun. Look for plants that do well in low light, small pots, and steady temperatures. Below, you’ll find great picks for quick-growing greens and herbs, compact fruits, and tips for growing seeds in containers.
Quick-growing leafy greens and herbs
Leafy greens grow fast and give you a steady supply. Try butterhead and romaine lettuces, arugula, baby spinach, and baby kale. They’re ready in three to six weeks for baby leaves.
Herbs also do well with less light. Basil, cilantro, parsley, chives, and mint are great choices. They grow in four to eight weeks and add fresh flavor to your cooking.
Compact fruiting vegetables that thrive inside
Fruiting plants need more care but can grow in small spaces. Look for dwarf and patio varieties like Micro Tom and Tiny Tim tomatoes for sunny spots.
Patio cucumbers, dwarf peppers, and container strawberries are good for fruit without big roots. Use stakes or small trellises and prune to keep them small. Help with pollination to get more fruit.
Seed varieties and cultivars suited to containers
Choose determinate and bush types for easy size and harvest. Check seed packets for days-to-maturity, height, and disease resistance before buying.
Trust U.S. seed suppliers like Burpee, Johnny’s Selected Seeds, and Baker Creek Heirloom Seeds for good container varieties. Buying healthy seedlings from local nurseries in spring can save time.
| Category | Examples | Days to Harvest | Container Tip |
|---|---|---|---|
| Leafy Greens | Butterhead lettuce, Romaine, Arugula, Baby spinach, Baby kale | 21–42 days (baby leaves) | Shallow trays, 6–8 inch depth; regular harvesting |
| Indoor Herbs | Basil, Cilantro, Parsley, Chives, Mint | 28–56 days for usable growth | 4–6 inch pots; trim to promote bushiness |
| Compact Fruit | Micro Tom, Tiny Tim, Patio cucumber, Mini bell, Jalapeño, Container strawberries | 50–90 days depending on crop | 8–12 inch pots for peppers; 5–7 gallon for tomatoes |
| Seed Sources | Burpee, Johnny’s Selected Seeds, Baker Creek | Packet info varies | Choose determinate/bush varieties; check days-to-maturity |
Lighting options for indoor vegetable gardens
Good light is key for a thriving indoor garden. First, check how much natural light your plants get. Then, add indoor grow lights where sunlight is lacking. Use simple tests and guidelines to find the right light for your crops.
Natural light assessment and window placement
Start by looking at your window’s direction. In the US, south-facing windows get the most light. East and west windows are good for morning and afternoon sun. North windows have less direct light, so plan carefully.
Do a midday shadow test. Hold your hand a few inches above a surface under the window. A sharp shadow means strong direct light. A soft shadow means diffuse light that still supports seedlings and many greens.
Measure if you can. A light meter showing foot-candles or lux helps decide when to add indoor grow lights. If values fall below recommended levels for your crop, supplement with artificial light.
Grow light types: LED vs fluorescent vs HID
LED grow lights are energy-efficient and last long. Brands like Samsung, Mars Hydro, and Spider Farmer offer full-spectrum fixtures that run cool. They work well for all stages and fit small apartments because they emit low heat.
Fluorescents such as T5 fixtures are budget-friendly. They suit seedlings, herbs, and leafy greens. You will place them close to plants, usually 2–6 inches, to keep intensity up without burning foliage.
HID systems, like metal halide and high-pressure sodium, deliver high intensity for larger setups. They use more power and produce heat, so you need ventilation and distance controls. Choose HID only for high-yield or commercial-style growing areas.
Light schedules and intensity recommendations
Match duration and intensity to plant needs. For leafy greens, plan a light schedule for indoor vegetables of about 12–16 hours per day at moderate intensity, roughly 100–300 μmol·m−2·s−1. Lettuce, spinach, and herbs tolerate longer dark periods, but avoid constant light.
Fruit-bearing crops such as tomatoes and peppers need stronger light and longer hours. Aim for 14–18 hours per day at 300–600 μmol·m−2·s−1. Use dimmable fixtures and timers to mimic natural cycles and prevent stretch or stress.
Invest in tools for accuracy. Quantum sensors or simple PAR meters measure usable light for photosynthesis. Timers automate the light schedule for indoor vegetables so you maintain consistency with minimal effort.
Practical placement and heat management
Keep LED grow lights 12–36 inches above canopy depending on wattage and design. Lower fluorescent tubes to within a few inches of young plants to boost intensity. For HID, allow greater distance and add fans or vents to remove heat.
Use reflective walls or mylar to bounce light back to plants and improve efficiency. If heat builds up, adjust height or switch to a cooler LED model. Proper placement extends bulb life and keeps your indoor garden healthy.
Quick decision guide
- Choose LEDs for energy savings, low heat, and full-spectrum needs.
- Pick T5 fluorescents for tight budgets and seedlings.
- Reserve HID for large, high-light-demand setups with good ventilation.
- Combine natural light for plants with indoor grow lights when windows can’t meet crop needs.
Container and soil selections for indoor vegetables
Choosing the right pots and soil is key for a successful indoor garden. Your containers should fit the size and spot of your plants. Using the right mix and reusing containers helps your veggies grow well and saves waste.
Picking the right pots for root space and drainage
Choose pots based on what your plants need. Lettuce and greens do well in 6–8 inch pots. Most herbs need 6–10 inch containers. Tomatoes or peppers need 5–7 gallon pots for their roots.
Make sure your pots have holes for drainage. Use saucers or trays to protect floors and furniture.
Containers that breathe well are best. Terra cotta and fabric grow bags are great for this. Smart Pots are good for fabric options. Hydrofarm offers quality plastic pots that drain well.
Soil mixes and amendments for healthy root systems
Don’t use garden soil indoors. Choose a sterile mix that drains fast. Look for mixes with peat moss, perlite, and composted bark.
Feed your plants with organic fertilizers, worm castings, or compost tea. Add lime if the mix is too acidic. Remember, wet mixes are heavy. Check if your shelves can hold them.
Reusable vs disposable containers and sustainability tips
Reusing nursery pots saves money. Clean them with a bleach solution or hydrogen peroxide between uses. This prevents disease.
Use food-grade buckets or compostable pots for starts. Look for planters made from recycled materials or FSC-certified wood. Choose durable options for long-term use to reduce waste and costs.
In small spaces, pick pots that drain well and breathe. Use a good potting mix for your plants. These small choices help your indoor garden grow well and save time and resources.
Watering and fertilizing strategies for indoor vegetable success
Getting water and nutrients right is key to a thriving indoor garden. Create a watering schedule that fits each plant’s needs. Choose the right fertilizer for your vegetables and keep an eye on humidity to keep roots healthy.
How often to water and how to spot problems
Leafy greens like lettuce and spinach like moist soil. Water them every 2–4 days, depending on the pot size and soil type. Tomatoes and peppers need steady moisture but can handle a bit of drying between waterings. Water them every 3–7 days, based on the pot’s depth and the room’s temperature.
Watch for signs that your plants need water. If leaves droop or turn yellow, and the soil feels dry, they need more water. On the other hand, if the soil is too wet, you’ll see mold, slow growth, or a bad smell. Use a moisture meter or the finger test to avoid overwatering and protect the roots.
Fertilizer types, schedules, and organic options
Balanced fertilizers, like a 20-20-20 formula, feed both leaves and roots well. For plants that produce fruit, like tomatoes, use a fertilizer with more phosphorus and potassium. Slow-release fertilizers provide nutrients over weeks.
Organic fertilizers are great for indoor gardens. Fish emulsion gives quick nitrogen, while worm castings provide steady nutrients. Kelp meal adds trace minerals, and compost tea is a gentle feed. Follow a simple schedule: dilute liquid fertilizers every 1–2 weeks or apply slow-release at planting time and follow the label’s reapplication schedule.
Managing humidity and avoiding salt build-up
Most vegetables prefer 40–60% relative humidity. Use a tabletop humidifier in dry winter months to raise humidity. If you see condensation, mold, or dampness, use a dehumidifier or improve air circulation to lower humidity.
Salt build-up appears as a white crust on the soil’s edge. Flush pots every 4–6 weeks with deep watering to remove salts. Use low-salt or controlled-release fertilizers. If your tap water is high in dissolved solids, consider using reverse-osmosis or filtered water.
| Crop Type | Typical Watering | Recommended Fertilizer | Humidity Range |
|---|---|---|---|
| Leafy greens (lettuce, spinach) | Every 2–4 days; keep evenly moist | Balanced liquid (e.g., 20-20-20) or compost tea every 1–2 weeks | 45%–60% |
| Herbs (basil, parsley) | Every 3–5 days; allow slight drying at surface | Half-strength soluble feed weekly or worm castings at potting | 40%–55% |
| Fruiting crops (tomato, pepper) | Every 3–7 days; consistent moisture with brief drying cycles | Higher P/K bloom-boosting formula during fruiting; liquid feed every 1–2 weeks | 45%–60% |
| Root crops (radish, carrot) | Every 3–6 days; steady moisture for even root development | Balanced slow-release at potting, supplement with diluted liquid once monthly | 40%–55% |
Pest and disease management for indoor vegetable gardens
Keeping your indoor garden healthy means knowing what to look for and acting quickly. Early signs of trouble are often small. Catching issues early saves time and protects your harvest when growing lettuce, tomatoes, herbs, or peppers inside.
Common indoor pests and how to spot them early
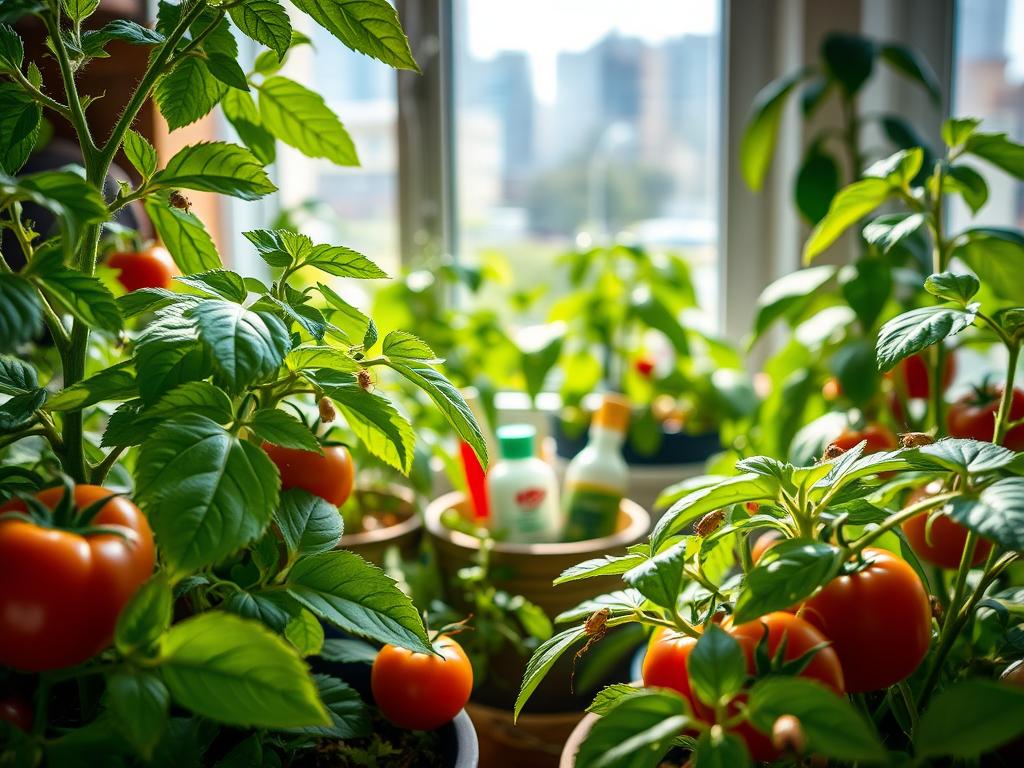
Watch for tiny flying insects, sticky residue on leaves, or fine webbing between stems. Fungus gnats leave larvae in wet soil and appear as small black flies. Spider mites cause stippled leaves and may form delicate webs.
Aphids and whiteflies cluster on new growth, causing distorted leaves. Mealybugs show up as cottony white patches on stems and leaf joints.
Early signs include honeydew that makes leaves shiny, yellowing or stippling of foliage, and visible eggs or larvae in the soil or on undersides of leaves. Check plants at least once a week to catch these symptoms before infestations spread.
Organic and natural control methods you can use indoors
Sticky traps catch flying adults for monitoring and reduction. Neem oil and insecticidal soap work well against soft-bodied insects when used correctly. Bacillus thuringiensis targets certain caterpillar larvae without harming beneficials.
If you manage plants inside a contained space or greenhouse, consider beneficials like Hypoaspis miles to reduce fungus gnat larvae. Always use organic pest management products designed for indoor use, read labels, and avoid overapplication to keep your edible crops safe.
Prevention strategies: cleanliness, quarantine, and airflow
Start with sterile potting mix and clean pots. Wash tools and your hands before handling plants. Isolate new purchases for one to two weeks to stop pests from entering your main collection.
Improve airflow with a small fan to reduce humidity pockets that favor fungal growth. Remove dead foliage promptly and wipe windowsills and walls to reduce hiding spots for pests. Regular monitoring and simple hygiene are the best ways to prevent plant diseases indoors and reduce the need for reactive pest control indoor vegetables.
| Problem | Early Signs | Organic Fix | Prevention |
|---|---|---|---|
| Fungus gnats | Small black flies; larvae in wet soil | Sticky traps; Hypoaspis miles; let soil dry between waterings | Use sterile mix; avoid overwatering; monitor weekly |
| Spider mites | Fine webbing; stippled or yellowing leaves | Insecticidal soap; neem oil; increase humidity briefly | Improve airflow; inspect undersides of leaves |
| Aphids | Clusters on new growth; distorted leaves; honeydew | Neem oil; insecticidal soap; blast with water | Quarantine new plants; clean tools; monitor regularly |
| Whiteflies | Tiny white moth-like flies; sticky residue | Yellow sticky traps; neem oil; insecticidal soap | Keep foliage dry; remove infested leaves; monitor |
| Mealybugs | Cottony white patches on stems and nodes | Isopropyl alcohol swabs; insecticidal soap; neem oil | Inspect new plants; clean crevices; maintain hygiene |
Temperature and humidity control for year-round growth
Right indoor garden temperature and moisture are key for a constant harvest. You’ll set day and night targets and choose tools to monitor them. Adjusting heat and humidity is crucial for healthy plants.
Optimal temperature ranges for common indoor vegetables
Leafy greens like most do well at 65–75°F during the day. Cooler nights, 5–10°F lower, help plants grow stronger.
Tomatoes and peppers need 70–80°F days. Nights around 60–70°F can help them produce more fruit.
Basil likes warmer nights, close to day levels. Lettuce and spinach can handle nights as low as 55–65°F.
Tools to monitor and regulate humidity and temperature
AcuRite and ThermoPro make digital thermometers and hygrometers for accurate readings. Place sensors near the plants and at pot level for a full view of conditions.
Use thermostats with heaters for temperature boosts. Small fans help keep air moving and prevent hot or cold spots.
Humidifiers and dehumidifiers help keep humidity in check. Smart plugs and thermostats like Nest or Ecobee automate gardening and save energy.
Seasonal adjustments to keep plants productive
In summer, reduce grow light intensity or shorten use if sun increases. Good ventilation prevents overheating and fungal growth.
In winter, humidify to combat dry air. Soil moisture checks are more important in dry air to avoid overwatering.
Adjust feeding and watering based on growth rates. Faster growth in warm months means more frequent watering. Slower growth in cool months means less feeding to avoid nutrient burn.
| Crop group | Day temp (°F) | Night temp (°F) | Relative humidity target (%) | Notes |
|---|---|---|---|---|
| Leafy greens (lettuce, spinach) | 65–75 | 55–65 | 50–70 | Tolerant of cooler nights; avoid high heat to prevent bolting. |
| Herbs (basil, cilantro) | 68–78 | 65–75 | 50–65 | Basil prefers warmer nights; cilantro enjoys slightly cooler conditions. |
| Fruiting crops (tomato, pepper) | 70–80 | 60–70 | 50–70 | Keep nights cooler to aid fruit set; maintain airflow to avoid disease. |
| Microgreens and seedlings | 65–75 | 60–68 | 60–75 | Higher humidity helps germination; reduce once true leaves appear. |
Vertical and space-saving techniques for small indoor spaces
Maximize a small room by stacking plants up and in. Vertical gardening turns walls and corners into useful spaces. You can create a garden in a balcony, pantry, or sunny hallway without taking up too much space.
Choose strong shelving and flexible lighting to keep plants healthy. IKEA metal racks and adjustable LED bars are good choices. You can find stackable pots and modular wall planters on Amazon and from local hydroponic suppliers.
Vertical shelving, hanging planters, and wall gardens
Use multi-tier shelving with a light strip for each shelf to avoid shaded areas. Place heavy pots on the bottom and light ones above. Stackable pots save space while giving roots room to grow.
Hanging baskets are great for trailing herbs and strawberries. Choose reliable hooks and breathable liners to prevent rot. Modular wall planters help arrange herbs, lettuces, and compact fruiting plants neatly.
Companion planting and maximizing yield per square foot
Pair plants that help each other while avoiding root crowding. Basil and tomatoes grow well together, boosting flavor and repelling pests. Nasturtiums trap aphids on indoor crops.
Intercrop fast greens like radish and arugula between slower growers. This fills gaps and speeds up harvests. Keep spacing moderate and prune regularly to prevent one plant from taking over. Succession planting keeps your garden producing steadily.
Designing efficient layouts for light and access
Lay out shelves for angled light from LEDs or a nearby window. Leave a narrow aisle or use rolling carts for easy access. Label pots and use drip trays to protect floors.
Rotate movable racks to change exposure and reduce shading. Place drip trays or carts under heavy systems for easier maintenance. With a plan that balances light, access, and plant weight, your vertical garden will be both productive and pleasant.
Propagation and starting seeds indoors for continuous harvests
Getting a steady supply of vegetables starts with smart propagation and timing. You can start seeds indoors to extend your season and keep harvests coming. Small changes—like using a seedling heat mat—speed germination for warmth-loving crops. Cuttings and divisions help you multiply herbs and greens fast. When seedlings grow true leaves, move them up in pot size and begin hardening off seedlings indoors so they handle brighter light and airflow.
Seed starting timelines and heat mat use
Use a seed-starting mix that drains and holds moisture. Below is a quick timeline to plan staggered plantings and continuous harvests.
| Crop | Weeks to transplant or harvest | Soil temp (°F) | Notes |
|---|---|---|---|
| Leafy greens (lettuce, spinach) | 4–6 weeks to harvest | 60–70°F | Cooler mix, keep dome on until sprout |
| Tomatoes | 6–8 weeks to transplant | 70–80°F | Use a seedling heat mat like Hydrofarm for best germination |
| Peppers | 8–10 weeks to fruit | 75–85°F | Consistent bottom heat and moisture speed germination |
Warmth-loving seeds benefit most from a seedling heat mat placed under trays. Keep a clear dome to retain humidity until sprouts appear. Remove covers as soon as you see true leaves to prevent damping-off.
Cuttings, divisions, and cloning for faster production
Many herbs root quickly from cuttings. Take 3–4 inch basil or oregano stems and place them in water or a moist propagation mix. Use a small pinch of rooting hormone to boost success. For mint and other perennials, division is the fastest way to expand your patch.
Sanitize scissors with isopropyl alcohol before cutting. Work with clean pots and fresh media to lower disease risk. Rooted cuttings often produce harvestable leaves sooner than seeds do.
Transplanting seedlings and acclimating indoors
Transplant into larger pots once true leaves appear. Hold the root ball gently and avoid shaking roots free; keep the soil around them intact. Fill the new pot with a loose mix and firm lightly to remove air pockets.
Hardening off seedlings indoors means increasing light and airflow slowly. Place young plants under stronger LEDs or closer to a bright window for a few hours a day. Add a small fan on low to simulate wind. Do this over 7–10 days until plants show no stress under longer exposure.
Stagger your start dates so you always have seedlings ready to transplant. Use the seed-starting routines above and learn to propagate vegetables indoors from both seed and cuttings to shorten the gap between plantings and harvests.
Seasonal planning and crop rotation for indoor gardening
Good planning keeps your indoor garden productive and healthy all year. Start with a simple year-round planting calendar. It maps sowing, harvest windows, and maintenance.
This view helps you set a staggered planting schedule. So, you never run out of fresh greens or herbs.
Staggered planting for uninterrupted harvests
Create a routine of sowing new seeds every 1–3 weeks for fast crops. For example, plant basil every 3 weeks, and sow lettuce every 2–3 weeks. Introduce a new tomato seedling every 8–10 weeks.
This staggered planting schedule turns peaks and troughs into a steady flow of produce for your kitchen.
Rotating containers and nutrient replenishment
Indoors, you can mimic outdoor rotation by shifting crops between pots and shelves. Move leafy greens to a different container after harvest, then follow with a fruiting crop that uses nutrients differently.
Refresh potting mix annually, top-dress with compost, and add slow-release fertilizer after each crop cycle. Sanitize pots to cut disease and pest carryover.
Replace heavily soiled media or amend it with fresh compost and worm castings. Container crop rotation reduces buildup of pathogens and helps balance nutrients across successive plantings.
Planning a year-round calendar for different crops
Map a 12-month plan tailored to your light, space, and goals. Focus on salad greens and herbs under lower winter light, then switch to fruiting crops when you can provide higher intensity.
Block out maintenance windows for deep-cleaning and soil replacement between crop cycles. Track sowing dates, harvests, and fertilizer top-ups with a spreadsheet or calendar app.
This simple record makes indoor crop rotation predictable. It helps refine your container crop rotation and staggered planting schedule over time.
Tools, gadgets, and tech to simplify indoor vegetable gardening
Choosing the right gear can save you time and increase your harvest. You’ll need tools for lighting, watering, monitoring, and daily care. Make sure they fit your space and skill level to keep your plants healthy and stress-free.
Timers, smart plugs, and automated watering systems
Programmable timers help keep your grow lights on a regular schedule. Smart plugs from TP-Link Kasa or Wemo let you control lights and fans from your phone or voice assistant. For watering, small drip or wick systems are great for herbs and lettuce.
Self-watering planters are perfect for easy care. Larger containers need reservoir systems to cut down on daily tasks. Make sure the flow rate and reservoir size match your plants to avoid too much water.
Apps and sensors for monitoring light, moisture, and temp
Bluetooth and Wi‑Fi soil moisture sensors from brands like Xiaomi or Ecowitt give you real-time data. Multi-sensors track PAR, humidity, and temperature, feeding into apps for trend tracking and alerts.
Use apps like Planta or Gardener’s Calendar for reminders and care guides. Link sensor data with Alexa or Google Home for automated responses when conditions are off.
Essential hand tools and maintenance gear for indoor use
Keep a small hand trowel, pruning shears, seedling trays, and a narrow-spout watering can ready. A moisture meter and pH tester like Apera help solve problems fast.
Choose items that are easy to clean and won’t make a mess. Use drip trays, washable mats, and compact storage bins. Wear lightweight gloves and have cleaning supplies nearby for quick cleaning.
| Item | Best for | Recommended brands/types |
|---|---|---|
| Programmable timer | Consistent light schedules | Digital timers, mechanical timers for simple setups |
| Smart plug | Remote control and automation | TP-Link Kasa, Wemo |
| Automated watering | Daily irrigation, reservoir watering | Self-watering planters, small drip kits, wick systems |
| Soil & multi-sensors | Moisture, temperature, PAR tracking | Xiaomi sensors, Ecowitt, PAR-capable multi-sensors |
| Plant monitoring apps | Alerts, logging, care reminders | Planta, Gardener’s Calendar, companion sensor apps |
| Hand tools | Potting, pruning, transplanting | Small trowel, pruning shears, seedling trays |
| Testing tools & PPE | Soil testing, protection | Apera pH meters, moisture meters, gardening gloves |
Conclusion
You can grow vegetables indoors all year by picking the right crops and giving them enough light. Use the right containers and soil too. By controlling water, nutrients, pests, temperature, and humidity, your plants will give you fresh food all the time.
Start with a small area, like a shelf or sunny windowsill. This will help you learn and build confidence. Keep track of when you plant, what you plant, and how it does. This way, you can get better each season.
For more, look into seed companies like Johnny’s Selected Seeds or Burpee. They have good varieties. Also, check out the USDA and your local Cooperative Extension for tips specific to your area. With a plan and care, you can enjoy fresh food all year.