Did you know 80% of new gardeners skip proper soil preparation? Those who prepare soil for vegetable gardens see crop yields jump by 300%. Your soil is the foundation of everything you grow.
The difference between a struggling garden and a thriving one starts underground.
Preparing soil for vegetable garden success isn’t just digging a hole and dropping seeds. You’re building a living ecosystem. This ecosystem feeds your plants, holds water, and supports tiny organisms.
These organisms keep vegetables healthy and strong. Better soil means better growth and bigger harvests.
The effort you put in now pays off throughout your entire growing season. Better soil means fewer problems with pests and diseases. It means your plants need less watering.
This guide walks you through every step of soil preparation. You’ll learn how to test your soil and clear away obstacles. You’ll discover how to add nutrients and set up the right conditions.
Whether your soil is hard clay, loose sand, or something in between, you’ll find specific techniques. These methods will transform it into a productive garden bed. Get ready to become a soil expert.
Understanding Your Soil Type
Before you start preparing your garden, you need to know your soil type. Your soil type determines water retention, drainage, and garden soil nutrients. Identifying your soil is the first step toward a healthy vegetable garden.
You can discover your soil type through a simple jar test at home. Fill a clear jar with garden soil and add water. Shake it well, then let it settle for 24 hours.
The different layers that form show you the soil composition. Sand settles first at the bottom, silt in the middle, and clay on top. This test reveals which soil type you have and what amendments you’ll need.
Sandy Soil
Sandy soil feels gritty between your fingers and drains very quickly. Water runs through it fast, which means garden soil nutrients wash away easily. This soil warms up rapidly in spring, which gardeners love.
The downside is that sandy soil struggles to hold moisture. It also fails to retain nutrients that your vegetables need.
- Drains too quickly
- Loses nutrients fast
- Warms up fast in spring
- Feels rough and grainy
Clay Soil
Clay soil feels sticky and heavy when wet. It holds water and garden soil nutrients well, which seems great. The problem is that clay drains slowly and becomes hard and compacted.
Your plants may struggle to push roots through dense clay soil.
- Retains moisture well
- Holds garden soil nutrients
- Drains slowly
- Gets compacted easily
Loamy Soil
Loamy soil is the gardener’s gold standard. It blends sand, silt, and clay in perfect balance. This soil drains well while holding enough moisture and garden soil nutrients.
Loamy soil crumbles nicely in your hand. It creates an ideal growing environment for vegetables. If you have loamy soil, you’re starting ahead.
| Soil Type | Drainage | Nutrient Retention | Workability |
|---|---|---|---|
| Sandy | Fast | Poor | Easy |
| Clay | Slow | Excellent | Difficult |
| Loamy | Good | Good | Excellent |
Knowing your soil type helps you choose the right amendments and watering schedule. Sandy soil needs organic matter to hold water and nutrients. Clay soil benefits from additions that improve drainage.
Loamy soil needs less work but still gains from regular feeding. Understanding what you have makes your garden preparation much more effective.
Testing Your Soil Quality
Before adding anything to your garden beds, know what’s already in your soil. Testing removes the guesswork and helps you make smart decisions about amendments. This step saves money and effort while giving vegetables what they need.
Accurate soil information acts like a roadmap for your garden. You’ll discover nutrient levels, organic matter content, and soil structure details. These findings guide your preparation plan.
pH Levels
The pH scale measures how acidic or alkaline your soil is. It ranges from 0 to 14. Most vegetables thrive in slightly acidic to neutral soil with a pH between 6.0 and 7.0.
pH directly affects nutrient availability in your soil. In alkaline soils, iron becomes less accessible to plants. In very acidic conditions, aluminum can reach toxic levels.
You have two options for soil pH testing:
- Home testing kits from garden centers provide quick results
- Local cooperative extension services offer comprehensive professional analysis
Nutrient Analysis
Beyond pH, your soil needs the right balance of nutrients. The three primary nutrients are:
| Nutrient | Symbol | Primary Purpose |
|---|---|---|
| Nitrogen | N | Promotes leafy green growth |
| Phosphorus | P | Supports root development and fruiting |
| Potassium | K | Maintains overall plant health |
Secondary nutrients like calcium and magnesium play important roles too. Micronutrients such as zinc, boron, and copper support specific plant functions. Professional soil testing reveals all these elements.
“A soil test is the cheapest insurance policy a gardener can buy.” – University of Vermont Agricultural Extension
Understanding your nutrient levels prevents you from adding unnecessary amendments. You’ll apply exactly what your garden needs, nothing more and nothing less.
Clearing the Area
Before you prepare soil for vegetable garden planting, clear your garden space of unwanted materials. This crucial first step removes obstacles that could interfere with root growth and vegetable development. A clean garden bed gives your plants the best chance to thrive.
Taking time to clear your area properly prevents frustration later. Thorough preparation now saves you work throughout the growing season. Your vegetables deserve a clean slate to grow strong and healthy.
Removing Weeds
Weeds compete with your vegetables for water, nutrients, and sunlight. Start by pulling them by hand when the soil is moist. Moist soil makes roots come up more easily.
For shallow-rooted annual weeds, use a hoe to slice them off just below the soil surface. Perennial weeds like dandelions and bindweed require deeper removal. Dig them out completely to prevent regrowth from root fragments.
For persistent weed problems, consider using landscape fabric or solarization. Cover your garden area with clear plastic for several weeks. This kills stubborn weeds before you begin to prepare soil for vegetable garden beds.
- Pull weeds by hand when soil is wet
- Use a hoe for shallow-rooted annual weeds
- Dig out perennial weeds completely
- Apply landscape fabric for extra protection
- Try solarization for severe weed problems
Debris and Rocks
Remove stones, sticks, old roots, and other materials that can block planting and root development. Large rocks should come out since they can interfere with your garden’s success. Small pebbles usually aren’t problematic and can stay in the soil.
Don’t throw away those rocks. You can repurpose them for garden borders or use them in drainage layers. Clear your space thoughtfully, and you’ll prepare soil for vegetable garden that’s free from underground obstacles.
| Material | Action Needed | Alternative Use |
|---|---|---|
| Large rocks | Remove completely | Garden borders or pathways |
| Small pebbles | Can remain in soil | Natural drainage support |
| Sticks and branches | Remove all pieces | Compost or mulch |
| Old roots | Dig out completely | Compost pile |
| Plastic and trash | Remove all items | Proper disposal |
Clearing your garden area properly is the essential foundation for growing healthy vegetables. This physical preparation work sets the stage for everything that follows in your vegetable gardening journey.
Tilling the Soil
Tilling garden beds is a key step in preparing your vegetable garden for planting. This process breaks up compacted soil and mixes in the amendments you’ve added. Tilling creates a loose, welcoming environment for your plant roots to grow strong and deep.
Why Tilling Matters
Breaking up compacted soil is the main reason tilling garden beds works so well. Over time, soil gets packed down from foot traffic and weather. Tilling loosens this hardened earth so vegetables can push their roots down easily.
Tilling also mixes your amendments evenly throughout the bed. This spreads compost or fertilizer uniformly across your garden. It creates consistent growing conditions for all your plants.
Tilling disrupts weed seeds and breaks up their root systems. This gives your vegetables a head start against competing plants. The right depth matters too.
Most vegetable gardens need tilling to 8 to 12 inches deep. This depth works perfectly for most root vegetables and garden plants. Going deeper can bring up subsoil that lacks organic matter.
Tools for Tilling
You have several options for tilling garden beds, depending on your garden size and physical ability.
- Shovel or spading fork: Best for small garden areas, these hand tools give you control and great exercise
- Manual rotary tiller: Works well for medium-sized spaces without using gas or electricity
- Gas-powered rototiller: Ideal for larger gardens, these machines cover ground quickly and efficiently
- Electric tiller: A quieter, cleaner option that works for medium gardens
| Tool Type | Best Garden Size | Depth Range | Effort Level | Cost |
|---|---|---|---|---|
| Shovel or Fork | Small (under 100 sq ft) | 6-10 inches | High | $20-$60 |
| Manual Tiller | Medium (100-300 sq ft) | 8-10 inches | Moderate | $80-$200 |
| Electric Tiller | Medium (100-400 sq ft) | 8-12 inches | Low | $300-$800 |
| Gas-Powered Tiller | Large (400+ sq ft) | 8-12 inches | Low | $500-$2000 |
Timing your tilling work is important. Soil should be slightly moist, not wet or bone dry. Wet soil clumps and compacts when tilled.
Dry soil becomes dusty and hard to work. Wait a few days after rain for the perfect moisture level.
Make multiple passes over your tilling garden beds to ensure thorough mixing. Two or three passes create uniform, well-prepared soil. Avoid over-tilling, which can destroy soil structure and harm beneficial organisms.
Improving Soil Drainage
Good drainage is essential for a thriving vegetable garden. Plant roots can rot when water sits in your soil. Poor drainage affects many gardeners, especially those with heavy clay soils.
You can fix drainage problems with smart soil preparation techniques. Organic matter incorporation works for almost every soil type. Adding organic material creates the structure your plants need to thrive.
Adding Organic Matter
Organic matter comes from living things and breaks down over time. Common options include compost, aged manure, and leaf mold. Coconut coir and well-rotted wood chips also work well.
Work 2 to 4 inches of organic matter into the top 6 to 8 inches of soil. You’ll need to repeat this process every year as materials break down. In clay soils, organic material creates spaces that let water move through.
In sandy soils, it acts like a sponge. This helps soil hold onto moisture longer.
| Organic Material Type | Best For | How to Use |
|---|---|---|
| Compost | All soil types | Mix 2-4 inches into top layer |
| Aged Manure | Nutrient-poor soils | Incorporate 2-3 inches deep |
| Leaf Mold | Clay and heavy soils | Add 3-4 inches, work in well |
| Coconut Coir | Sandy and dry soils | Mix 2-3 inches throughout |
| Wood Chips | Long-term soil building | Layer 1-2 inches, let settle |
Building Raised Beds
Raised beds offer a smart solution for troublesome soil. They work well for heavy clay, contaminated soil, or physical limitations. You can skip difficult digging and start fresh with ideal conditions.
Creating the perfect raised bed soil mix requires balance. The best approach combines equal parts of three components:
- Topsoil for structure and nutrients
- Compost for organic matter and drainage
- Drainage material like perlite or coconut coir
A raised bed soil mix gives you complete control over your growing environment. These beds warm up faster in spring and drain better than ground-level gardens. You can fill them with exactly what your plants need.
Your plants will reward you with stronger growth and better harvests. Both methods—amending existing soil or building raised beds—deliver excellent results.
Enhancing Nutrient Content
Your vegetables need strong nutrition to grow healthy and productive. The right garden soil nutrients give plants energy to develop roots, leaves, and fruit. You can boost your soil through compost, fertilizers, and natural amendments.
Each method works differently, so combining them creates the best results. Together, these approaches build a thriving vegetable garden.
Composting Basics
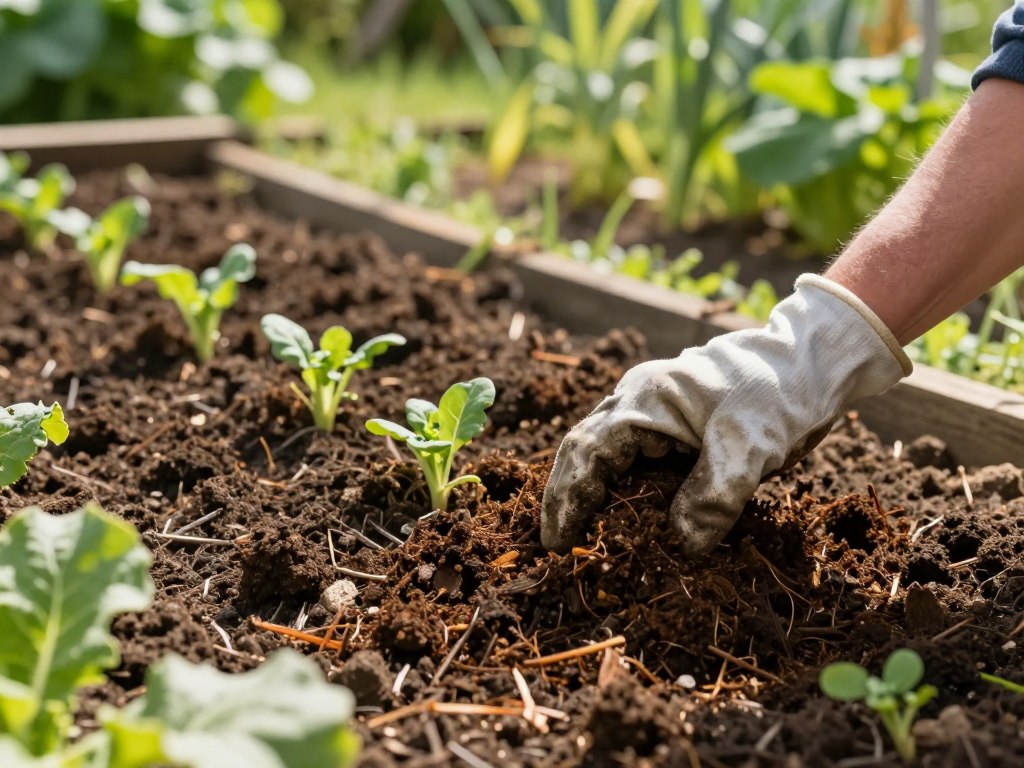
Creating compost for vegetable beds is one of the smartest moves you can make. Compost breaks down organic materials into dark, crumbly matter that feeds your soil. You need two types of materials to make good compost:
- Green materials (nitrogen-rich): vegetable scraps, grass clippings, and coffee grounds
- Brown materials (carbon-rich): dried leaves, straw, and cardboard
Mix these ingredients in layers and keep them moist. Your compost is ready when it looks dark and smells earthy. This typically takes 2-6 months.
You can also buy finished compost from local garden centers. Compost for vegetable beds improves soil structure and helps retain water. It releases nutrients slowly over time.
Benefits of Fertilizers
Fertilizers provide concentrated garden soil nutrients that plants absorb quickly. Look at the N-P-K numbers on the package. These show nitrogen, phosphorus, and potassium levels.
Choose fertilizers based on what your soil test revealed.
| Nutrient Type | Organic Options | Purpose |
|---|---|---|
| Nitrogen | Blood meal | Green leaf growth |
| Phosphorus | Bone meal | Root and flower development |
| Potassium | Kelp meal | Overall plant strength |
| Trace minerals | Kelp meal | Disease resistance |
Natural Amendments
Natural amendments offer gentle, long-lasting ways to improve garden soil nutrients. Worm castings are incredibly rich in nutrients and beneficial microbes. Rock dust adds essential minerals slowly over time.
Wood ash boosts potassium and raises soil pH if your soil is too acidic. Green manures work differently—you plant crops like clover or alfalfa, then till them in. This adds organic matter and nitrogen naturally.
Combining these amendments with compost for vegetable beds creates a nutrient-dense environment. Your vegetables will flourish in this rich soil.
Maintaining Soil Structure
Your soil structure determines how well your vegetables grow and thrive. A healthy soil structure creates spaces for air, water, and roots to move freely. Proper soil structure supports the microorganisms that help plants absorb nutrients.
Building strong soil structure takes time and consistent effort. Every action you take affects how your soil holds together. Organic matter incorporation plays a vital role in creating stable soil particles that stick together properly.
Adding compost, aged manure, or other organic materials builds the foundation for long-term garden success.
Importance of Soil Aeration
Compacted soil stops roots from spreading and blocks water from moving down to plant roots. Your plants need oxygen just like you do. Air pockets in soil allow roots to breathe and water to drain properly.
You can improve aeration without heavy machinery. Avoid stepping on your garden beds whenever possible. Create permanent walking paths so you’re not crushing the soil where plants grow.
Use a broadfork—a two-handled tool that breaks up compacted layers without flipping the soil upside down. Regular organic matter incorporation through composting and mulching keeps air pockets open and stable.
- Never work soil when it’s wet and muddy
- Use permanent pathways away from planting areas
- Apply broadfork technique for deep aeration
- Add compost annually for ongoing aeration benefits
Cover Crops
Cover crops work for you during off-seasons and between plantings. These special plants, called green manures, improve your soil without extra effort. They prevent erosion, suppress weeds, and add valuable organic matter back into your beds.
Select cover crops based on what your soil needs. Clover fixes nitrogen from the air, giving your soil a natural fertilizer boost. Buckwheat grows quickly and attracts beneficial insects.
Winter rye prevents erosion and adds significant organic matter incorporation when tilled under. Annual ryegrass builds biomass rapidly for spring planting.
| Cover Crop | Best Season | Main Benefit |
|---|---|---|
| Clover | Spring or Fall | Adds nitrogen to soil |
| Buckwheat | Summer | Suppresses weeds and attracts beneficials |
| Winter Rye | Fall and Winter | Prevents erosion and adds organic matter |
| Annual Ryegrass | Spring or Fall | Builds biomass quickly |
Plant your cover crop seeds directly into prepared beds. Water regularly until plants establish themselves.
Cut down the cover crops and let them dry slightly once you’re ready to plant vegetables. Turn them into your soil using organic matter incorporation techniques. This cycle continues improving your soil structure and fertility naturally, season after season.
Managing Soil pH
Your vegetable garden thrives when soil pH stays in the sweet spot. Most vegetables grow best when pH ranges between 6.0 and 7.0. This range allows your plants to access all the nutrients they need.
Getting your soil pH right is one of the smartest things you can do before planting. Soil pH testing helps you understand where your soil stands. Once you know your numbers, you can amend garden soil with the right materials to create perfect growing conditions.
Adjusting pH Levels
Soil that is too acidic (below 6.0) needs lime to raise the pH. You have two main choices. Calcitic limestone adds calcium to your soil.
Dolomitic limestone adds both calcium and magnesium. Sandy soils need less lime than clay soils because they contain fewer particles. Apply lime in fall if you plan to plant in spring, as it works slowly over time.
Your soil might be too alkaline (above 7.5), so you need to lower the pH. Elemental sulfur works well but takes months to show results. Organic materials like peat moss and pine needles work faster.
Remember that pH changes don’t happen overnight. Patience matters when adjusting soil chemistry. Test again after two to three months to see if your changes are working.
Testing Kits and Resources
You have several options for soil pH testing:
- Color-change test strips that are affordable and easy to use
- Probe-style pH meters that give instant readings
- Chemical test kits that deliver more accurate results
- Professional lab testing through your local cooperative extension service
Taking good samples matters for accurate results. Collect soil from at least five different spots in your garden. Mix these samples together to get a true picture of your soil’s pH.
Test in fall or early spring for best timing.
| pH Range | Soil Condition | Amendment to Use | Application Timing |
|---|---|---|---|
| Below 6.0 | Too Acidic | Calcitic or Dolomitic Limestone | Fall for Spring Planting |
| 6.0 to 7.0 | Ideal Range | No Amendment Needed | Maintain with Testing |
| Above 7.5 | Too Alkaline | Elemental Sulfur or Peat Moss | Fall or Early Spring |
“A well-balanced soil pH is the foundation of a thriving vegetable garden. Test annually to keep your growing medium in peak condition.”
Your local cooperative extension service offers affordable testing options. Many universities run soil labs that provide detailed reports about pH, nutrients, and organic matter. This professional approach gives you exact numbers to guide your amend garden soil efforts.
Contact your extension office to learn about mailing in samples or dropping them off in person.
Preventing Soil Erosion
Soil erosion can destroy all your hard work in soil preparation. Rain, wind, and water runoff wash away precious topsoil and nutrients. Protecting your garden from erosion keeps soil in place for healthy plant growth.
Two powerful methods help defend your garden: mulch and contour planting. These techniques work together to slow water movement. They keep soil exactly where it belongs.
Use of Mulch
Mulch acts like a protective blanket over your soil. Rain falls, and mulch absorbs the impact while slowing water runoff. This gives water time to soak in instead of flowing away with topsoil.
A layer of 2 to 4 inches of mulch delivers the best results.
Different mulch types work well for vegetable gardens:
- Straw—excellent for gardens, though watch for weed seeds
- Shredded leaves—free and effective, breaking down quickly
- Wood chips—long-lasting protection for your soil
- Grass clippings—readily available, best applied in thin layers
Keep mulch a few inches away from plant stems. This prevents rot and pest problems. Your soil preparation creates a healthy growing environment.
Contour Planting
On sloped gardens, contour planting saves soil from washing downhill. Plant rows that follow the land’s shape, running across the slope. This slows water flow and lets moisture sink in.
Additional strategies include:
- Terracing—create flat planting areas on slopes
- Swales—dig shallow ditches to capture water
- Contour rows—arrange plants perpendicular to slope direction
These techniques transform challenging slopes into productive growing space. They protect your soil investment while creating better conditions for plants.
Watering Techniques
Proper watering unlocks the full potential of your garden soil nutrients. Your vegetables need consistent moisture to absorb nutrients from your soil. The right watering keeps soil moist without becoming soggy.
This approach allows roots to access garden soil nutrients effectively. Good watering means your plants thrive. Your soil stays healthy for seasons to come.
Soil Moisture Monitoring
Check your soil regularly to understand its moisture level. The simplest method is the finger test. Push your finger about 2 to 3 inches into the soil.
If the soil feels dry at that depth, it’s time to water. This basic technique gives you quick feedback without any tools.
For more precise readings, consider using a moisture meter. These devices display exact moisture levels. They take the guesswork out of your watering schedule.
Watch your plants closely as well. Early wilting signs tell you that roots need water soon. Different soil types hold moisture differently:
| Soil Type | Moisture Retention | Watering Frequency |
|---|---|---|
| Sandy Soil | Drains quickly | More frequent watering needed |
| Clay Soil | Holds moisture longer | Less frequent, watch for waterlogging |
| Loamy Soil | Balanced retention | Moderate, ideal balance |
Best Practices for Watering
Deep, infrequent watering works better than frequent light watering. Watering deeply helps roots grow deeper into soil. There they find protection from heat and drought stress.
This approach encourages strong root systems. These systems access garden soil nutrients from deeper layers.
Choose your watering method wisely:
- Soaker hoses and drip irrigation deliver water directly to the root zone with minimal waste
- Sprinklers cool plants but may increase disease risk by wetting foliage
- Hand watering gives you close contact with your plants for careful monitoring
Time your watering for early morning hours. Morning watering allows leaves to dry during the day. This reduces disease problems.
Proper watering also dissolves nutrients in your soil. This makes them available for roots to absorb. Your garden soil nutrients become accessible when moisture is present.
Consistent watering practices support overall plant health. They boost productivity throughout the growing season.
Planning Crop Rotation
Crop rotation keeps your garden healthy without constant amendments. Strategic rotation gives soil time to recover while naturally reducing pests and diseases. Farmers have used this practice for hundreds of years with great success.
The basic idea is simple: don’t plant the same vegetables in the same spot year after year. Different plants use different nutrients and attract different pests. Moving plant families around your garden beds breaks pest cycles and lets soil rebuild naturally.
This means you spend less money on fertilizers and amendments. Your vegetables will grow stronger and healthier too.
Benefits for Soil Health
Rotating crops helps your soil in several important ways. Legumes like beans and peas actually add nitrogen to the soil through their roots. Heavy feeders such as tomatoes and squash come next to use that nitrogen.
Light feeders like root vegetables and herbs follow, giving your soil time to rest. Deep-rooted plants such as carrots break up compacted layers. This makes it easier for shallow-rooted crops to grow afterward.
Crop rotation also stops soil-borne diseases from building up. If you grew tomatoes in one bed, avoid planting peppers or eggplants there next year. They’re vulnerable to the same diseases, so rotating prevents problems naturally.
Crop Families
Understanding plant families helps you plan rotation effectively. Group your vegetables by their botanical family:
- Nightshades — tomatoes, peppers, eggplants, potatoes
- Brassicas — cabbage, broccoli, kale, radishes
- Legumes — beans, peas, lentils
- Cucurbits — squash, cucumbers, melons
- Alliums — onions, garlic, leeks
A simple four-year rotation cycle works great for most home gardens. Move each plant family to a new bed every season. This approach keeps your garden naturally fertile while reducing your workload.
Timing Your Garden Preparation
Timing matters just as much as technique for soil preparation. The right timing helps amendments work better and gives plants the best start. You have two main windows: fall and spring.
Seasonal Considerations
Fall is often the ideal time for soil preparation work. You can add amendments like lime or sulfur that need months to break down. Mix in compost and organic matter that will decompose slowly over winter.
The freeze-thaw cycles of cold weather naturally break up clay soil. This improves soil structure without extra work.
Spring preparation requires patience and the right conditions. Wait until soil is workable but not too wet. Test by squeezing soil in your hand.
If it crumbles apart, you are ready to work. If it forms a muddy ball, wait a few more days. Soil temperature should reach about 50°F before you dig.
Working wet soil causes compaction that can take years to fix.
Different vegetables need different planting times. Cool-season crops like lettuce, peas, and broccoli go in early spring or fall. Warm-season crops like tomatoes, peppers, and squash need warmer soil in late spring.
If you plan to succession plant throughout the season, prepare beds in stages.
Local Climate Factors
Your location shapes preparation timing for vegetable garden beds. Check your USDA hardiness zone and learn your frost dates. Study your area’s summer heat patterns and rainfall.
Connect with other gardeners in your area to learn region-specific timing. Join a local community garden. Contact your cooperative extension service for advice that fits your climate.