Gardeners who use proper pruning techniques see up to 40 percent more blooms and fruit. This striking difference shows how powerful correct pruning can be for your garden’s success.
Learning how to prune plants correctly is one of the most rewarding gardening skills. Pruning transforms the way your plants grow and thrive. It’s about understanding how plants work and partnering with nature.
The benefits of plant pruning go far beyond simple aesthetics. Proper pruning encourages stronger stems, healthier leaves, and more vigorous growth patterns. Your plants become more resistant to disease.
Well-pruned plants produce more flowers and fruit. They develop better shapes that fit your garden’s design. You’ll spend less time fighting overgrown plants and more time enjoying beautiful outdoor space.
This guide walks you through everything you need to know about pruning. You’ll discover when to make cuts, what tools to use, and which techniques work best. From young saplings to established trees, you’ll find practical advice you can use right away.
You’ll feel confident tackling any pruning project after reading this guide. Your plants will reward your efforts with better health and stronger growth. Expect more beautiful displays season after season.
Understanding the Basics of Plant Pruning
Learning to prune is key to a successful garden. Pruning means removing specific parts like branches, buds, or roots. This simple action shapes plants and keeps them healthy.
Proper pruning helps your plants grow stronger. You can use these skills on trees, shrubs, or flowers. Understanding these techniques gives you control over your garden’s success.
What is Plant Pruning?
Plant pruning removes selected parts to improve health and appearance. Think of it as giving your plants a haircut. You cut away branches that crowd the plant.
You also remove stems that aren’t growing correctly. Every cut you make has a purpose. You’re making smart choices about which parts to remove.
Why Prune?
Your plants need pruning for several important reasons. Cutting back helps them stay healthy and attractive. Look at this list to see why it matters:
- Removes dead, diseased, or damaged wood
- Improves air circulation through branches
- Controls the size and shape of your plants
- Encourages more flowers and fruit production
- Rejuvenates older, tired-looking plants
- Prevents overcrowding and tangled growth
Pruning keeps your plants looking fresh and living longer. It’s one of the best investments in your garden’s future.
When is the Best Time to Prune?
Timing matters greatly for successful pruning. The wrong time can stress your plants. It may also remove flower buds before they bloom.
Here’s what you need to know about timing:
| Plant Type | Best Pruning Time | Reason |
|---|---|---|
| Deciduous trees and shrubs | Late winter or early spring | Plants are dormant and recover faster |
| Spring-blooming plants | Right after they finish flowering | Preserves next year’s flower buds |
| Summer growth control | Mid to late summer | Slows excessive growth safely |
| Dead or diseased wood | Any time of year | Prevents spread of disease |
Remember the three D’s rule: always remove dead, diseased, and damaged wood. You can do this any season. This keeps your plants healthy year-round.
Learning to prune doesn’t need to be complicated. Start by learning these basics. You’ll feel confident making your first cuts.
With practice, proper techniques become second nature.
Essential Tools for Pruning
Having the right tools for pruning plants makes your work easier and safer. Quality equipment gives you cleaner cuts that help your plants heal faster. Good tools save you time and effort on every project.
Pruners and Shears
Pruners come in two main types: bypass pruners and anvil pruners. Bypass pruners work best for live, green stems because they cut cleanly. Anvil pruners suit dead wood better since they have a flat surface.
Brands like Felco and Corona make high-quality pruners that last for years. Hand shears work great for detailed work on smaller plants and hedges. Quality hand shears give you clean cuts with less effort.
Saws and Loppers
Loppers extend your reach and cut branches between ¾ inch and 2 inches wide. The long handles provide extra leverage and reduce hand strain. For larger branches, pruning saws are your best choice.
Folding saws fit easily in your tool bag. Bow saws handle bigger jobs with strength. Pole pruners let you reach high branches safely from the ground.
Safety Gear
Protecting yourself matters just as much as having quality tools for pruning plants. Wear sturdy gloves to shield your hands from thorns and sharp edges. Safety glasses protect your eyes from flying debris.
| Safety Item | Purpose | Why It Matters |
|---|---|---|
| Work Gloves | Hand protection | Prevents cuts and blisters from thorns |
| Safety Glasses | Eye protection | Shields eyes from debris and branches |
| Long Sleeves | Arm protection | Reduces scratches from rough branches |
| Closed-Toe Shoes | Foot protection | Keeps feet safe from falling branches |
The right combination of tools for pruning plants and safety gear keeps you protected. Quality equipment makes every cutting task simpler and results in healthier plants.
Different Types of Pruning Techniques
Mastering different plant pruning techniques keeps your garden healthy and beautiful. Each method serves a specific purpose and works best in certain situations. Understanding which pruning tips to use helps you make smart cuts.
Thinning Cuts
Thinning cuts remove entire branches back to where they started. You cut the branch at its origin on the main trunk or parent branch. This technique opens up your plant’s canopy and lets air and light reach inside.
Look for the branch collar—a small raised ring where the branch meets the trunk. Cut just outside this collar to help your plant heal properly. Thinning cuts don’t cause excessive new growth, so your plant keeps its natural shape.
Heading Cuts
Heading cuts work differently. You cut a branch back to a bud or smaller side branch. This type of cut pushes your plant to grow new shoots below where you cut.
Use heading cuts when you want to:
- Shape young plants into the form you prefer
- Control how big your plant gets
- Create bushier, fuller growth
Be careful with heading cuts on mature plants. They can sometimes create weak, crowded growth that looks messy.
Rejuvenation Pruning
Rejuvenation pruning is a bold approach for overgrown or neglected plants. This technique removes one-third to one-half of the oldest stems at ground level. The key is doing this over two to three years.
This strong method gives old shrubs a fresh start. Spread the heavy cutting across multiple growing seasons so your plant doesn’t go into shock.
| Pruning Technique | What You Cut | Best Use | Growth Result |
|---|---|---|---|
| Thinning Cuts | Entire branch to origin | Open canopy, improve air flow | Maintains natural shape |
| Heading Cuts | Branch to bud or side branch | Shape and control size | Stimulates new shoots |
| Rejuvenation Pruning | Old stems at ground level | Overgrown shrubs | Complete renewal over time |
Learning these plant pruning techniques gives you the tools for almost any pruning job. Pick the right method for what you want to achieve. Your plants will reward you with healthy, attractive growth.
Pruning Trees: Tips and Best Practices
Tree pruning requires different strategies depending on your tree’s age and growth stage. Young trees need careful training to build a strong foundation. Mature trees benefit from a gentler touch.
Learning the right pruning tips helps you avoid costly mistakes. These mistakes can damage your trees for years to come. This section covers everything you need to know about keeping your trees healthy and strong.
How to Prune Young Trees
Young trees need guidance to develop properly. Your tree’s young years shape its future structure. The best practices for pruning plants involve establishing a central leader.
The central leader is the main trunk that grows upward. This strong central trunk becomes the backbone of your entire tree.
Select well-spaced scaffold branches to form the tree’s permanent framework. These branches should:
- Be spaced 6 to 8 inches apart along the trunk
- Have wide crotch angles (60 degrees or wider)
- Grow in different directions around the tree
- Be removed if they have narrow angles that could split later
Remove any competing leaders that challenge the central trunk. These extra leaders will only create weak spots in your tree’s structure. Focus on creating a balanced canopy that looks natural and healthy.
Pruning Mature Trees
Mature trees need a different approach than young ones. Think of it as maintenance rather than training. Use conservative pruning tips with established trees—remove only what’s necessary.
- Dead or diseased
- Crossing or rubbing against other branches
- Growing inward toward the center
- Damaged from storms or pests
Never remove more than 25 percent of your tree’s canopy in a single year. Cutting too much at once weakens your tree and invites disease.
Use the three-cut method for large branches. Make an undercut first to prevent bark tearing. Cut from above farther out to remove weight, and finish just outside the branch collar.
Common Mistakes to Avoid
Several pruning mistakes can permanently harm your trees. Knowing what to avoid is just as important as knowing what to do.
| Mistake | Why It’s Harmful | Better Approach |
|---|---|---|
| Topping trees | Cuts off the top, creating weak new growth and ruining structure | Remove individual branches instead |
| Flush cuts | Removes the branch collar, preventing proper healing | Cut just outside the branch collar |
| Leaving stubs | Stubs won’t heal and become entry points for disease | Cut flush to the branch collar |
| Lion-tailing | Removes inner branches, leaving only foliage at tips, weakens tree | Maintain even branch distribution throughout |
Avoid making cuts that remove the branch collar. That protective ring of bark sits where the branch meets the trunk. Your tree needs it to heal properly.
Understanding these common errors helps you prune with confidence. Keep your trees thriving for decades to come.
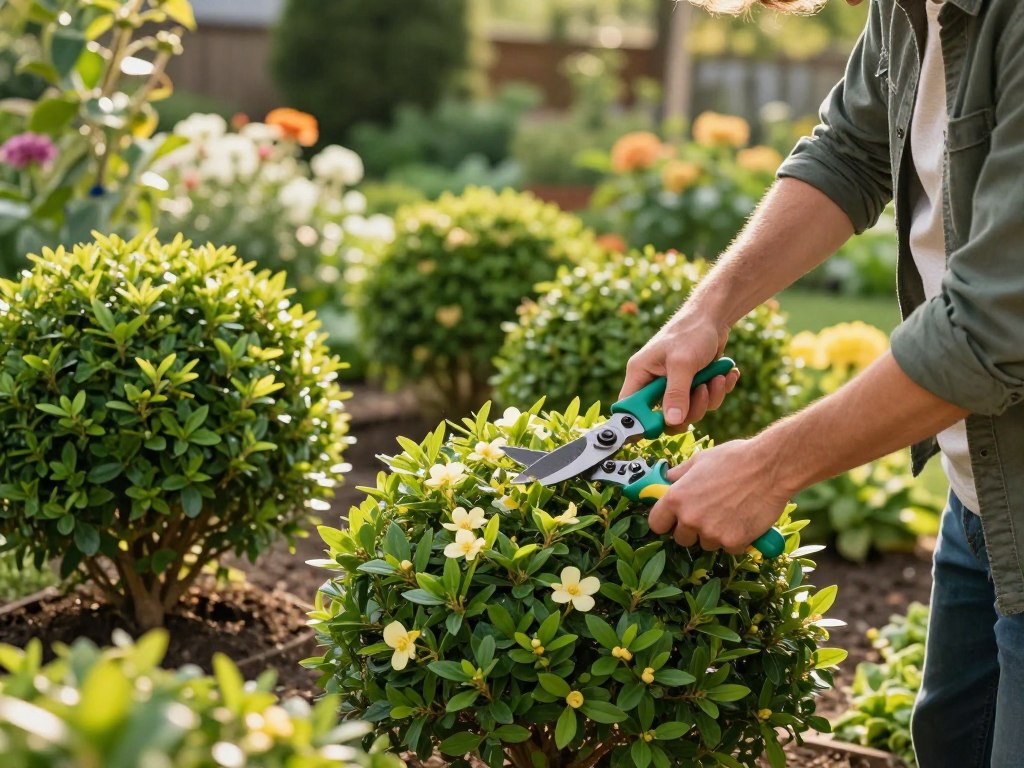
Pruning Shrubs: A Step-by-Step Guide
Shrubs form the backbone of many landscapes. Learning how to prune them keeps them looking their best. The right timing and technique make all the difference.
Proper pruning creates healthy, vibrant shrubs. This guide shares essential tips you need throughout the year. Master these skills to transform your shrub care.
When to Prune Flowering Shrubs
Timing matters most for flowering shrubs. Your shrubs fall into two groups based on bloom time. Understanding this difference changes your entire pruning strategy.
Some shrubs bloom on old wood. These include lilacs, forsythia, and rhododendrons. Prune them right after their flowers fade.
This timing removes spent blooms safely. You won’t cut off next year’s flower buds. Spring-blooming shrubs set buds in summer, so late pruning removes those precious buds.
Other shrubs bloom on new wood. Roses, butterfly bush, and crape myrtle fit this group. Prune them in late winter or early spring.
These varieties flower on current-season branches. Pruning encourages fresh growth filled with blooms. The timing promotes maximum flowering potential.
| Shrub Type | Bloom Time | Best Pruning Window | Why This Timing Works |
|---|---|---|---|
| Lilac | Spring | Right after flowering | Protects next year’s flower buds |
| Forsythia | Early Spring | Immediately after blooms fade | Allows new growth before dormancy |
| Rose | Spring to Fall | Late winter or early spring | Stimulates new flowering branches |
| Butterfly Bush | Summer to Fall | Early spring | Promotes vigorous new growth |
| Rhododendron | Spring | Just after flowers drop | Prevents bud removal |
| Crape Myrtle | Summer | Late winter before growth | Encourages new flowering stems |
Shaping and Size Control
You can shape shrubs while keeping their natural character. Start with the three D’s first. Remove any dead, diseased, or damaged branches.
These branches never improve on their own. They can spread problems to healthy growth. Removing them protects the rest of your shrub.
Next, find crossing or rubbing branches. These create wounds and look awkward. Remove the weaker or less attractive branch from each pair.
Use thinning cuts for size control. Remove entire stems at the base. Cut branches back to a main limb.
This technique reduces overall size naturally. It keeps the shrub’s natural shape intact. Avoid heavy shearing that blocks interior light.
- Remove dead wood first
- Cut crossing branches at the base
- Thin out dense areas to let light penetrate
- Make cuts just above a healthy bud or branch junction
- Step back frequently to check your progress
- Preserve the shrub’s natural form
Maintenance Pruning
Annual maintenance keeps shrubs vigorous and attractive. Remove about one-third of the oldest stems yearly. This encourages fresh growth from the base.
Different shrubs need customized approaches. Hydrangeas vary by species in their blooming habits. Boxwoods tolerate frequent shearing for formal landscapes.
Spireas benefit from renewal pruning methods. This maintains their delicate, arching form. Learn your specific plants and their growth patterns for best results.
Pruning Perennials: Timing is Crucial
Perennials bring lasting beauty to your garden year after year. Knowing when to prune plants makes all the difference in performance. Proper timing helps your plants thrive through every season.
Spring vs. Fall Pruning
You face an important choice about pruning seasons. Each approach offers distinct benefits for your perennial garden.
Fall pruning gives your garden a tidy appearance. It reduces disease pressure on plants. Cut back disease-prone perennials like bee balm and phlox in autumn.
Spring pruning protects wildlife and provides winter visual interest. Leave ornamental grasses and sedums standing through cold months. These dried stems offer shelter for beneficial insects.
| Pruning Approach | Best For | Benefits | Timing |
|---|---|---|---|
| Fall Pruning | Bee balm, phlox, tall perennials | Reduces disease, creates neat appearance | After first frost |
| Spring Pruning | Ornamental grasses, sedums, evergreens | Protects insects, adds winter interest | As new growth appears |
| Summer Pruning | Early bloomers, spring bulbs | Encourages bushier growth | After flowering ends |
Deadheading Techniques
Deadheading removes spent flowers and keeps perennials looking fresh. Your pruning tips should include three main methods:
- Pinch soft stems between your fingers for delicate perennials
- Snip with pruners just above the next leaf set
- Shear back entire plants like hardy geraniums for thick new growth
Removing dead flowers encourages repeat bloomers to produce more. Plants like coneflowers, salvia, and catmint benefit most. This simple practice extends your flowering season by weeks.
Dividing and Rejuvenating
Dividing overgrown perennials acts as a form of rejuvenation pruning. The timing depends on your perennial type.
Dig up clumps of hostas, daylilies, or asters every three to four years. Split them into sections using a sharp spade or knife. Replant divisions in fresh soil with compost added.
- Spring division works best for most perennials
- Fall division suits late bloomers better
- Keep divided sections moist until established
- Water newly planted divisions regularly for six weeks
These pruning tips keep your perennial garden blooming vigorously. Your plants will reward you with healthy growth throughout the growing season.
Special Considerations for Vines
Vines bring beauty and natural coverage to your garden. However, they demand specialized care. Unlike shrubs or trees, climbing plants grow with different habits and patterns.
You’ll need to learn specific plant pruning techniques. These methods keep your vines healthy and under control. This section teaches you how to manage vigorous climbers with confidence.
How to Prune Climbing Plants
Each vine type grows differently. Understanding these growth habits helps you prune correctly. Some vines twine around structures like morning glories.
Others use tendrils to climb, similar to grapes. Climbing hydrangeas attach with aerial roots. Climbing roses lean and need support.
Knowing your vine’s growth method shapes your pruning approach.
Clematis vines fall into three groups based on bloom time. Each group requires different pruning schedules. Spring bloomers need minimal cutting right after flowering.
Summer bloomers benefit from early spring pruning. Fall bloomers should be cut back hard in late winter.
Wisteria demands aggressive pruning twice yearly. This controls its powerful growth and encourages stunning blooms. Climbing roses need old canes removed to promote fresh growth.
These plant pruning techniques prevent your vines from becoming unmanageable.
Managing Growth
Vigorous vines can quickly overwhelm your garden spaces. Summer pruning helps control size and shape during active growth. Root pruning slows overly aggressive vines without stopping growth entirely.
Removing wayward shoots keeps vines directed where you want them.
Weight becomes an issue with mature vines covering structures. Regular maintenance pruning prevents branches from becoming too heavy. This protects supports from damage.
Thinning interior growth improves air circulation. It also reduces disease risk.
| Vine Type | Growth Habit | Best Pruning Time | Frequency |
|---|---|---|---|
| Clematis | Variable by type | After blooming or late winter | Annually |
| Wisteria | Vigorous twining | Summer and late winter | Twice yearly |
| Climbing Roses | Lean and scramble | Late winter | Annually |
| Climbing Hydrangea | Aerial root attachment | Late winter | Annually |
| Morning Glory | Twining stems | Early spring | As needed |
Seasonal Care Tips
Timing matters greatly with pruning tips for vines. Most vines benefit from late winter pruning while dormant. This timing reduces stress and prevents bleeding sap.
Spring-blooming varieties like Carolina jessamine need special care. Prune them right after flowers fade. This ensures next year’s blooms.
- Winter pruning: Remove dead wood and thin crowded branches
- Spring care: Redirect new growth toward desired structures
- Summer maintenance: Control size and remove excess shoots
- Fall monitoring: Check for disease and prepare for dormancy
Training vines on structures requires patience and regular guidance. Tie new shoots loosely to allow growth movement. Space branches evenly for balanced coverage and better light penetration.
Rejuvenating old, woody vines takes time. However, it brings them back to productivity. Cut severely in late winter, then guide new growth carefully.
Keep vines as garden assets by staying consistent with maintenance. Your effort prevents them from taking over everything nearby.
Maximizing Growth with Correct Pruning
Pruning with purpose unlocks your plant’s full potential. The benefits go far beyond simple maintenance. Smart cuts direct energy toward bushier foliage, vibrant flowers, or abundant fruit.
Understanding how plants respond to pruning helps you make cuts that truly matter.
Understanding Growth Patterns
Plants follow natural growth rules you can use to your advantage. Many plants have a terminal bud at the branch tip. This bud suppresses growth below it.
Removing this tip wakes up the buds underneath. They start growing and create a fuller, bushier plant. You get width instead of just height.
Different plants grow differently. Some push growth from the tips. Others sprout from buds along the sides.
Expert advice recognizes these patterns. Heading cuts work best on plants with terminal bud growth. Thinning cuts suit plants with lateral bud growth.
Knowing your plant’s growth style makes your cuts work with nature.
Signs of Healthy Recovery
After pruning, watch for these positive signs:
- Callus tissue forming around cut edges
- Fresh, vigorous shoots emerging within weeks
- Improved overall plant appearance and strength
- Leaves appearing fuller and greener
- No signs of disease or pest damage at cut sites
Healthy plants bounce back quickly. New growth shows your pruning worked perfectly. Weak or slow growth means your plant needs more light, water, or nutrients.
Encouraging Flowering and Fruit Production
Want more blooms and fruit? Expert advice includes specific techniques:
| Goal | Pruning Strategy | Best Timing |
|---|---|---|
| More Flowers | Remove spent blooms and thin crowded growth to allow light to reach flowering wood | After blooming or early spring |
| Better Fruit Yield | Thin fruit-bearing branches to concentrate plant energy on remaining fruit | Late winter or early spring |
| Preserve Fruiting Spurs | Remove only unproductive wood while keeping short fruit-bearing branches on apple and pear trees | Dormant season |
| Redirect Energy | Summer pruning focuses growth toward fruit development rather than new leaves | Midsummer after flowering |
Summer pruning is your secret weapon. Pruning during the growing season redirects energy. Your plant makes fruit instead of new branches.
This focused effort produces bigger, sweeter harvests.
The benefits of plant pruning show up year after year. Each cut teaches you more about what your plants need. You become the expert who shapes growth toward your specific goals.
Dealing with Diseases and Pests
Plant diseases and pest infestations can harm your garden quickly. Smart pruning techniques serve as your first line of defense. By spotting problems early and using proper pruning tips, you can stop issues before they spread.
Pruning becomes a powerful tool once you understand what to look for and how to act fast.
Identifying Issues
Watch your plants closely for warning signs. Fire blight makes branches look blackened and scorched. Cankers appear as sunken, diseased areas on bark.
Galls show up as abnormal growths on stems. You might also notice pest damage from borers, scale insects, or spider mites.
Healthy plant tissue looks normal in color and texture. Diseased areas show discoloration, weird growths, or soft spots. Check both the tops and undersides of leaves for pest activity.
Pruning Affected Areas
Cut back to healthy wood once you find a problem. Always remove at least 6 to 12 inches below visible disease symptoms. This removes the infected tissue completely.
- Make cuts on dry, sunny days
- Use sharp, clean tools for each cut
- Disinfect your pruners between cuts using one part bleach to nine parts water
- Remove infected branches entirely from your yard
Prevention Strategies
The best practices for pruning plants include preventing problems before they start. Thin your plant canopies to boost air circulation, which fights fungal diseases. Remove water sprouts and suckers that attract pests.
Cut out rubbing branches that create wounds where diseases enter. Keep your plants at healthy sizes to reduce stress. Stressed plants struggle to fight off pests and diseases.
Regular pruning tips applied throughout the growing season keep your garden strong and disease-free.
Common Plant-Specific Pruning Guidelines
Different plants need different approaches for effective pruning. Roses, herbs, and fruit trees each have unique requirements. These requirements determine their health and productivity.
Getting expert advice helps you make the right cuts at the right time. Understanding these techniques transforms your garden into a thriving space.
Roses: Best Practices
Roses demand precision and timing for proper pruning. Hybrid tea roses benefit from hard pruning in early spring. Cut them back to 12-18 inches to create an open vase shape.
Aim for 3-5 strong canes on each plant. Shrub roses need lighter pruning—remove about one-third of their growth instead. Climbing roses require removing old, unproductive canes while keeping younger flowering canes.
Always cut at a 45-degree angle about ¼ inch above an outward-facing bud. This technique encourages open growth and better air circulation around your roses.
Herbs: How to Prune for Flavor
Regular pruning intensifies herb flavors by preventing flowering. Flowering can make leaves bitter. Expert pruning advice for herbs focuses on encouraging tender new growth.
- Pinch basil regularly to prevent bolting
- Cut woody herbs like rosemary and thyme back by one-third in spring
- Harvest leafy herbs like parsley and cilantro from the outside in
- Prune mint aggressively to prevent it from spreading
Fruit Trees: Yield Enhancement
Maximizing fruit production requires proper pruning for optimal sunlight exposure. Create an open center or modified leader form. This lets sunlight reach developing fruit.
Thin fruit clusters so remaining fruits grow larger and sweeter.
| Fruit Tree Type | Fruiting Pattern | Pruning Strategy |
|---|---|---|
| Apple and Pear | Fruit on spurs | Preserve spurs, remove crossing branches |
| Peach and Nectarine | Fruit on one-year-old wood | Renew wood annually for consistent yields |
| Stone Fruits | Terminal buds produce fruit | Maintain manageable height for easy harvest |
Applying these plant-specific techniques ensures your garden produces healthy plants. Your plants will have abundant blooms and fruit for years to come.
Caring for Your Tools and Pruning Maintenance
Your pruning tools need proper care to stay in top shape. Quality equipment lasts for years when you maintain it well. Regular care keeps tools sharp, clean, and ready for garden work.
Cleaning and Sanitizing Your Tools
Wash your tools with warm soapy water after each pruning session. Use a wire brush to remove sap, dirt, and plant debris. Dry everything with a clean cloth to prevent rust.
Disease prevention matters during pruning. Wipe blades with rubbing alcohol between each plant. You can also use diluted bleach solution (one part bleach to nine parts water).
Sharpening Techniques
Dull blades create ragged cuts that heal slowly. Sharpen hand pruners and loppers with a whetstone or diamond file. Keep the original 20-degree bevel angle with smooth strokes.
Sharp tools cut better and heal plants faster. You’ll use less force and reduce hand fatigue. Sharp blades are safer because they won’t slip during use.
Storing Tools Properly
Store your tools in a dry location away from moisture. Hang them on a wall or pegboard instead of the ground. Apply light oil to metal parts before storage to prevent rust.
Create a maintenance schedule for peak tool condition. Clean tools after each use and sharpen them each season. Do a full inspection yearly and replace worn parts.