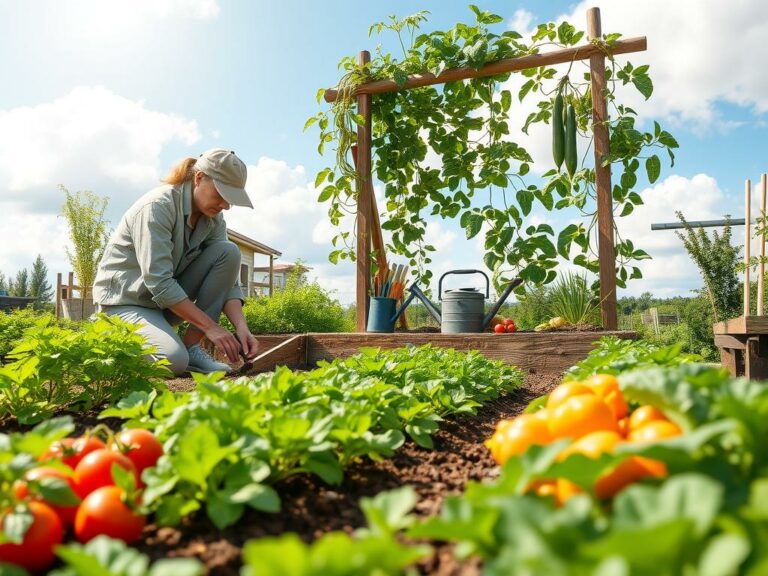
Watering mistakes can cut your harvest by up to 50%. This is more than pests or poor soil in many gardens. Learning to water right can make your plants healthier, increase your harvest, and save on water bills.
This article will show you how to water your vegetable garden. You’ll learn about timing, how long to water, and methods like hand watering and drip systems. You’ll get tips to boost your yield and cut down on disease.
You’ll also discover irrigation for different garden setups. This includes in-ground beds, raised beds, and containers. We’ll cover soil, mulching, using rainwater, and troubleshooting. Plus, we’ll talk about simple tools to monitor your watering. Follow these steps to make your plants flourish with less water and more food.
Why Proper Watering Matters for Your Vegetable Garden
Water is key for every part of plant life in your garden. It’s needed for photosynthesis, moving nutrients, and growing strong stems and fruits. Good watering habits help your garden grow more and stay healthy.
How water affects plant growth and yield
Water and plant growth are closely linked. When the soil is just right, plants absorb nutrients better. This leads to bigger leaves and fruits.
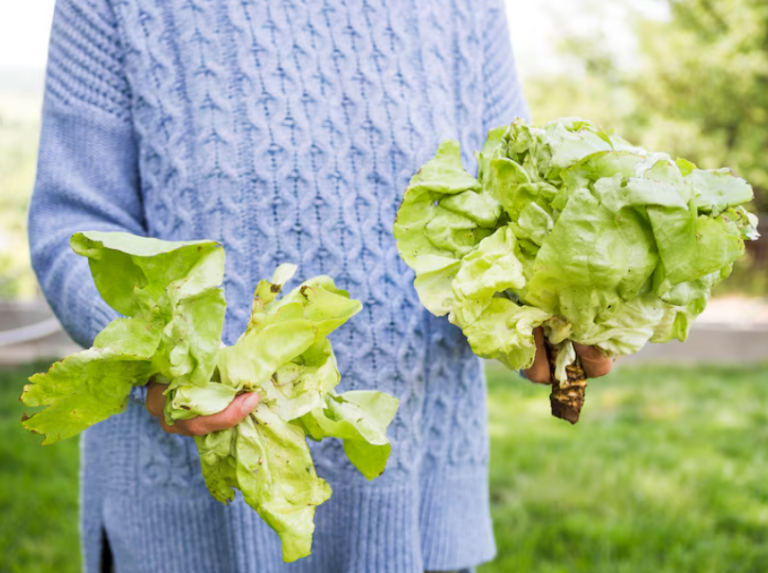
Deep watering helps roots grow deep. Experts like those at the University of California say this makes plants more drought-resistant. For example, tomatoes need steady moisture to avoid fruit problems, and lettuce needs even water for tender leaves.
Common problems from under- and over-watering
Signs of too little water include wilting, curled leaves, and slow growth. Plants may drop flowers and have tough, bitter vegetables. Roots stay shallow, making plants struggle in hot weather.
Too much water causes yellow leaves, poor root health, and root rot from harmful fungi. It can also wash away nutrients and lead to fungal diseases.
Mixed watering can cause spots on fruits and make vegetables bitter. Before changing your watering routine, test the soil with your finger or a moisture meter to avoid mistakes.
Watering as part of overall garden health
Good watering is part of a healthy garden. It involves soil structure, fertilizing, pest control, and mulching. Proper watering reduces stress on plants, making them less appealing to pests and diseases.
Combine good watering with crop rotation, organic fertilizers, and mulching. This keeps moisture in and reduces evaporation. It also helps protect local water sources and prevents fertilizer runoff into streams.
| Issue | Signs | Quick Fix |
|---|---|---|
| Underwatering | Wilting, leaf curl, small or bitter produce | Water deeply, mulch, check root depth after a week |
| Overwatering | Yellow leaves, soggy soil, root rot | Improve drainage, reduce frequency, test soil moisture |
| Inconsistent watering | Fruit splitting, uneven growth | Use drip irrigation or soaker hoses, maintain schedule |
| Poor nutrient uptake | Stunted growth, pale leaves | Adjust watering to aid nutrient flow, add compost |
Understanding Soil Types and Moisture Retention
Knowing your soil is key to watering plants right. Each soil type handles water differently. This affects how often and how deeply you water.
Sandy soil is gritty and dries fast. It drains water quickly. So, water sandy soil often and briefly to keep moisture in the roots.
Loamy soil is a mix of sand, silt, and clay. It drains well but holds moisture, making it great for veggies. Loam is better than clay for keeping moisture and air in the soil.
Clay soil is sticky when wet and forms a ribbon. It holds water but drains slowly. Too much water can cause roots to rot due to poor air and water balance.
How soil structure influences watering frequency
Sandy soils need quick, frequent watering. Clay soils can go longer between waterings but watch out for waterlogging.
Compacted soil doesn’t absorb water well, wasting it and leaving dry spots. Raised beds drain faster, so check them more often.
Improving water retention with organic matter
Add compost, manure, leaf mold, or coconut coir to improve soil moisture. Mix 2–4 inches of compost into the top 6–12 inches of soil. Top-dress annually to keep benefits.
Mulching and cover crops reduce evaporation and add organic matter. This feeds microbes, improving soil structure. It helps roots get water and nutrients better.
Do simple tests to check soil texture and drainage. The ribbon test shows clay, squeezing shows sandiness, and water absorption shows drainage. These tests help you water and amend soil correctly.
How to Water a Vegetable Garden
Getting water right is key to keeping plants healthy and productive. Below, you’ll find simple steps on timing, duration, and garden water signs. These tips will help you adjust your routine for different crops and weather changes.
Best time of day to water for efficiency
Water in the early morning, before sunrise to mid-morning. This helps prevent evaporation and ensures more water reaches the roots. Plants will be better prepared for the heat of the day.
Avoid watering late in the evening to prevent fungal diseases. If you must water at midday, aim directly at the roots to reduce loss to heat and sun.
How long to water based on plant needs
Moisten the root zone to 6–12 inches, as most vegetables draw water from this depth. Aim for 1–1.5 inches of water per week for established beds, including rainfall.
Test by placing a rain gauge or cup in the bed. Time how long it takes to deliver 1 inch. This will help you set your watering schedule. For many systems, this is 20–40 minutes, but it varies.
When hand watering, soak slowly in two or three passes. Short bursts can cause runoff and only wet the surface. Slower watering encourages deeper infiltration and stronger roots.
Signs your garden needs more or less water
Look for these signs to adjust your watering. Your plants need more water if they wilt in the morning, have dry soil, or show slowed growth.
Cut back if lower leaves turn yellow, soil stays soggy, or mold appears. These signs can indicate root trouble rather than thirst.
Use quick checks like the finger test to 1–2 inches, a screwdriver probe for resistance, and a visual look at plant vigor. These help you adjust watering to match real needs.
Combine these habits with soil improvements, mulches, and a simple timer or drip setup. This makes watering reliable and waste-free. Small tweaks now save water and boost harvests later.
Choosing the Right Watering Method for Your Garden
How you water your garden affects plant health, your time outdoors, and your water bill. Each method has its own pros and cons. Consider your garden’s size, the types of plants you have, and your budget before making a choice. Here are some practical options to help you pick the best method for your garden.
Hand watering with a watering can or hose
Hand watering lets you control the water precisely. It’s great for small beds and containers. Use a hose with a shut-off nozzle or a watering wand to get water to the roots without wetting the leaves.
Hand watering is cheap to start and good for spot treatments. But, it becomes impractical for larger gardens. You might miss out on consistent watering and spend a lot of time on it.
Soaker hoses and drip irrigation pros and cons
Soaker hoses are cheap and easy to install. Lay them under mulch for slow, efficient watering. Drip systems are more advanced. They deliver water directly to the roots for high efficiency.
Both soaker hoses and drip systems save water and improve crop consistency. They can save up to half the water compared to overhead systems. But, drip systems are more expensive to start, can clog, and need winterization in cold climates.
Sprinklers: when they work and when to avoid them
Sprinklers are good for lawns, seedbeds, or temporary large plantings. Use low-angle, low-pressure heads for better coverage. They work best early in the morning.
But, sprinklers aren’t ideal for vegetable beds. They can spread diseases, don’t cover evenly in the wind, and waste water. For vegetables, choose drip or hand watering for better health and water use.
Match your watering method to your needs: hand watering for small areas, soaker or drip for efficiency, and sprinklers for lawns or temporary needs. This way, you balance effort, cost, and plant health in your vegetable garden.
Setting Up a Drip Irrigation System
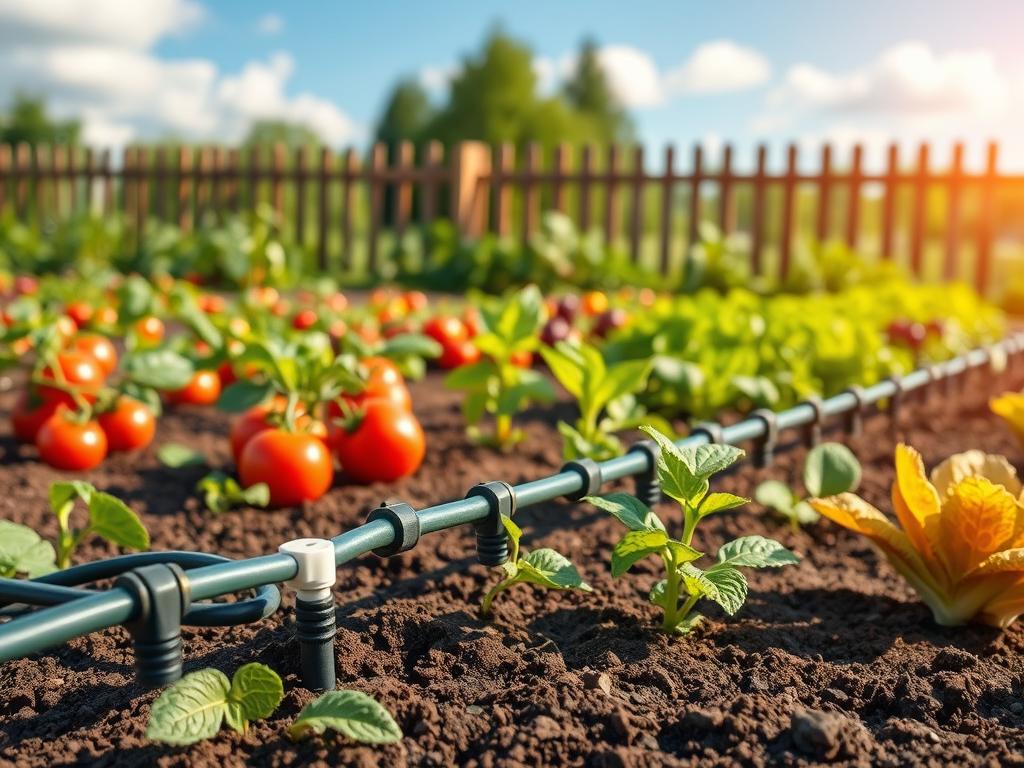
A drip irrigation system saves water and time. It keeps plants moist consistently. Start by planning and mapping your garden. This makes installation easier and helps you adjust the system for each plant.
Components you’ll need to get started
First, gather all necessary parts. You’ll need a spigot, a backflow preventer, a pressure regulator, and a filter. Also, get main supply tubing, emitter tubing, emitters, connectors, and end caps. An optional timer or controller is also useful.
Choose from brands like Rain Bird, DripWorks, Orbit, and Netafim for kits and parts. Tools like a tubing cutter, stakes, and a punch tool are helpful. Having everything ready saves time and trips to the store.
Layout tips for vegetable beds and containers
Plan your layout based on plant spacing and root zones. Place main lines down the center of beds. Use lateral lines 12–18″ apart for row crops. For tomatoes, position emitters 1–2 inches from the stem.
In raised beds, use one or two lines along the length. For containers, give each a dedicated emitter or small tubing loop. Group plants with similar needs together for easier scheduling. Sketch a map and test each zone before burying tubing or adding mulch.
Maintenance and troubleshooting common issues
Keep filters clean and flush lines at the start and mid-season. Most systems work best at 10–25 psi. Use a pressure regulator to protect emitters. Check the system weekly during peak season.
For low flow, check for clogged emitters, kinked tubing, or blocked filters. If you see puddles, reduce emitter flow or widen spacing. Fix leaks by replacing cracked tubing or tightening fittings. Winterize by draining lines or removing components in freezing climates.
Watering Schedules by Vegetable Type
Getting the timing and depth right helps you avoid stress, boost yield, and cut waste. Use a simple plan that matches plant growth stage, weather, and soil. Below you’ll find clear guidance for leafy greens, fruiting crops, and root vegetables so you can set a practical watering schedule for vegetables in your beds.
Leafy greens and cool-season crops:
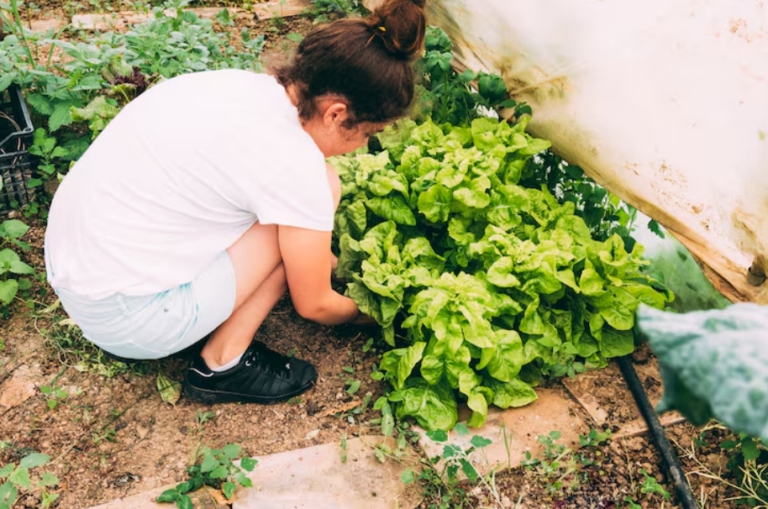
Young lettuce, spinach, kale, and bok choy need steady surface moisture to form tender leaves. Keep the top 1–2 inches of soil consistently damp. In warm weather, water 2–4 times per week depending on soil and temperature. Shift from frequent shallow watering when seedlings are tiny to deeper, less frequent soaks as roots grow.
Fruiting vegetables like tomatoes, peppers, and cucumbers:
Fruiting crops demand deeper, steady moisture to avoid blossom end rot and fruit splitting. Aim for about 1–1.5 inches of water per week, delivered as a deep soak 1–3 times weekly depending on heat and soil. Use a tomato watering schedule that focuses on consistent volumes rather than light, frequent sprays. Mulch and drip systems smooth out fluctuations while sidedressing with calcium helps prevent nutrient-related disorders when watering and soil calcium are adequate.
Root vegetables and how their needs differ:
Carrots, beets, radishes, turnips, and potatoes need moisture at root depth for even development. Maintain steady moisture to about 6–8 inches for many root crops. Drought causes forked, woody roots; overwatering leads to rot or shallow growth. Cut back slightly before harvest for storage roots like carrots, but avoid swings between wet and dry.
| Crop Group | Typical Needs | Frequency Example | Practical Tips |
|---|---|---|---|
| Leafy greens | Consistent surface moisture; shallow roots | Top 1–2 inches moist; 2–4×/week in warm weather | Use low-emitter drip or light hand watering; plant in partial shade in hot months |
| Fruiting vegetables | Deep, consistent water during flowering and fruit set | 1–1.5 inches/week; deep soak 1–3×/week | Mulch heavily; keep tomato watering schedule steady to prevent blossom end rot |
| Root vegetables | Steady moisture to root depth (6–8 inches) | Regular moderate watering; reduce slightly before harvest | Avoid prolonged sogginess for potatoes; maintain even moisture for carrots and beets |
Mulching and Other Techniques to Reduce Water Use
Keeping soil moist without watering more often takes planning. Use mulching, smart plant pairings, and simple barriers to cut evaporation and keep crops healthy.
Start with the right mulch. Organic options like straw, shredded leaves, wood chips, grass clippings, and compost lock in moisture. They also improve soil as they break down. On the other hand, landscape fabric and black plastic block weeds and save water but don’t add organic matter to soil.
Apply 2–4 inches of organic mulch around plants, leaving a couple inches clear at the stem to prevent rot. Straw works well for long vegetable rows. Shredded leaves and compost suit young transplants and perennials. Replenish mulch each year as it decomposes to maintain benefits.
Living mulches and ground covers offer a dual benefit. Low-growing clover or vetch shades the soil, reduces evaporation, and adds nitrogen or organic matter when mowed or tilled in. Choose ground covers that don’t outcompete your vegetables for water or nutrients.
Pair crops for moisture savings. Tall crops such as corn or pole beans can provide shade to lower plants and cut soil drying. Use companion planting water conservation strategies to place thirsty and shade-tolerant crops together. Watch competition and adjust spacing to keep yields high.
Shade cloth is useful during heat waves. Temporary shade reduces plant stress and lowers transpiration on sensitive crops. You can drape fabric over hoops or frames for short periods when temperatures spike and sunlight is intense.
Wind increases moisture loss quickly. Install garden windbreaks like fencing, hedges, or dense shrub lines to slow air movement and cut evapotranspiration. Position beds and orient rows to take advantage of natural shade and prevailing winds for a milder microclimate.
Use these tactics together to reduce water use garden demands. Mulching vegetable garden beds, combining companion planting water conservation, and adding garden windbreaks form a layered defense against drought stress.
| Technique | Best Use | Water-Saving Effect | Notes |
|---|---|---|---|
| Straw mulch | Vegetable rows, tomatoes, peppers | High | Light, easy to apply; replenish annually |
| Shredded leaves / compost | Transplants, perennials | High | Improves soil structure and fertility |
| Wood chips | Pathways, perennial beds | Medium | Slow to break down; avoid around young stems |
| Landscape fabric / black plastic | Weed control, row crops | High | Does not add organic matter; warms soil |
| Living mulch (clover, vetch) | Between rows, low-growing cover | Medium | Adds nitrogen; monitor competition |
| Shade cloth | Heat waves, sensitive crops | Variable | Temporary use reduces sunscald and transpiration |
| Garden windbreaks (fences, hedges) | Perimeter of beds | High | Lowers wind speed; reduces daily water loss |
Using Rainwater and Sustainable Water Sources
Bringing rain into your vegetable beds cuts down on water use and makes your garden more resilient. A rainwater harvesting garden can provide steady water when you use smart delivery methods. First, check local rules to know how to collect rainwater legally in your area.
Harvesting rainwater legally and safely
State and county laws vary across the United States. Some states encourage home systems, while others limit cistern size or require permits. Always contact your local water agency before installing a barrel or tank.
For safety, use food-grade containers if you might use water for washing produce. Fit gutters with screens and add a first-flush diverter to keep roof debris and bird droppings out of storage.
Storing and distributing collected water
Choose storage that matches your needs. Small rain barrels (50–100 gallons) work well for container gardens and raised beds. Larger cisterns handle yard-scale irrigation and reduce refill frequency.
Gravity feed suits low-pressure drip lines. Add a small electric pump for multiple zones or to run sprinklers. Install mesh screens to block leaves and mosquitoes. Use inline filters ahead of drip tubing to prevent clogs.
In freezing climates, drain barrels or bypass them for winter to avoid damage to tanks and plumbing.
Ethical water use and conservation tips for gardeners
Match delivery to plant needs. Drip systems and soaker hoses give targeted moisture with minimal waste. Combine rainwater harvesting with mulching and soil improvement to cut irrigation needs.
Where legal, consider greywater for nonedible beds, using gentle soaps. Stay aware of local restrictions during drought and follow community watering schedules. Thoughtful storage and careful use of garden water storage protects supplies for neighbors and wildlife.
- Tip: Place barrels near downspouts for easy collection and short hose runs.
- Tip: Pair a cistern with a timer and pressure switch to automate sustainable garden watering.
- Tip: Rotate crops and choose drought-tolerant varieties to reduce overall demand on collected water.
Troubleshooting Common Watering Problems
When your veggies look off, it’s often because of water issues. First, check the soil moisture, plant symptoms, and recent weather. Spotting these problems early can save your plants from damage.
Yellowing leaves, blossom end rot, and wilting
Yellow leaves at the bottom with soggy soil mean too much water. Dry, crispy leaves suggest not enough water. Test the top 2–4 inches of soil to figure it out.
Dark spots on tomato or pepper bases are often blossom end rot. This is usually due to inconsistent moisture, which limits calcium uptake. Keep watering steady and add calcium if your soil test shows low levels.
Wilting can mean dry roots or too much water damage. Check the soil feel and gently dig to inspect roots. Healthy roots are white and firm. Brown or black, mushy roots need a closer look.
Diagnosing root rot and fungal issues
Wilting that persists while the soil is wet often means root rot. Pull a plant and check the roots. Healthy roots are white and firm. Brown or black, mushy roots with a sour smell indicate pathogens like Pythium or Phytophthora.
Poor drainage, compacted beds, and too much water increase risk. Improve drainage, loosen soil, and water less often. Remove infected plants and dispose of them away from your garden.
Use fungicides only on advice from the extension service. Rotate crops and raise beds to lower pathogen load. These steps help with long-term root rot diagnosis and recovery.
Adjusting watering after heavy rain or drought
After heavy rain, let the soil dry to the right depth for your crops before watering again. Check for standing water and compacted areas. Fix grading or add organic matter if water pools.
After a drought, rehydrate soil slowly. Give several light-to-moderate waterings over days to help roots recover. Shade tender transplants during recovery and add mulch to hold moisture.
When water use limits are in place, focus on high-value crops and young transplants. Use drip lines to target roots and adjust watering after rain events to avoid overwatering. Prioritize actions that reduce waste while keeping plants healthy.
| Symptom | Likely Cause | Quick Action | Long-term Fix |
|---|---|---|---|
| Yellow lower leaves | Overwatering or nutrient deficit | Check soil moisture; pause watering | Improve drainage; run soil test for nutrients |
| Blossom-end dark spot on fruit | Inconsistent moisture limiting calcium uptake | Water evenly; remove affected fruit | Amend soil with lime or gypsum if tests show low calcium |
| Wilting with dry soil | Underwatering | Deep soak to encourage root growth | Mulch and adjust schedule to retain moisture |
| Wilting with wet soil and foul smell | Root rot or fungal infection | Remove infected plants; reduce irrigation | Improve bed drainage; rotate crops; consult extension for treatments |
| Post-rain standing water | Poor grading or compaction | Hold off on scheduled watering | Regrade beds; add organic matter to improve infiltration |
Tools and Sensors to Monitor Soil Moisture and Flow
Monitoring soil moisture helps you water more efficiently and saves time. Simple tools provide clear readings. These readings can be used with timers or smart irrigation controllers to match water to plant needs.
Affordable soil moisture meters are a good starting point. Cheap analogue meters from Luster Leaf or Sonkir give quick readings for the top 2–4 inches. For deeper roots, use probes that reach 6–8 inches. Insert the probe into the root zone, wait a few seconds, then read the scale. Calibrate when the manufacturer recommends.
Cheap meters measure electrical conductivity, so salinity can skew results. Treat those devices as one input alongside a finger test and visual checks of leaves and soil. Choose the best soil moisture meter that fits your garden budget and the depth you need.
Basic timers let you set run cycles for sprinklers or drip lines. Brands like Orbit, Hunter, and Rain Bird make reliable mechanical or digital timers that handle simple schedules. For adaptive control, consider smart irrigation controllers from Rachio, Netro, or RainMachine. They pull weather data, link to soil probes, and let you adjust remotely from a phone app.
Confirm compatibility before you buy. Many smart controllers work with drip systems and standard valves, but you must match valve type and system pressure. That step avoids wasted time and extra parts.
To read moisture data, first set target ranges based on crop and soil type. For loam and most vegetables, aim for consistently moist but not waterlogged values in the root zone. If sensors show persistent dryness, lengthen run time or add emitters. If values stay high, reduce cycle duration or improve drainage.
Use sensor data with forecasts and plant observation to refine your schedule over weeks. Log changes and responses so you can spot patterns, adjust seasonally, and tune your system for peak performance.
| Tool | What it measures | Best use | Limitations |
|---|---|---|---|
| Luster Leaf analogue meter | Topsoil moisture (2–4 in) | Quick checks for seedlings and container gardens | Affected by salinity; not ideal for deep roots |
| Sonkir probe | Moisture at variable depths | Home beds that need occasional checks | Shallow versions may miss deep moisture |
| In-depth soil probes | Moisture at 6–8 in or deeper | Tomatoes, peppers, and established vegetables | Higher cost; require careful placement |
| Mechanical/Digital timers (Orbit, Hunter) | Run cycles and durations | Automating simple schedules | No weather or sensor integration |
| Smart controllers (Rachio, Netro, RainMachine) | Weather, schedules, sensor inputs | Adaptive watering and remote control | Need compatible valves and stable Wi‑Fi |
| Soil moisture sensors garden (integrated probes) | Continuous moisture readings | Real-time monitoring and automation | Calibration and placement matter |
Conclusion
Watering your garden is key. Water deeply and often, matching it to your soil and plants. Watering in the early morning helps prevent evaporation and diseases.
Use efficient methods like drip lines or soaker hoses. They deliver water right to the roots. Mulch and catching rainwater also save water and keep the soil healthy.
Start by testing your soil with a finger test or a moisture meter. Choose the right watering method for your garden size. For small areas, hand water. For bigger ones, use drip or soaker systems.
Apply 2–4 inches of organic mulch around your plants. Keep a log of when you water and when it rains. This helps you plan better.
Think about getting a moisture meter or a smart timer. They save time and help your plants grow better. With these tips, your garden will thrive, using less water and needing less care.